Document Designer
Modified on Mon, 16 Feb at 10:11 AM
With the Document Designer, we offer you a convenient way to create your document templates via the dashboard. You can find the Document Designer under “Tools – Templates.”
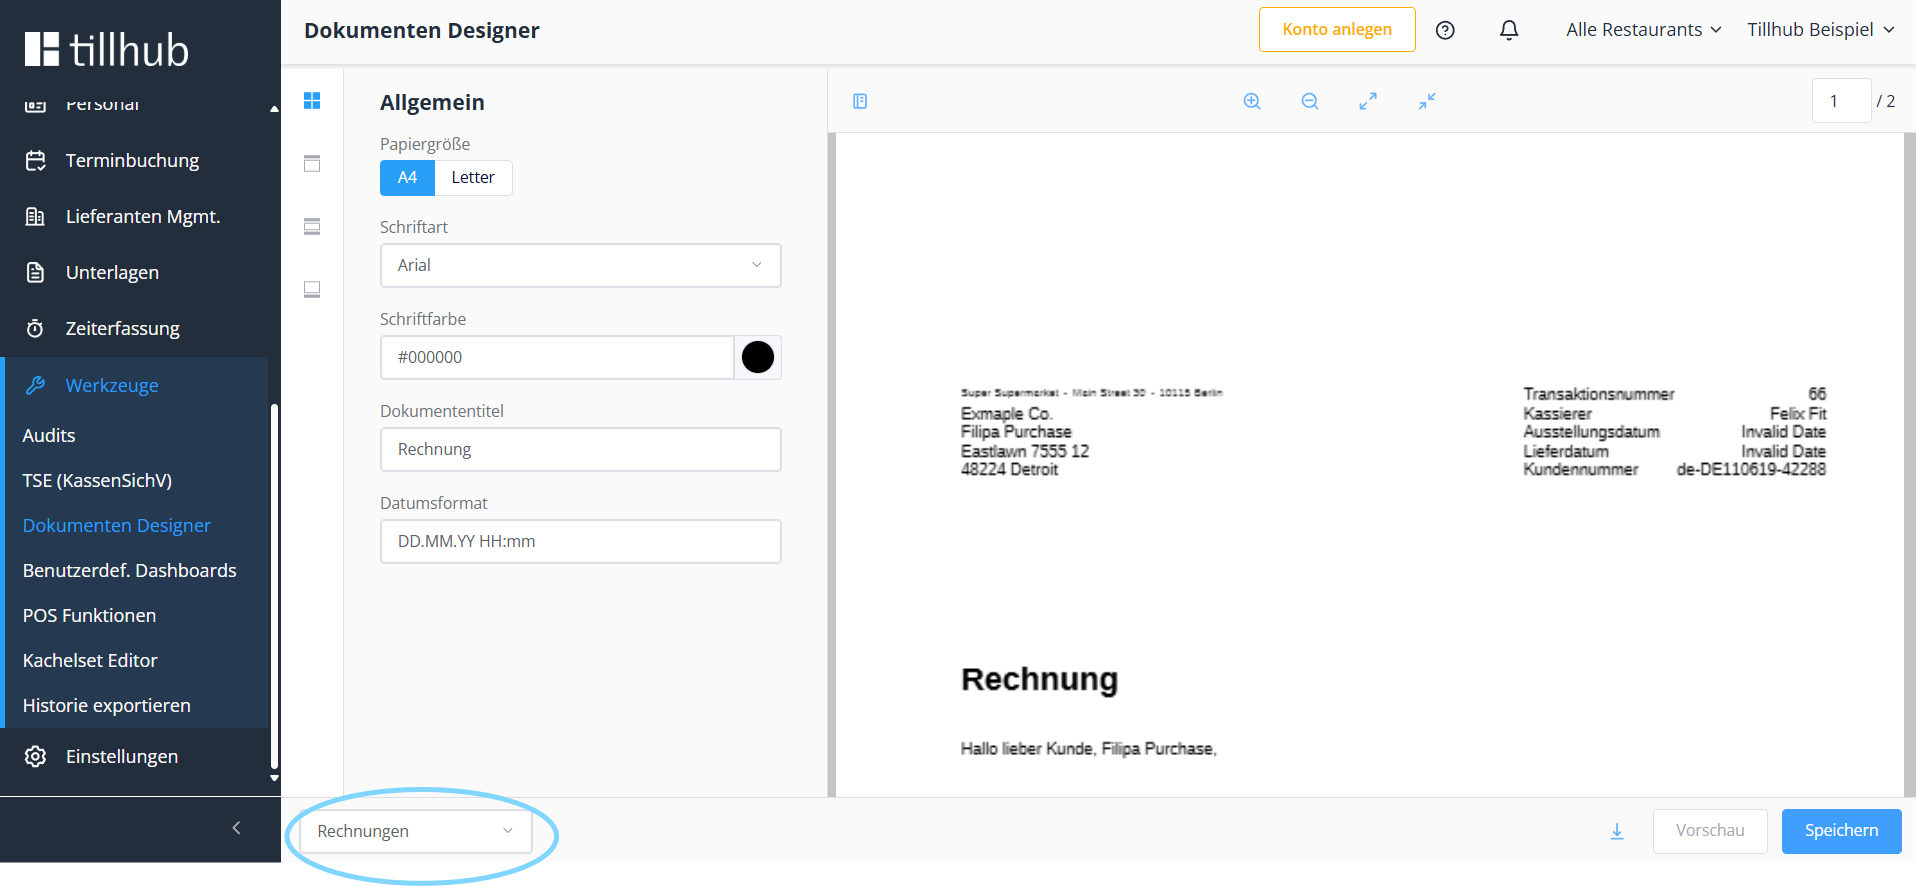
In the bottom-left area, you can select the document you want to edit. Available options are “Invoices, Receipts and Delivery Notes.”
Once you have selected the desired document, you can choose on the left side next to the document which section you want to edit. We start with “General.”
Here you can change the document “Size,” “Font / font color,” and the “Title.”
Please note that all changes will only become visible after you click the “Preview” button.
Customize the header
After you have adjusted the “General” section as desired, continue with the “Header.” Here you can set the “Logo,” decide whether “Sender” and “Address details” are displayed, and change the labels for “Transaction number, Cashier and Issue/Delivery date.”
If the error message “Error Image exceeds maximum filesize” appears when uploading the logo, simply log out briefly and log back in. You can then upload the image (png, jpeg, bmp) again.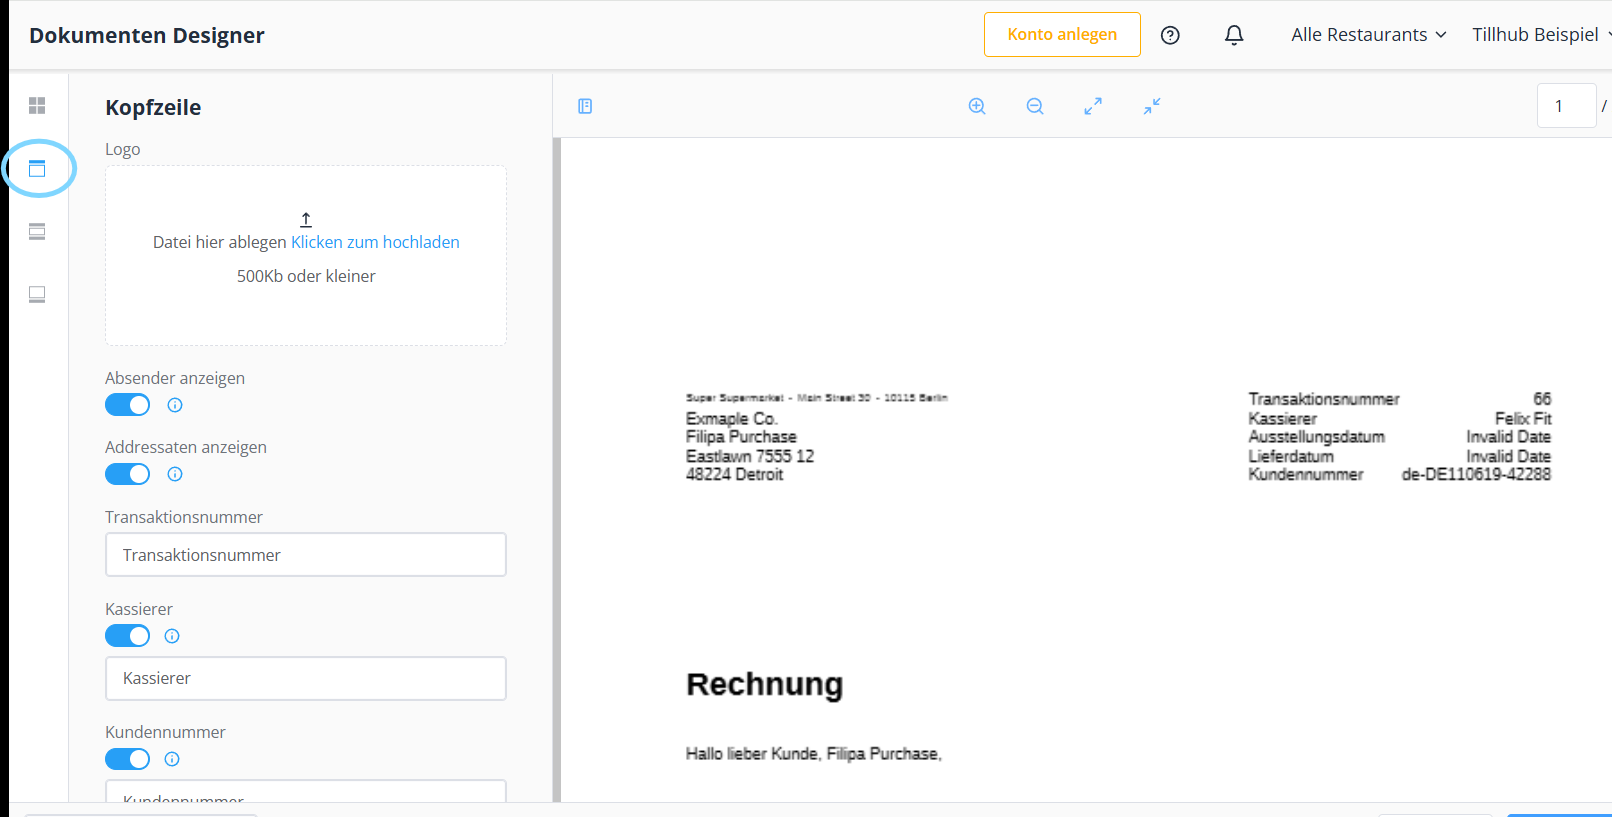
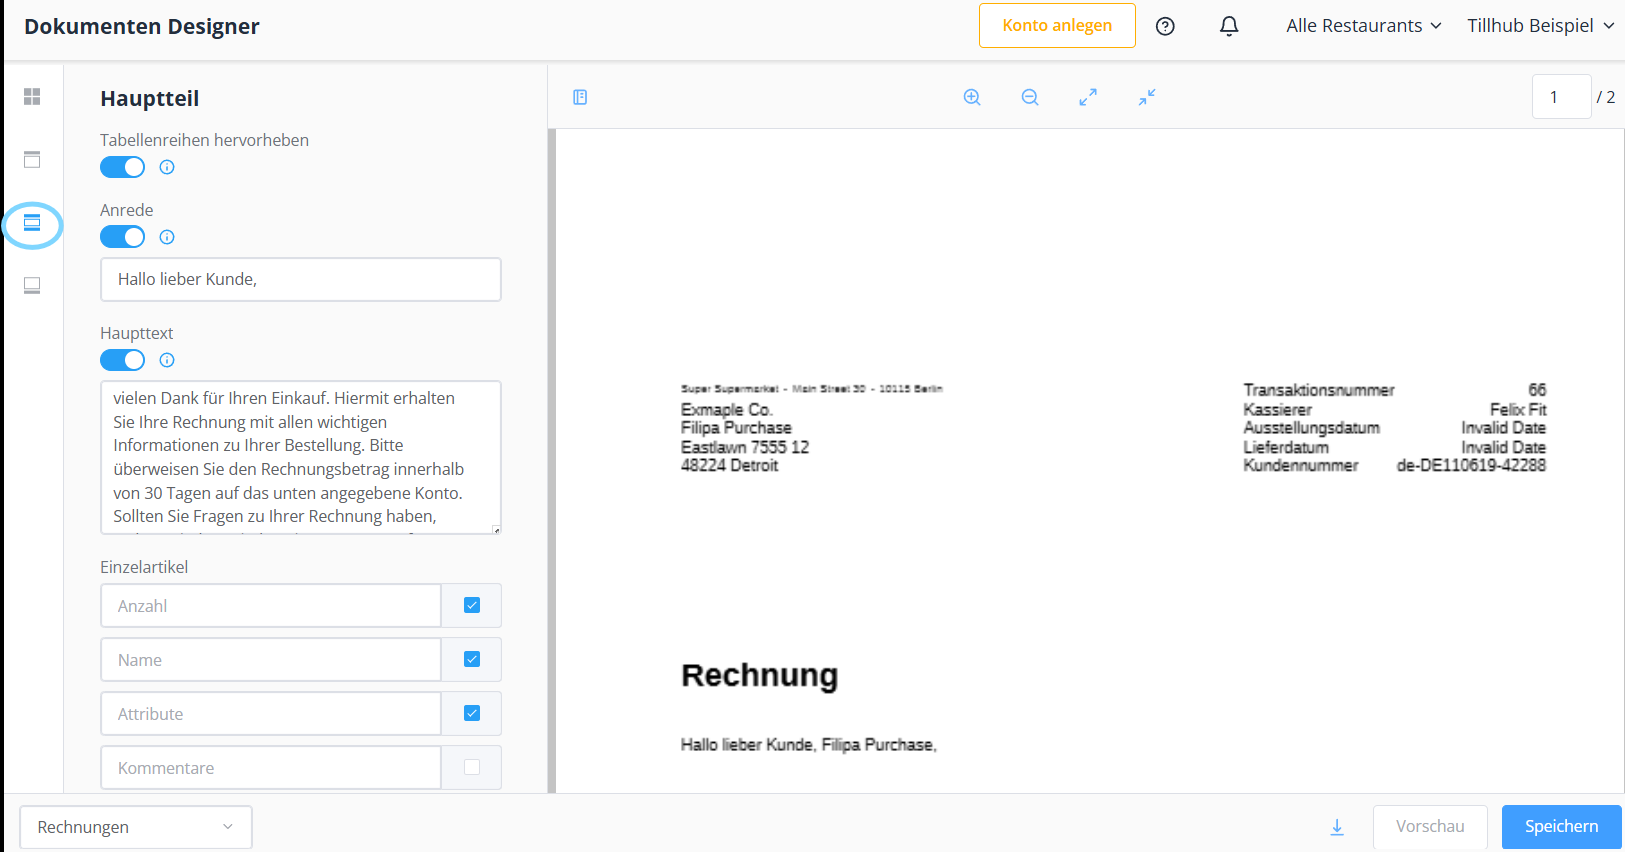
Customize the main section
In the “Main section,” you can decide whether you want to “Highlight table rows.” You can also adjust the “Salutation” and the “Main text,” and define which categories of the “Single products” and the “Total” section are displayed.
Currency formatting is also possible. You can rephrase the individual fields as you like and customize your invoice accordingly.
Customize the footer note
Finally, you can freely edit the text passage in the “Closing text & Footer” section. Once you are finished with all changes, simply confirm by clicking “Save,” and your document will appear exactly as you want it.
In this article we only used the “Invoice” example; however, the procedure and selection options for “Receipts” and “Delivery notes” are almost identical.
Only for the “Receipt” there is an additional option to change the labels for “Place, Date, Signature” and “Amount received.”

Update the app
The last step is to update your app.
Note: You can disable automatic app updates in the Apple settings. This gives you more time to adjust your invoices to your preferences.Was this article helpful?
That’s Great!
Thank you for your feedback
Sorry! We couldn't be helpful
Thank you for your feedback
Feedback sent
We appreciate your effort and will try to fix the article