Areas & Reservations
Modified on Mon, 16 Feb at 10:11 AM
TABLE OF CONTENTS
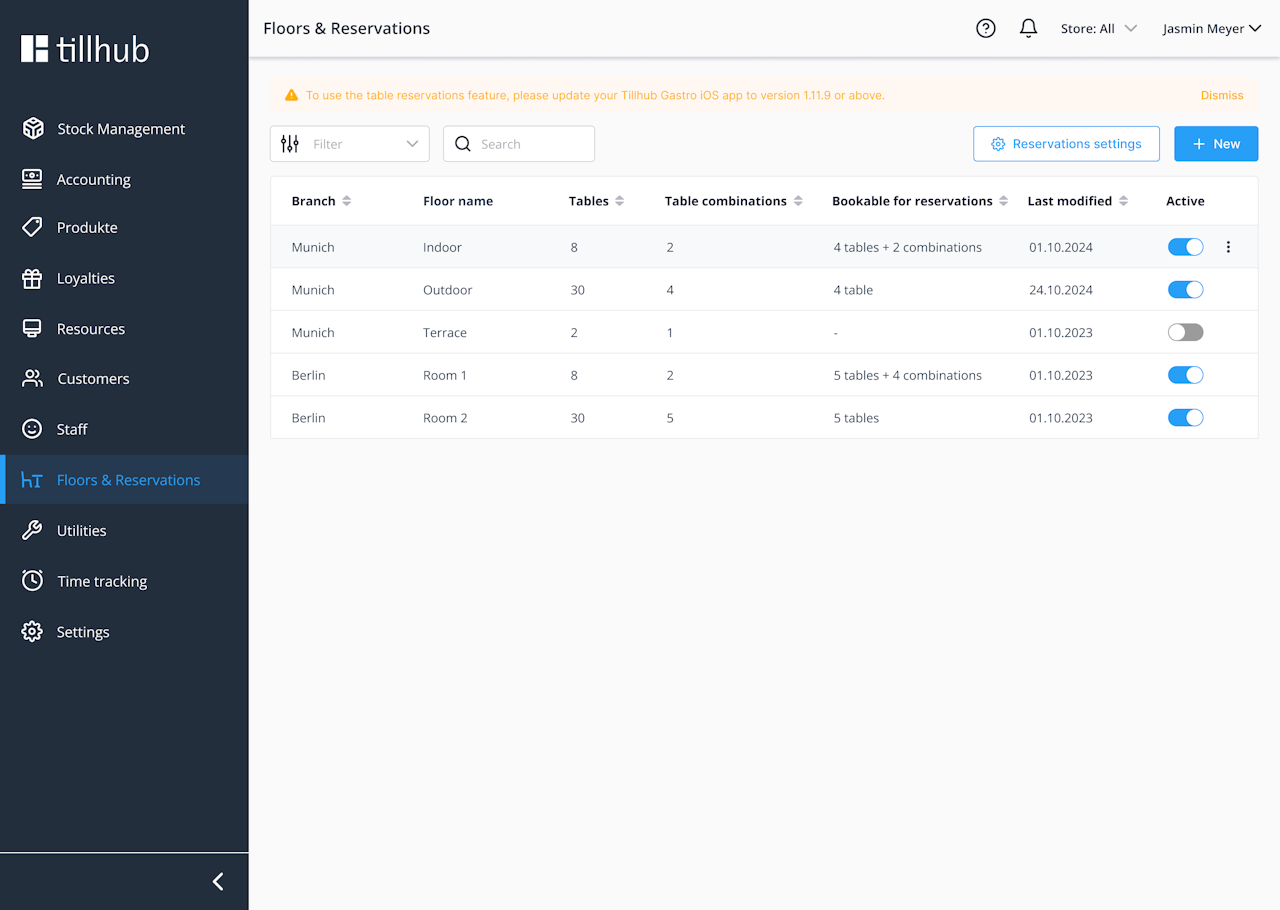
First, go to “Areas & Reservations” in the menu. There you can create different rooms, each with a different number of tables and with table combinations. To create a new room, click “New” in the top right.
List view
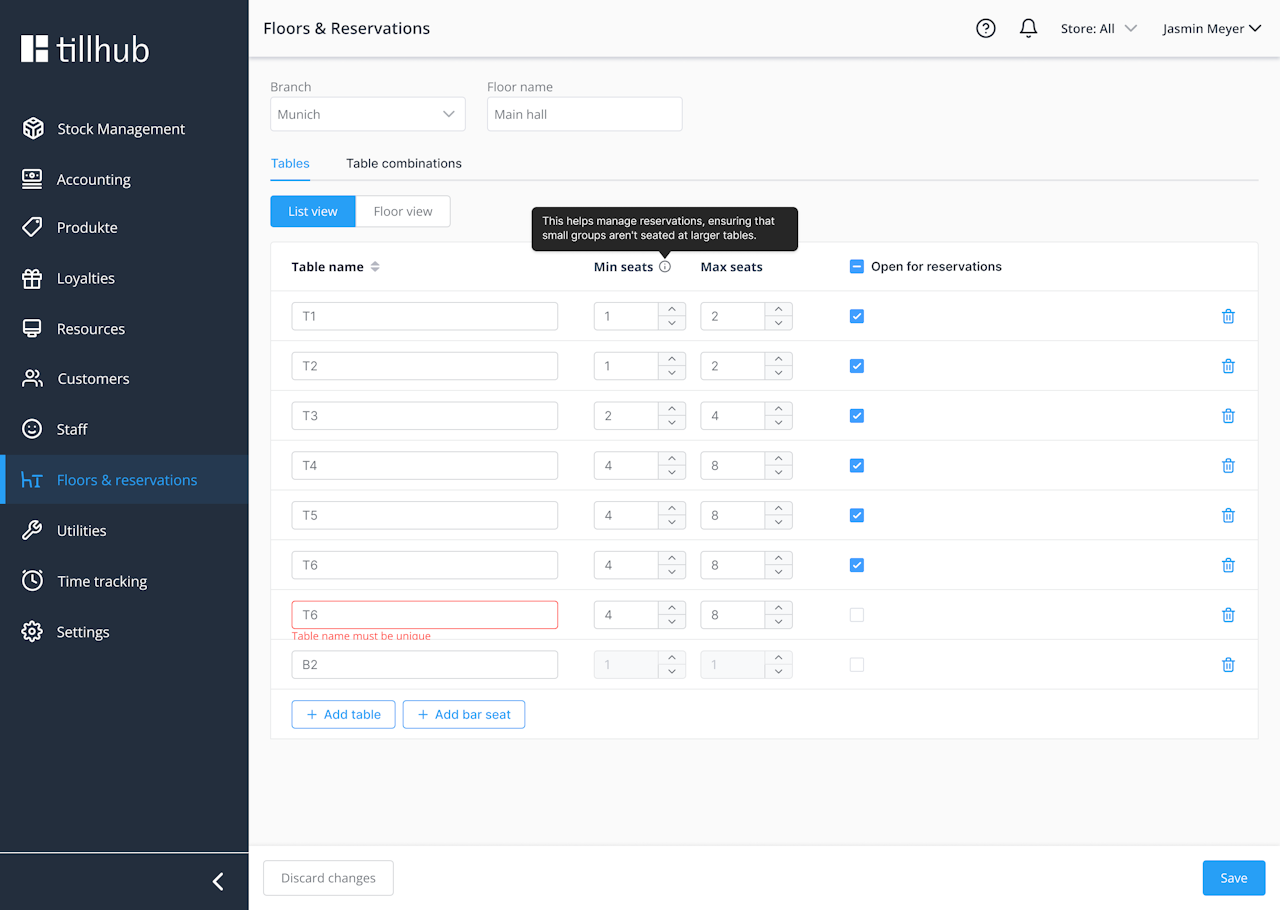
- Then select the correct location at the top left and give the room a suitable name.
- Below is the list view, where you can easily add tables. Click “+ Add table.”
- To edit a table, click it. You can change the table name, set the minimum and maximum number of seats, and tick the box on the right to make the table reservable online.
Deleting tables
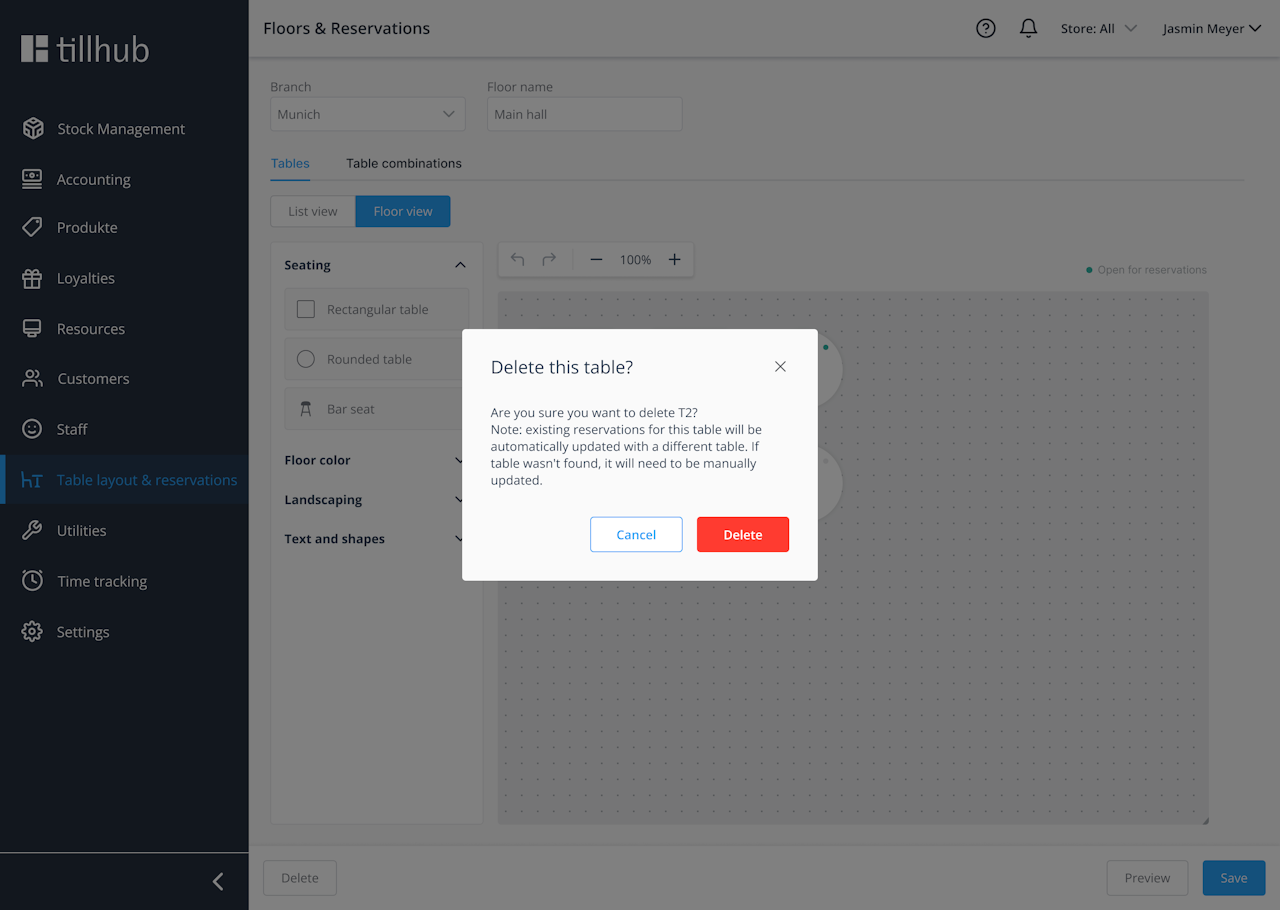
- To delete a table, click the trash icon next to it. Note that any existing reservations for this table will also be deleted.
Floor plan view
- To edit the room layout, switch to the floor plan view. You can drag and drop tables to move them.
- Clicking “Floor area” lets you change the floor color. You can also insert fixtures, text, and shapes and position them freely in the room.
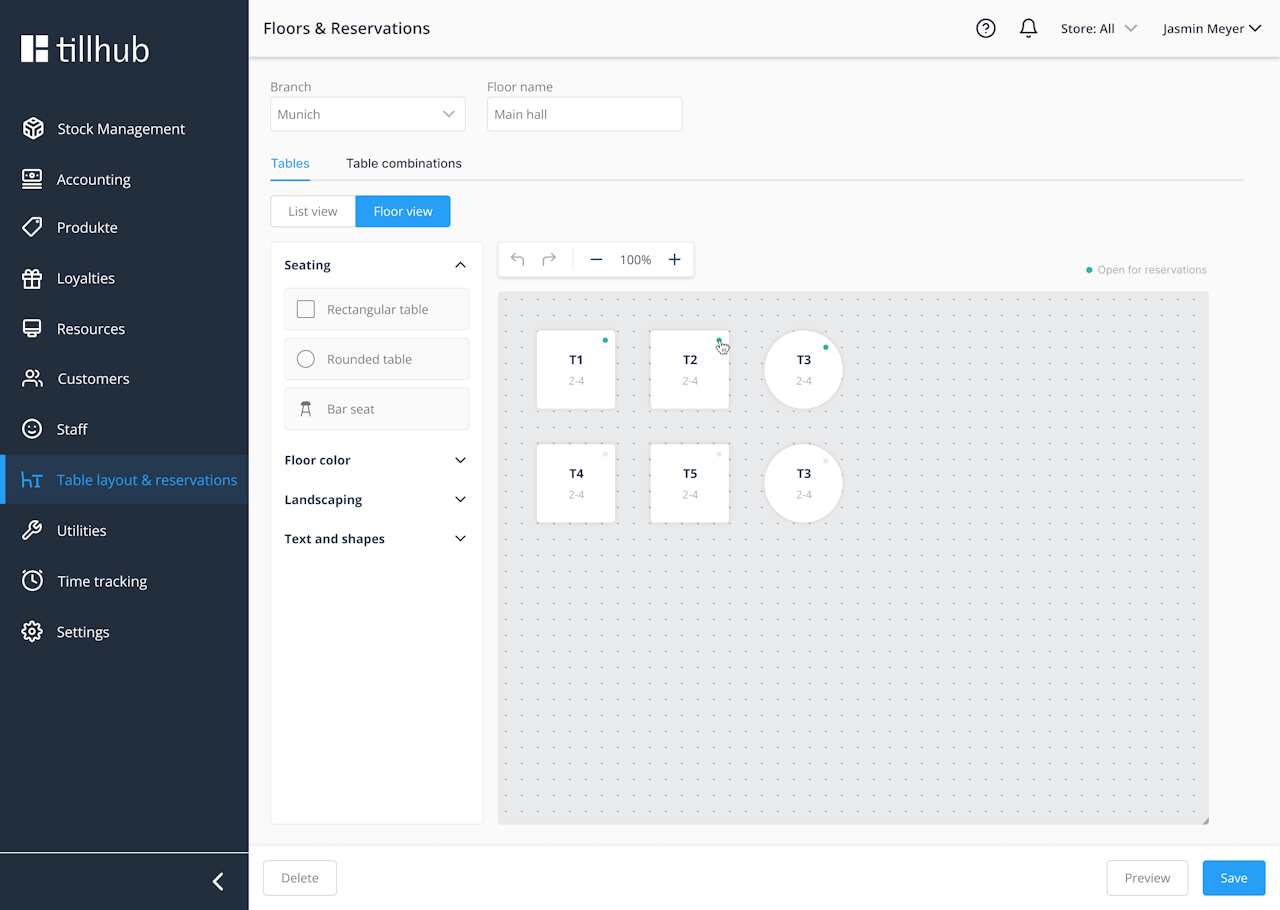
- When you click a table here, you can also change its properties: name, minimum and maximum seats, table shape (round or rectangular), and whether it’s reservable online.
- Don’t forget to click “Save” at the bottom after making changes.

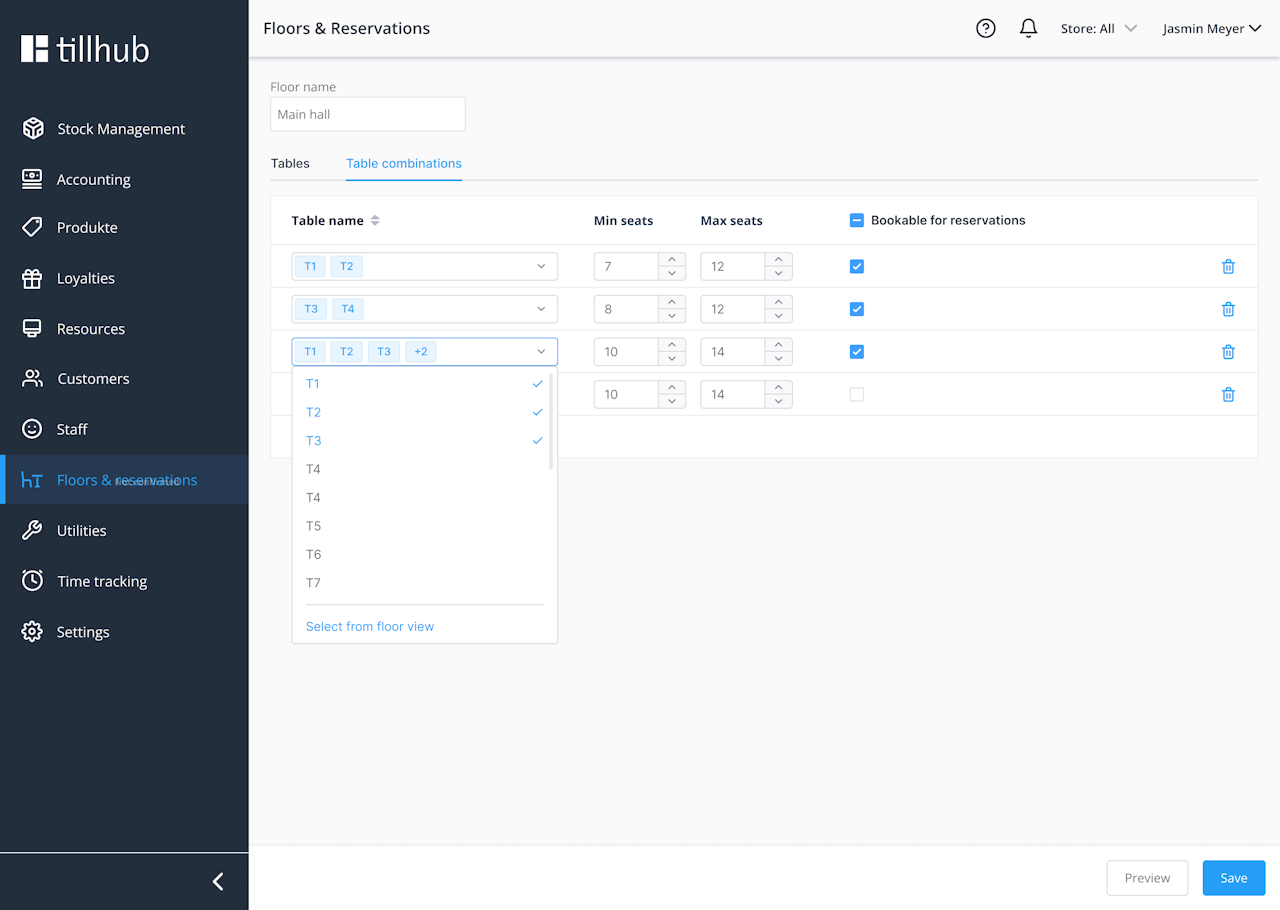
Table combinations
- Another important section is table combinations. Using the tab at the top, you can define which tables may be combined. Select the desired tables in the column, set the minimum and maximum seats, and decide whether this combination should also be reservable online.
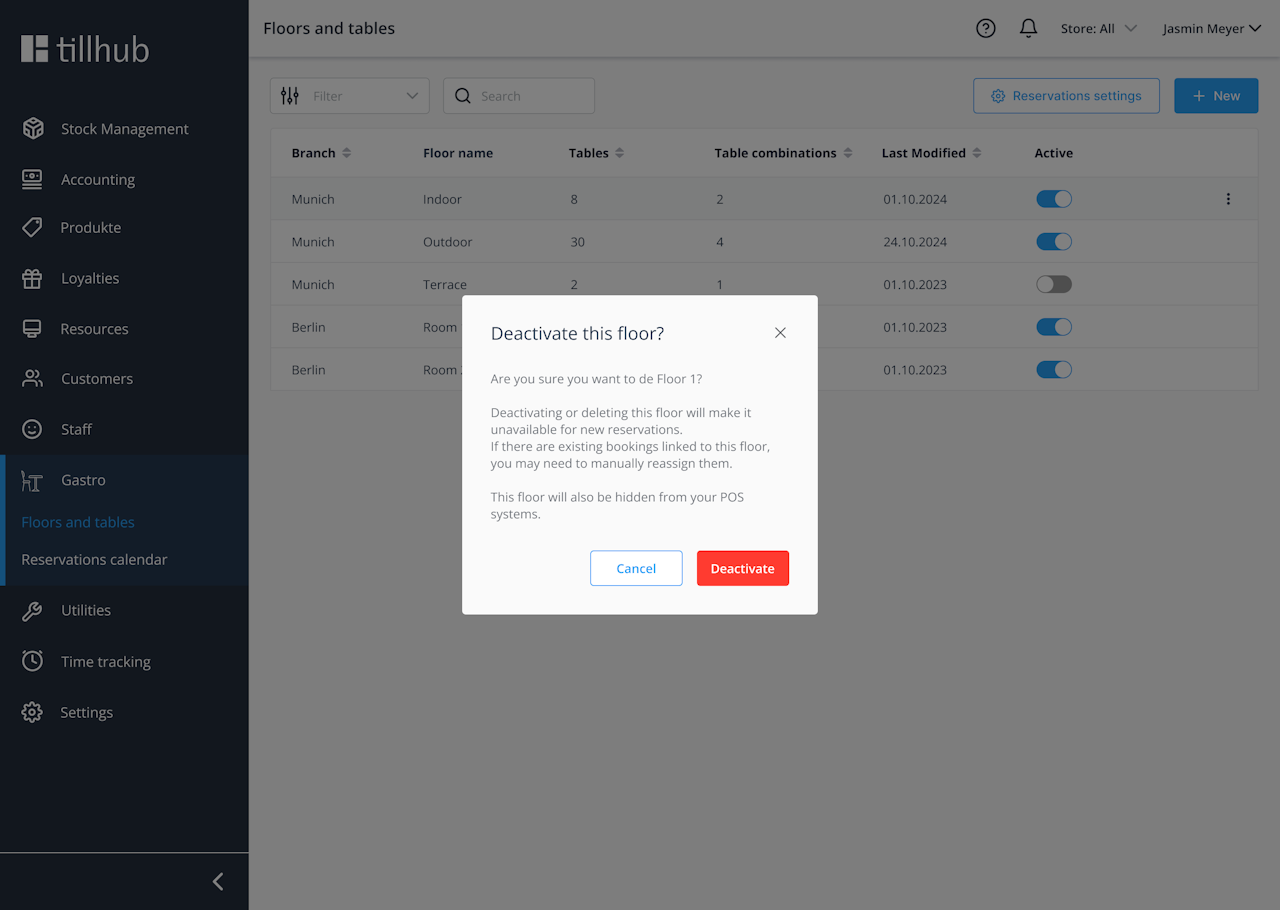
Delete/deactivate room
- Rooms can also be deactivated. In that case, no further bookings can be made there, existing reservations are deleted, and the room is removed.
Was this article helpful?
That’s Great!
Thank you for your feedback
Sorry! We couldn't be helpful
Thank you for your feedback
Feedback sent
We appreciate your effort and will try to fix the article