Reset Epson TM‑M30 receipt printer to factory settings
Modified on Mon, 16 Feb at 10:11 AM
If other troubleshooting steps have not resolved your issue, you can reset the printer to its factory settings. This article explains how.
Green-highlighted areas (in the original guide) indicate the features or buttons to use.
There are two ways to perform the reset, both described below.
Option 1
Note: Use a thin object (e.g., a pen refill). Position the printer on the table so you can reach both the top and bottom at the same time.
- Turn off the printer (do not unplug the power cable) and locate the small hole on the underside as shown in the reference image.
- Press and hold the button inside the hole with the thin object, then turn the printer back on.
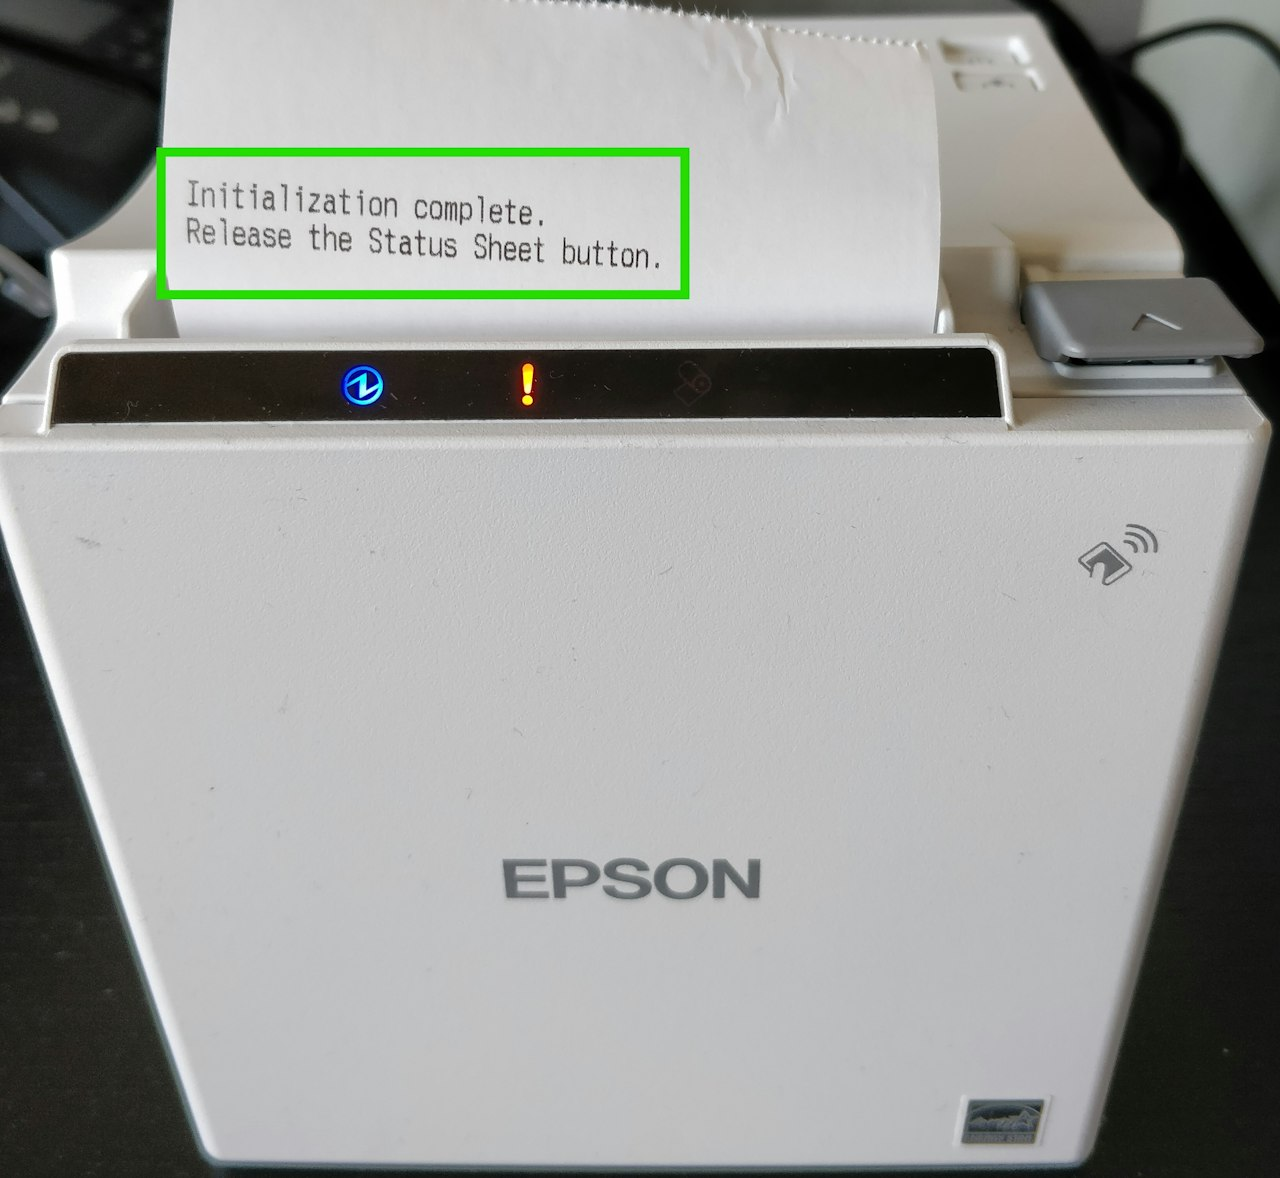
Important: Keep holding the reset button until the printer prints “Initialization complete.”
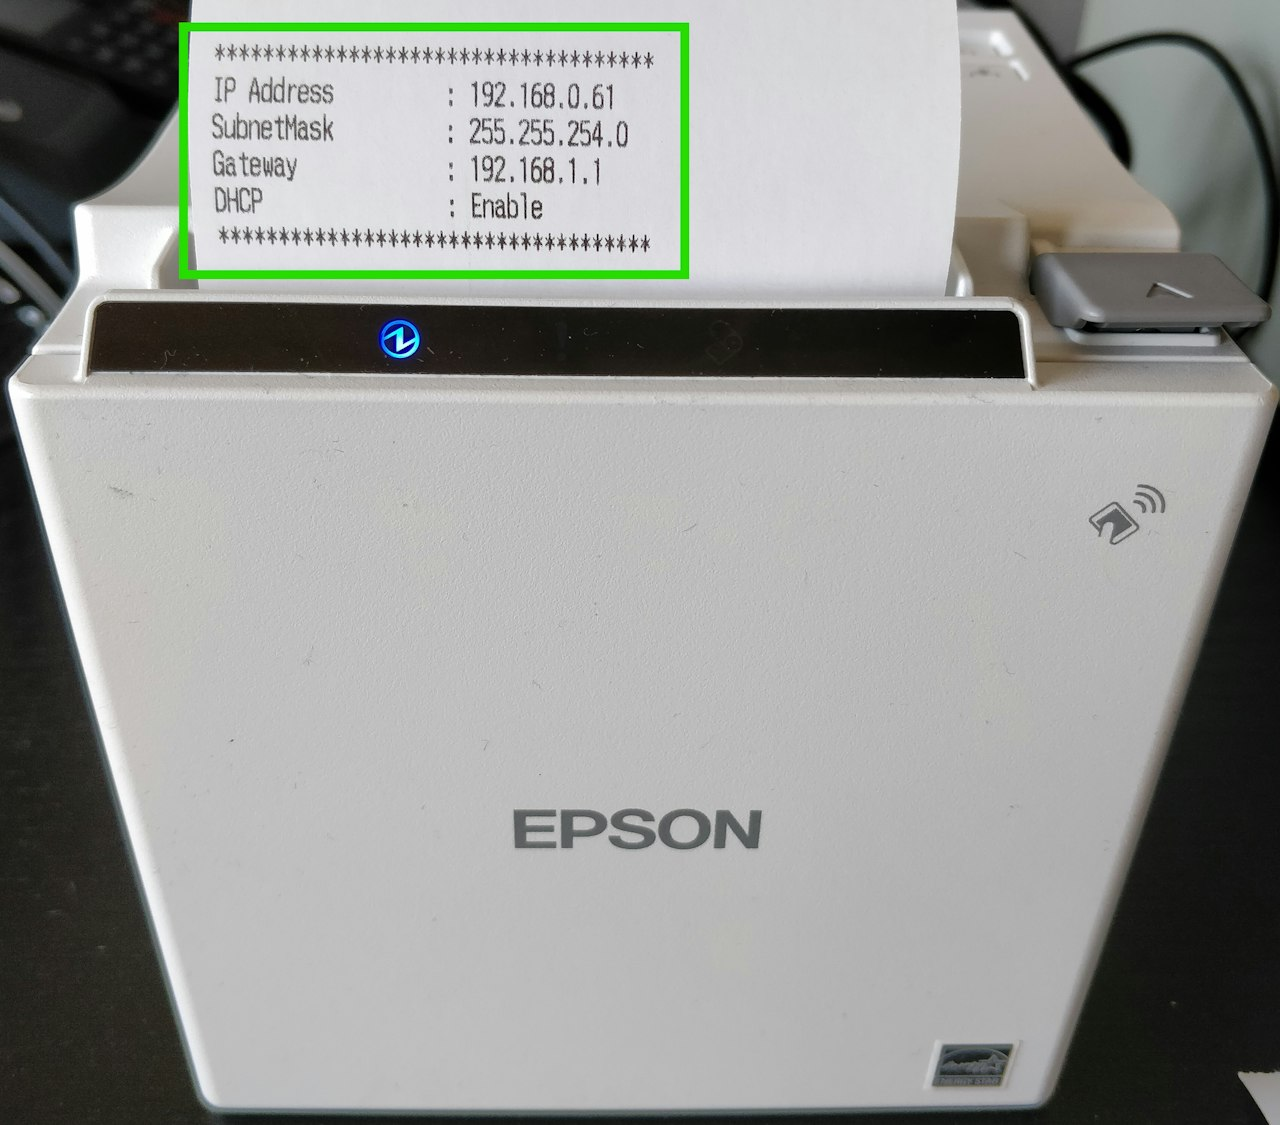
You can now release the button and wait for another printout showing the IP address.
The printer has now been successfully reset.

Option 2
You can run the printer’s self‑test using a specific button combination. Follow these steps:
- Close the receipt roll cover.
- Turn on the printer while holding down the paper feed button. (Hold the paper feed button until printing starts.) After the current status is printed, a continuous self‑test guide is printed and the paper LED blinks.
- To continue the self‑test, briefly press the paper feed button (less than one second). The printer will print the built‑in character set. After “*** completed ***” is printed, the printer resets and returns to standard mode.
Was this article helpful?
That’s Great!
Thank you for your feedback
Sorry! We couldn't be helpful
Thank you for your feedback
Feedback sent
We appreciate your effort and will try to fix the article