Inventory management with Warehub
Modified on Wed, 8 Jul at 4:20 PM
Tillhub offers you the opportunity to record and reconcile inventory with the new Dashboard and the Warehub app. This article demonstrates how and where you can use this feature.
TABLE OF CONTENTS
Features in the Dashboard
The new function is located under "Inventory Management - Processes" in the Dashboard. An inventory process can be created by clicking the "+ New" button, to which start/end time and status can be assigned. Mandatory information includes:
- Process name
- Location
- Responsible employee
Inventory Recording on Mobile Device
Installing the Warehub App
On Android devices, open the "Play Store" and search for "Warehub". Install the app and open it afterward. On iOS devices, open the "App Store" and search for "Warehub". Tap "Download" once found and open the app after installation.
Using the Warehub App
After installing and opening Warehub, log in with your Merchant Log-In to access the app. Note: The "Organization" field can remain empty for now. Once logged in, tap the "Gear" icon at the top right, then select "Scanner" at the bottom to ensure the correct "Scan Mode" is set for your device. If using a scanner connected to an iPad, select "Simple Mode".

Connecting the Warehub App to the Dashboard
After downloading the Warehub App, please follow these steps:
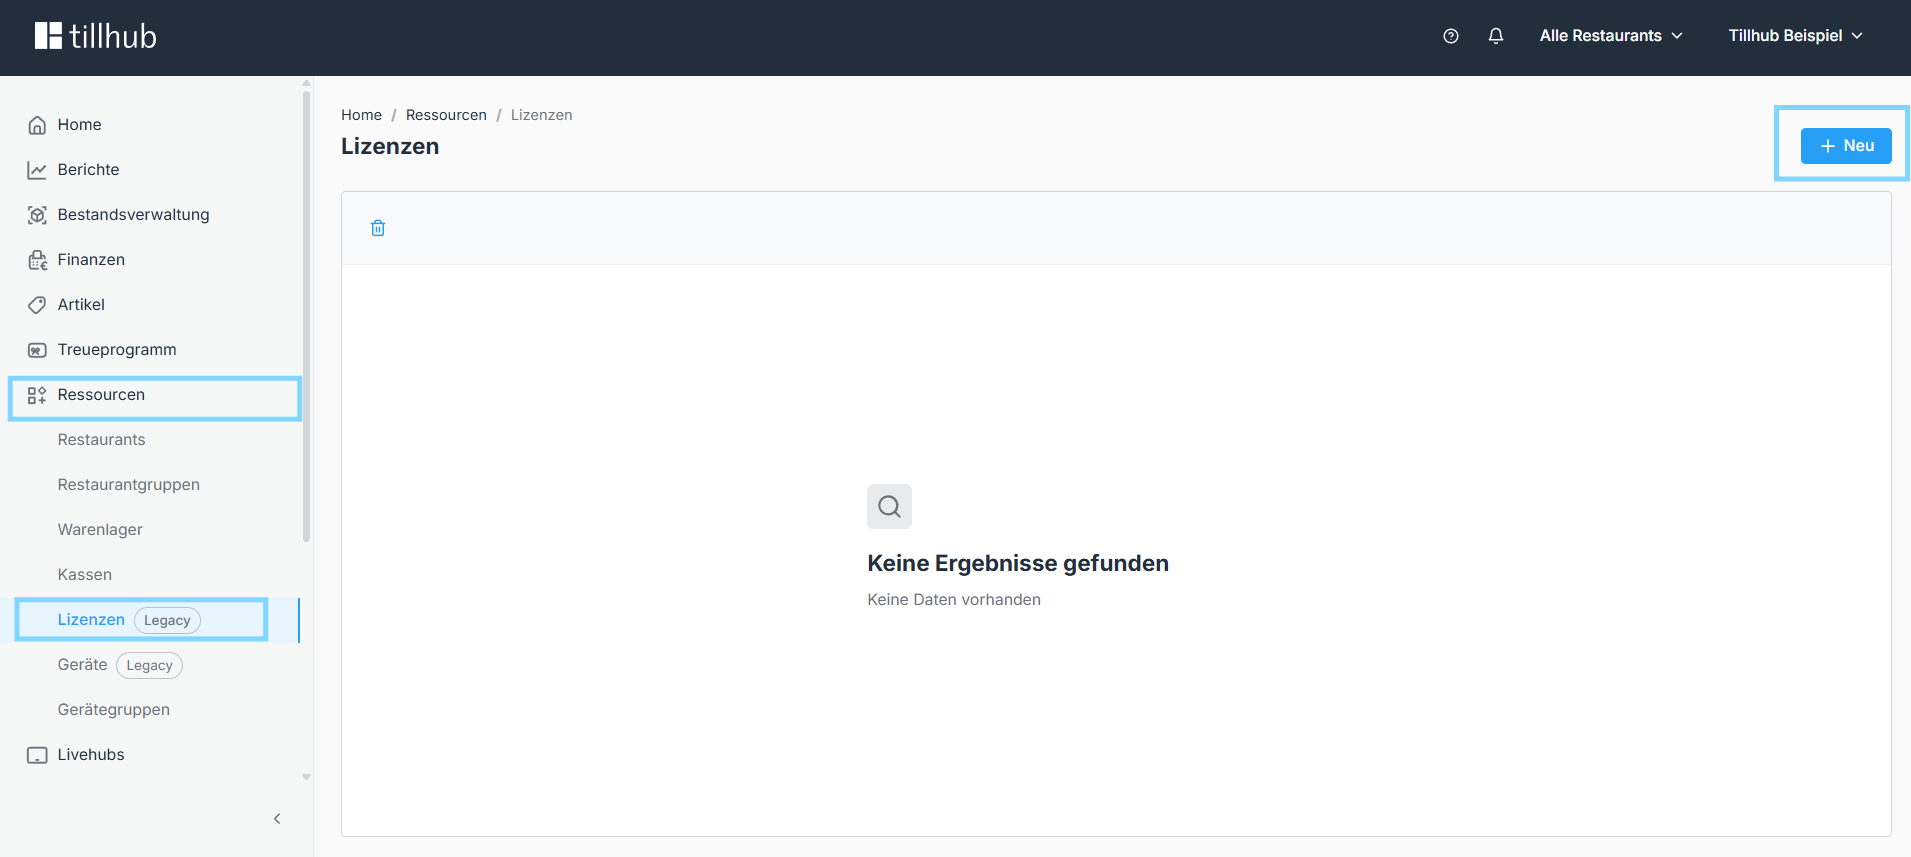
Step 1: Create a license in the Dashboard
Open the Dashboard and click on Resources in the menu on the left. Then select Licenses and click on + New in the top right corner. Next, select New Warehub License, click on Create, and close the window.


Step 2: Log in to the Warehub App
Open the Warehub App on your device and log in with your credentials. These are the same credentials you use for the Dashboard and the till.
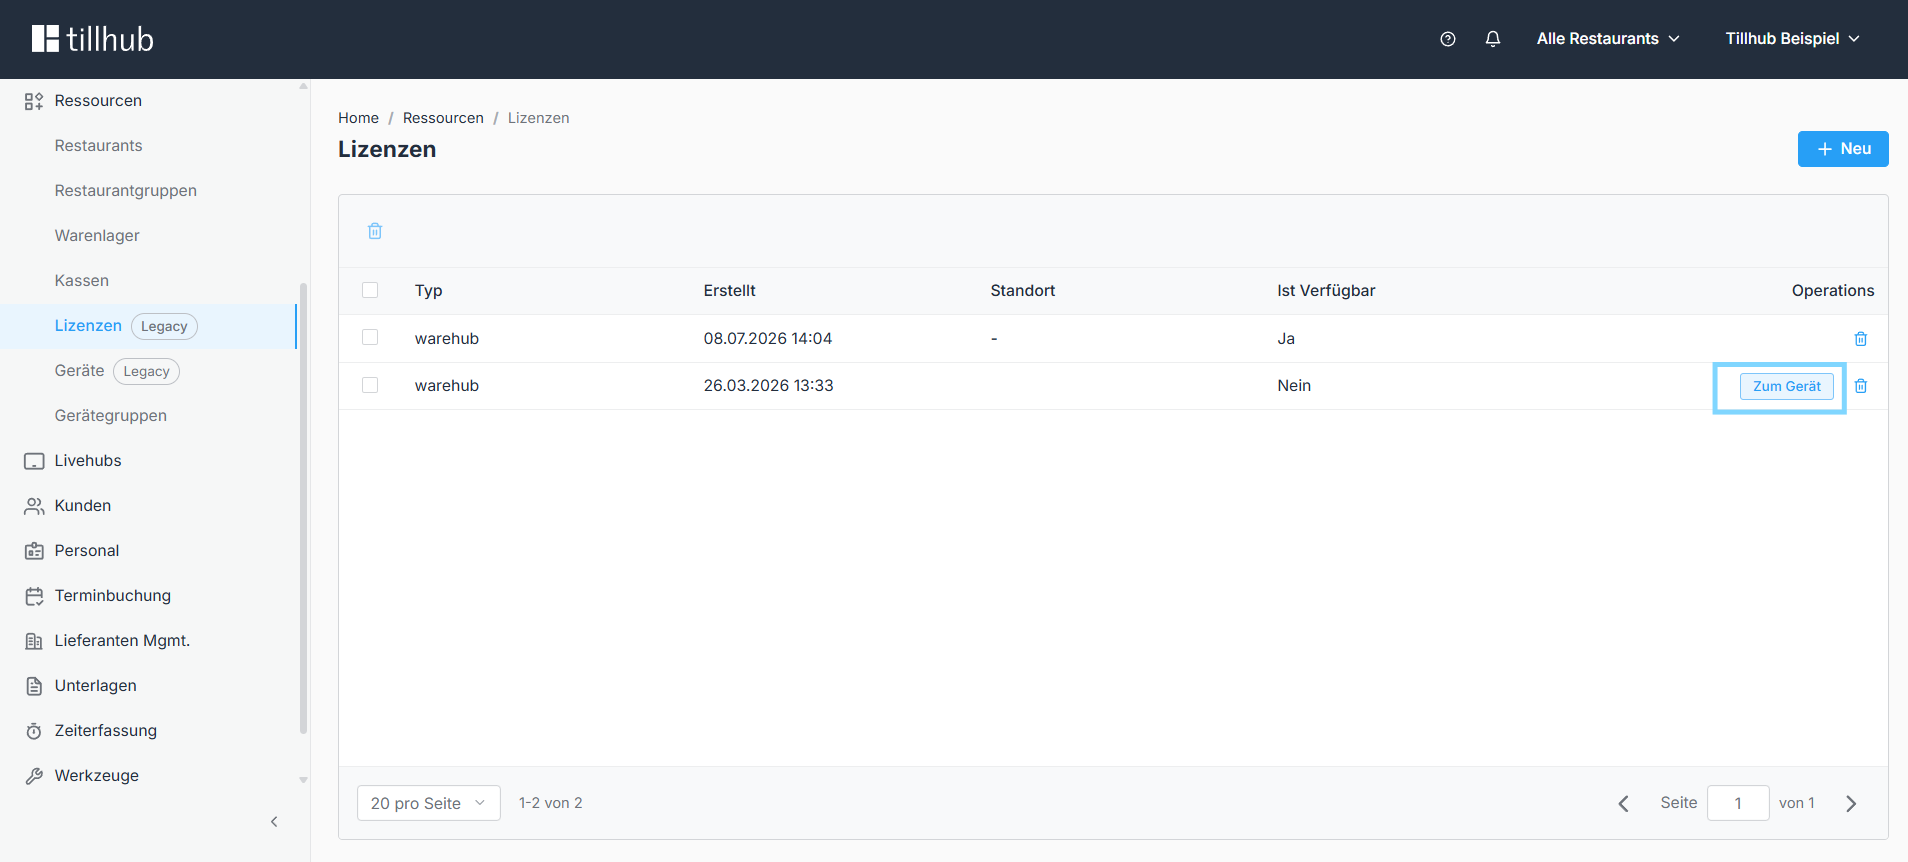
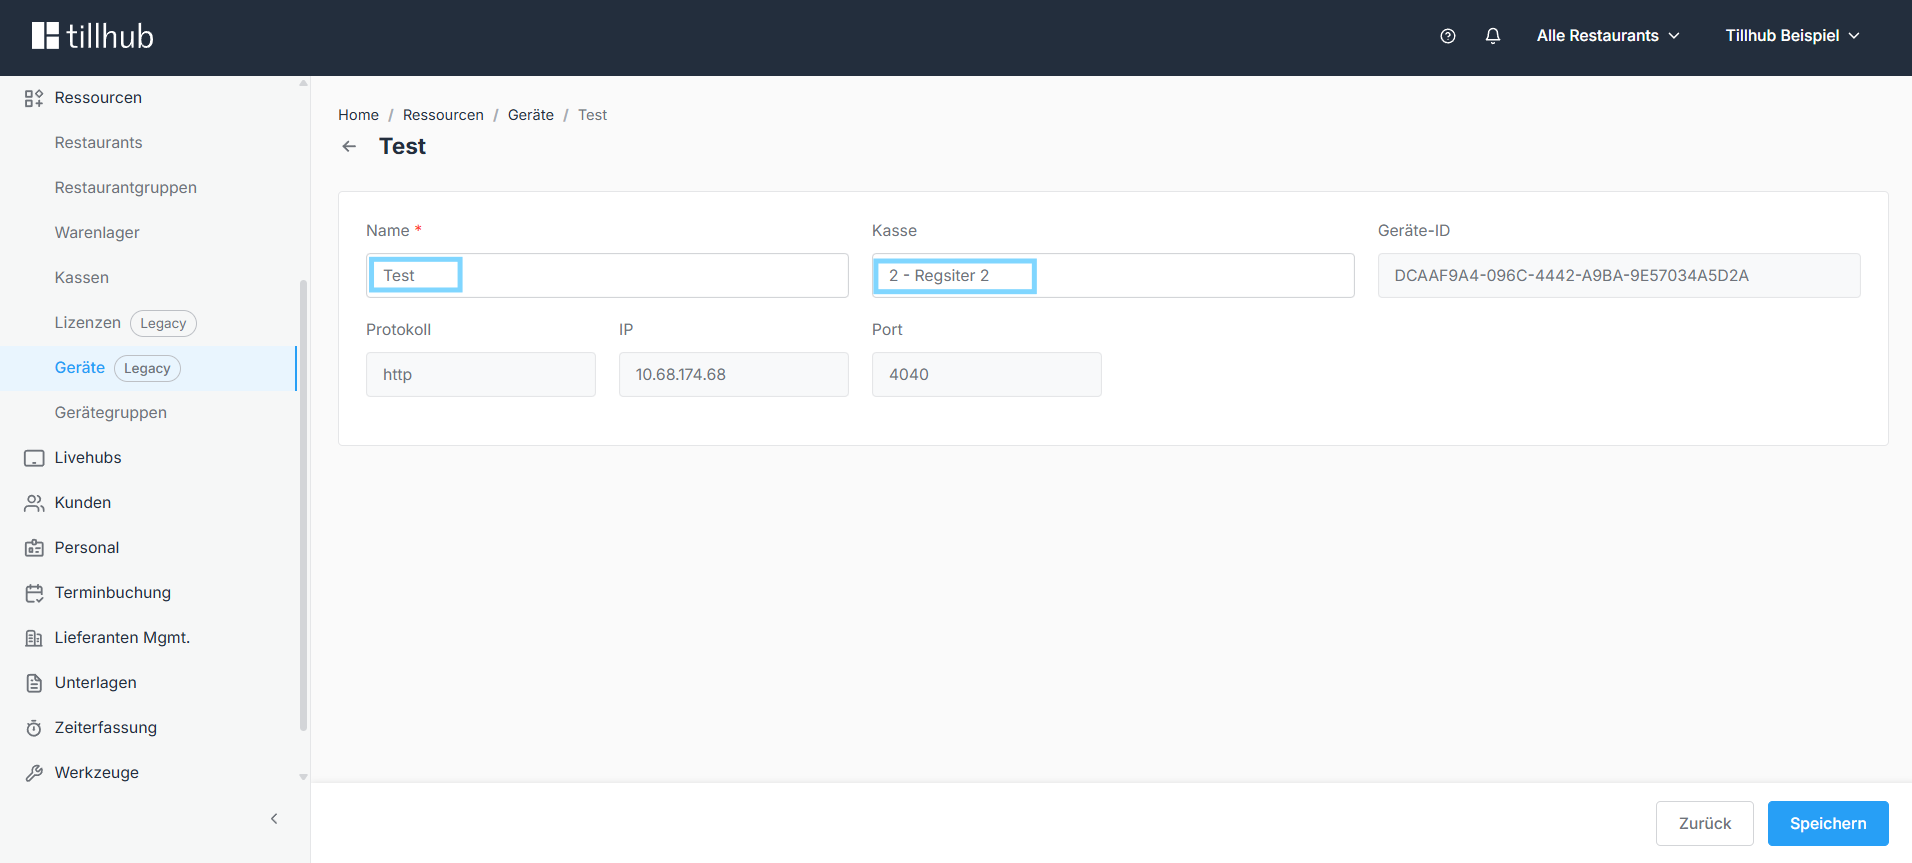
Step 3: Link the device to the license
Go back to the Dashboard to the license you just created and click on To Device next to it. Give the device a name, select the appropriate branch, and click on Save at the bottom.
Your Warehub App is now successfully connected to the till.
EPSON ePOS Mode
For a scanner connected directly to your Epson printer, select the EPSON ePOS Mode. The scanner will then appear in the list below. Click configure to register it in Warehub.

Zebra SDK Mode
If you use a Metapace scanner, select Zebra SDK Mode. The scanner will show up in the list below and can be selected for configuration in the app.

Inventory Counting
Warehub is now ready for use. Initiate a new inventory count by tapping "Inventory Counting" on your device.

Assign the process name, location, and responsible employee.
For instance, the "Q4 2019 Inventory" could be conducted at the "Mate Bar Berlin-Neukölln" by employee "André W." Alternatively, an inventory created in the Dashboard can be accessed in the app by tapping "Incomplete Tasks" and selecting the desired process.

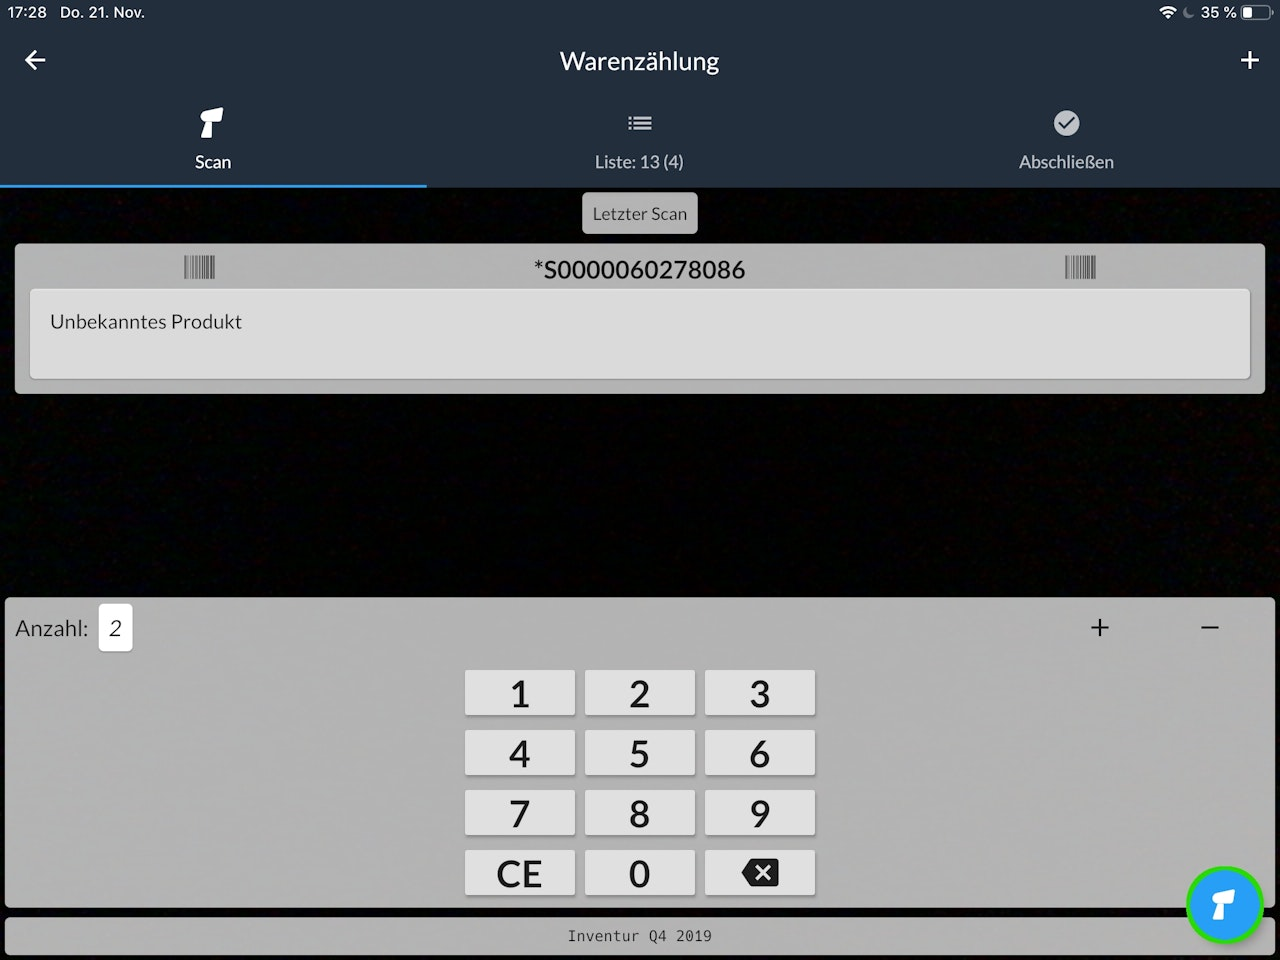
Scanning Products
After creating or selecting a process, use the device to scan products. Scan the barcode with the device's camera or a scanner. The "Scanner" icon at the bottom right acts as the camera trigger.
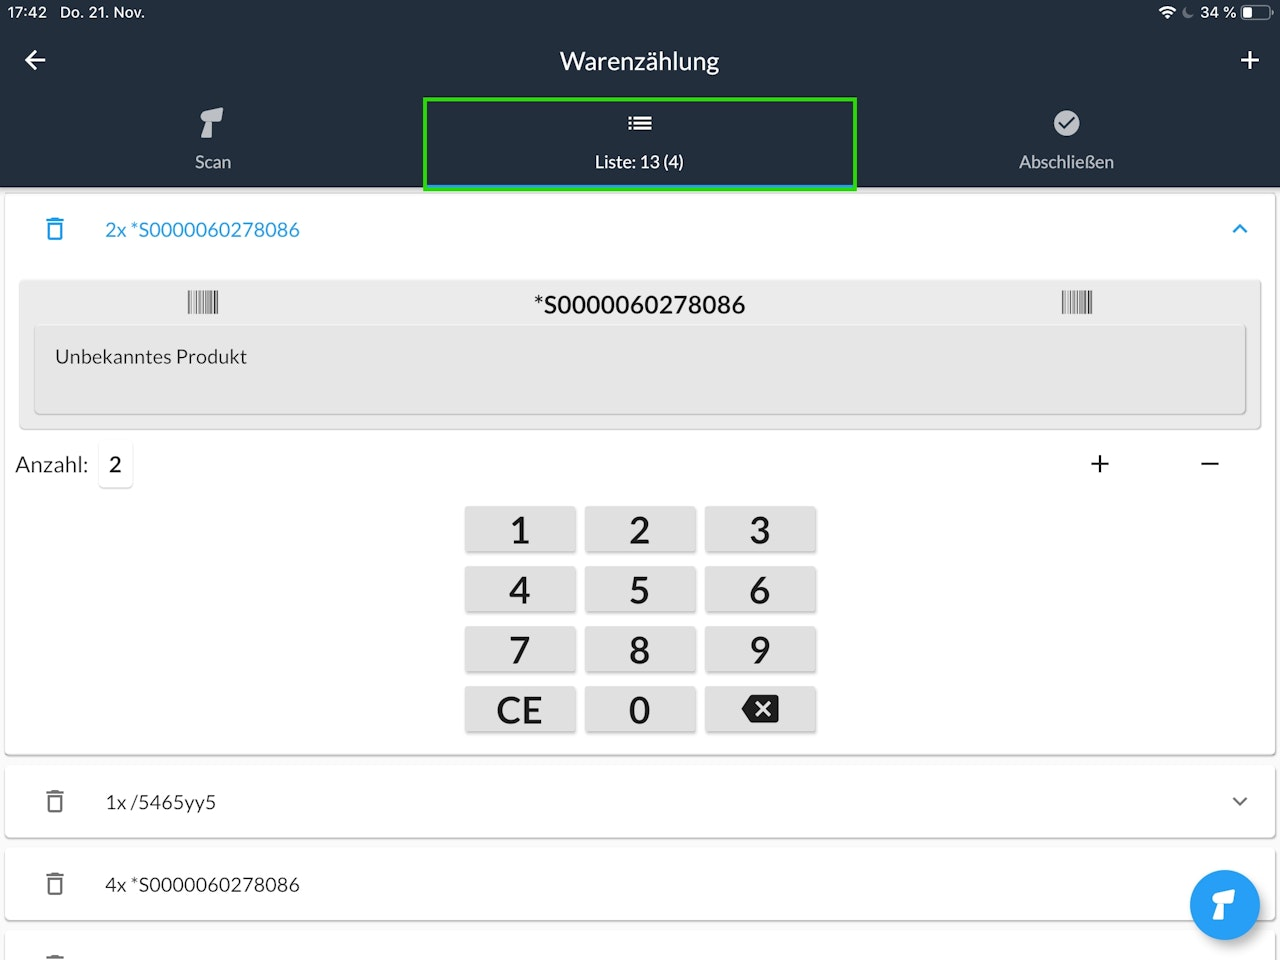
Once a code is scanned, the item appears on the screen, allowing you to input the quantity directly. If the barcode is unrecognized, only the EAN is displayed, not the item’s image or name.
Tip: If the scan fails, add items by tapping the "+" icon at the top right and entering the EAN. This method is a last resort and should be avoided if possible.
All scanned items appear under the "List" tab. Delete incorrect items with the trash icon and adjust quantities by tapping the arrow next to them. The number next to "List" represents the total item count, while the figure in brackets indicates unique items.
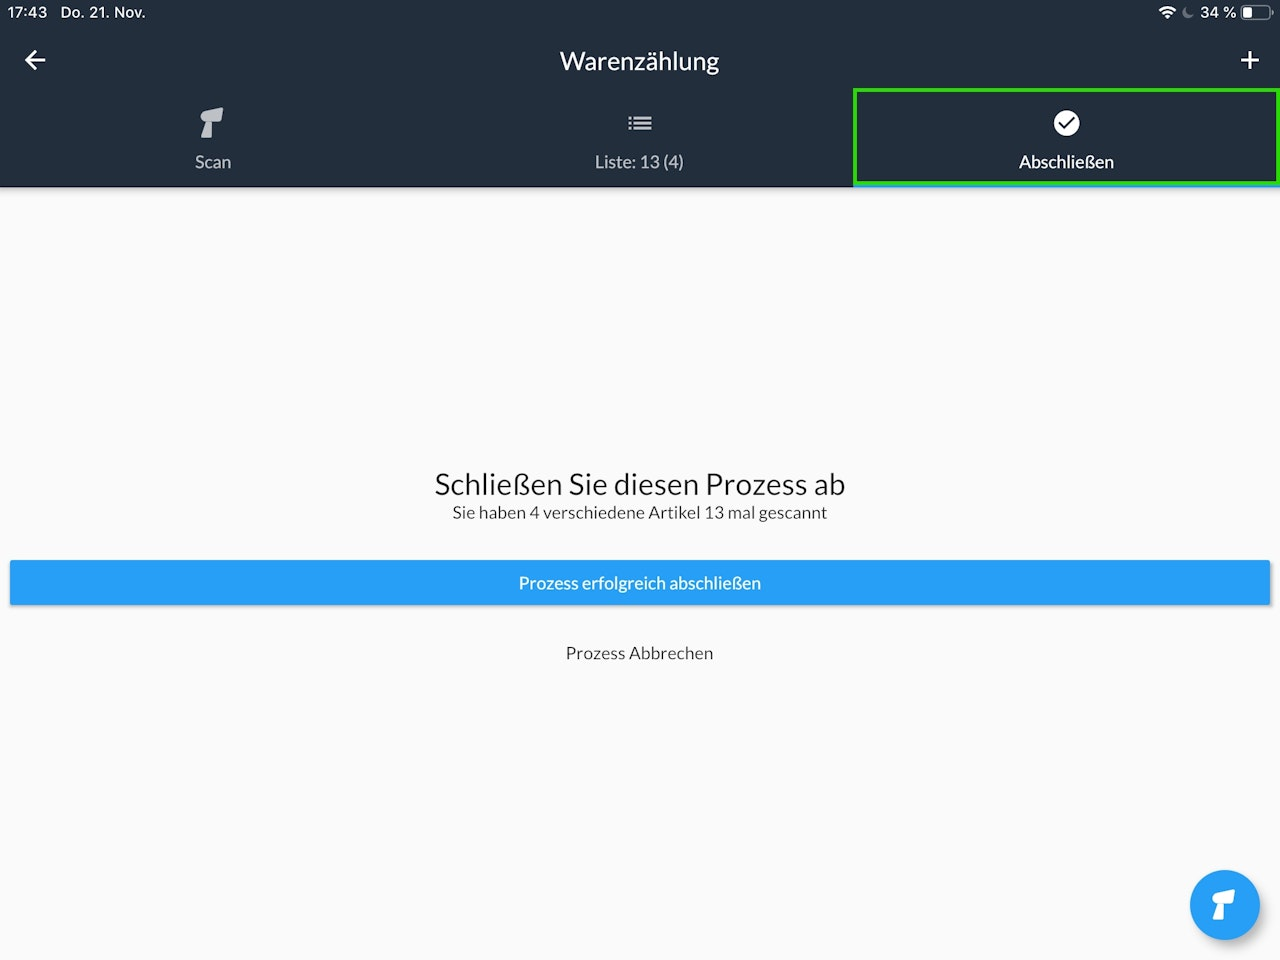
After correctly scanning and counting all items, tap "Complete". Choose between "Successfully Complete Process" or "Cancel Process". Canceling the process acts as a void for the inventory, meaning it cannot be resumed.
Was this article helpful?
That’s Great!
Thank you for your feedback
Sorry! We couldn't be helpful
Thank you for your feedback
Feedback sent
We appreciate your effort and will try to fix the article