POS Go - Setting Up Your Connection
Modified on Tue, 10 Feb at 4:01 PM
In this tutorial, we would like to show you how to connect your POS Go card reader to a Wi-Fi network or alternatively via a SIM card.
SIM cards are optional.
The card reader is compatible with 2.4 GHz and 5 GHz Wi-Fi networks as well as the LTE function in the mobile network.
Main Menu
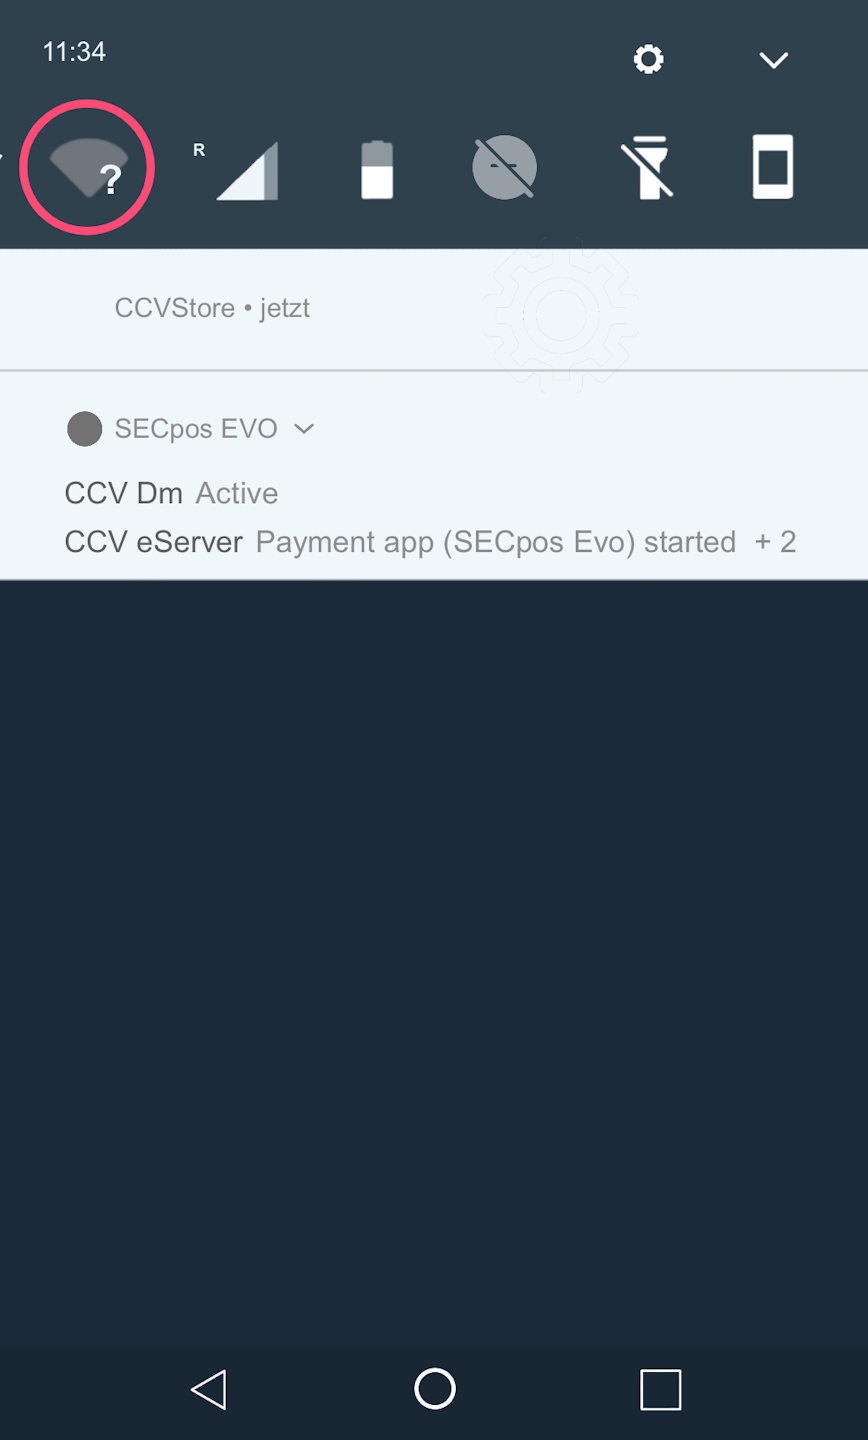
Please swipe down from the top of your main display to access the Android connection setup.
Please select the desired connection.

WLAN Selection
Please press and hold the WLAN symbol for a moment. A new menu window will open.
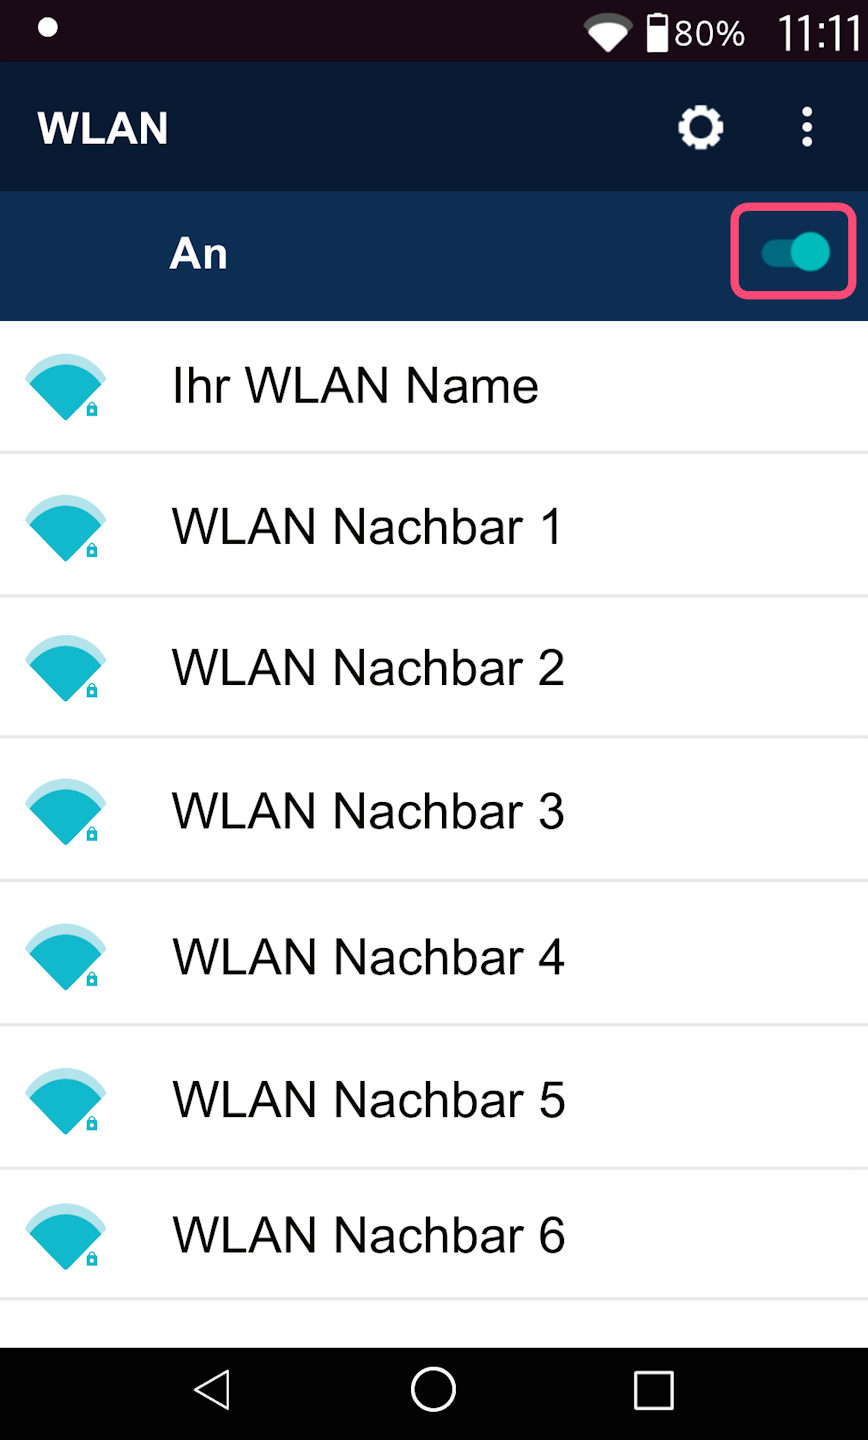
Selecting the WLAN Network
In the first step, please activate the WLAN function.
Activation by swiping
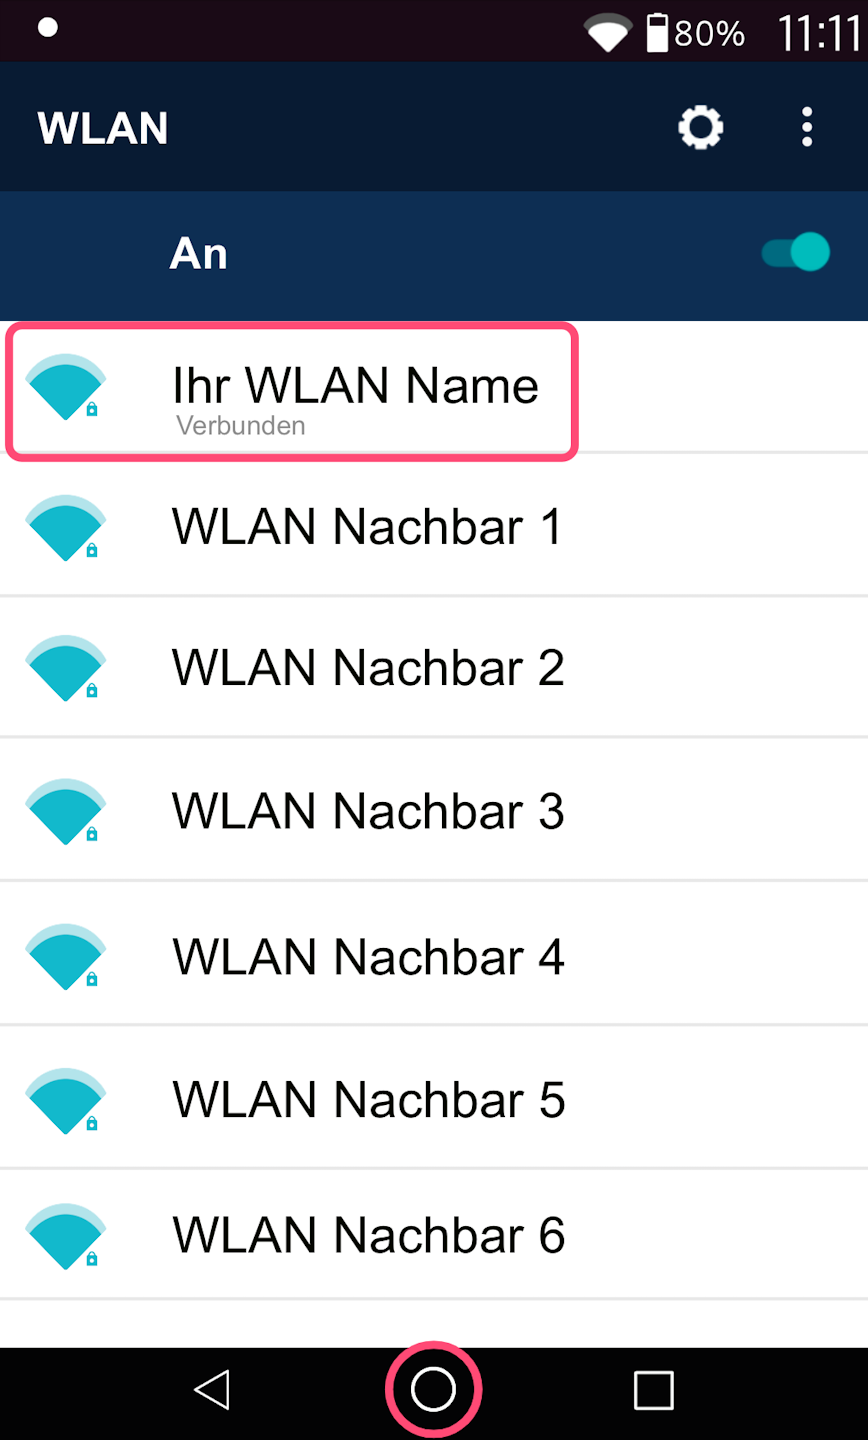
Now all WLAN networks in your area will appear.
Please select your WLAN network to which you want to connect the card reader.
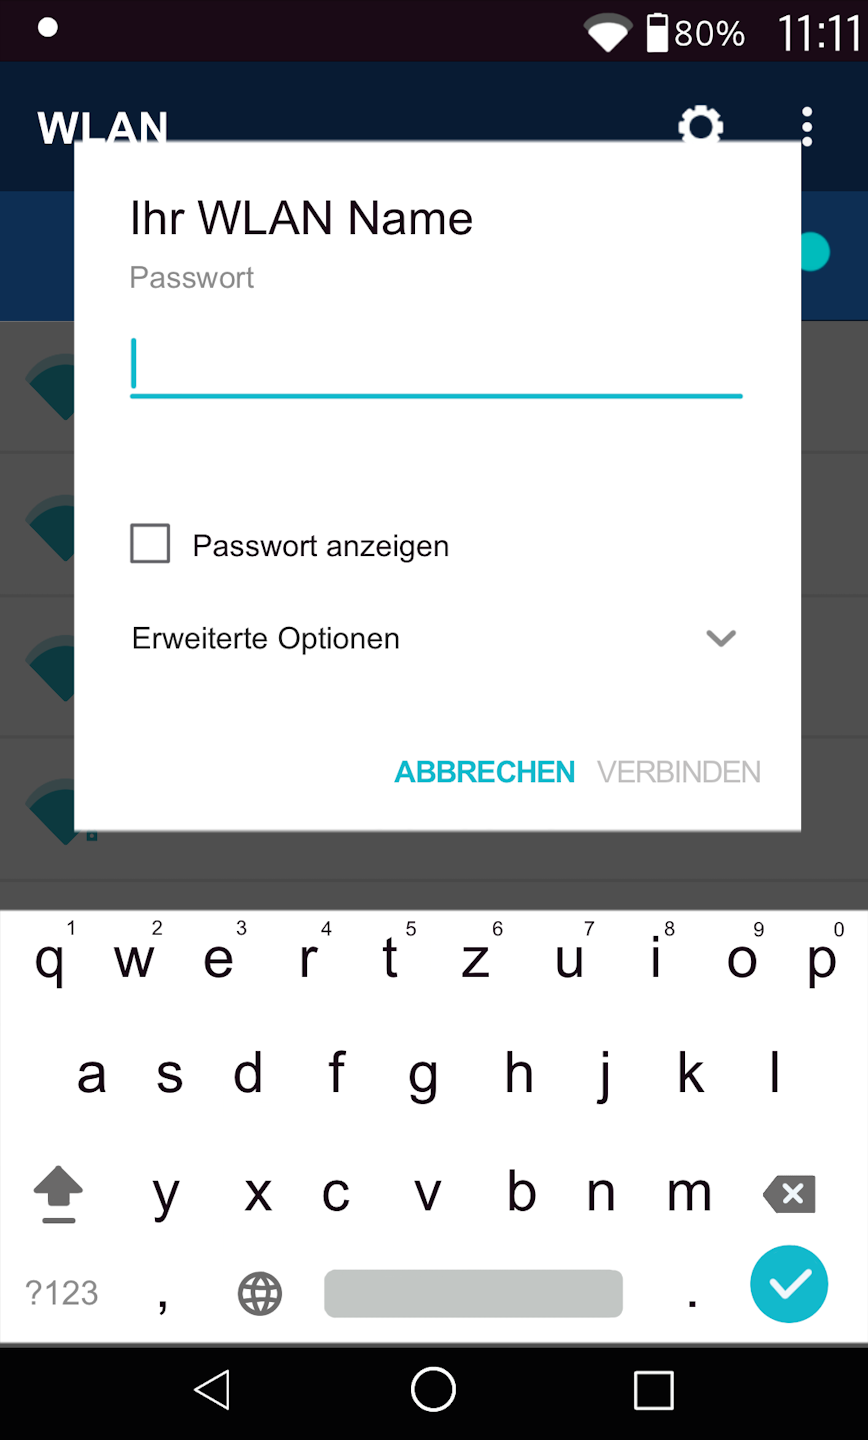
Entering the WLAN Password
At this point, the WLAN password will be requested.
Please pay attention to uppercase and lowercase letters in your password.
You can check the box for Show password to prevent possible typing errors.
Please confirm the password entry by pressing Connect.
Completion
As soon as Connected is visible under your WLAN network name, your card reader has an active internet connection.
Please use the center circle to return to your app view.
If you have successfully set up the connection, please check functionality using our article Check Connection.
Here you will find an informative article about the connection symbols on your card reader.
SIM Card Selection
Please press and hold the SIM card symbol for a moment. A new menu window will open.
Mobile Networks
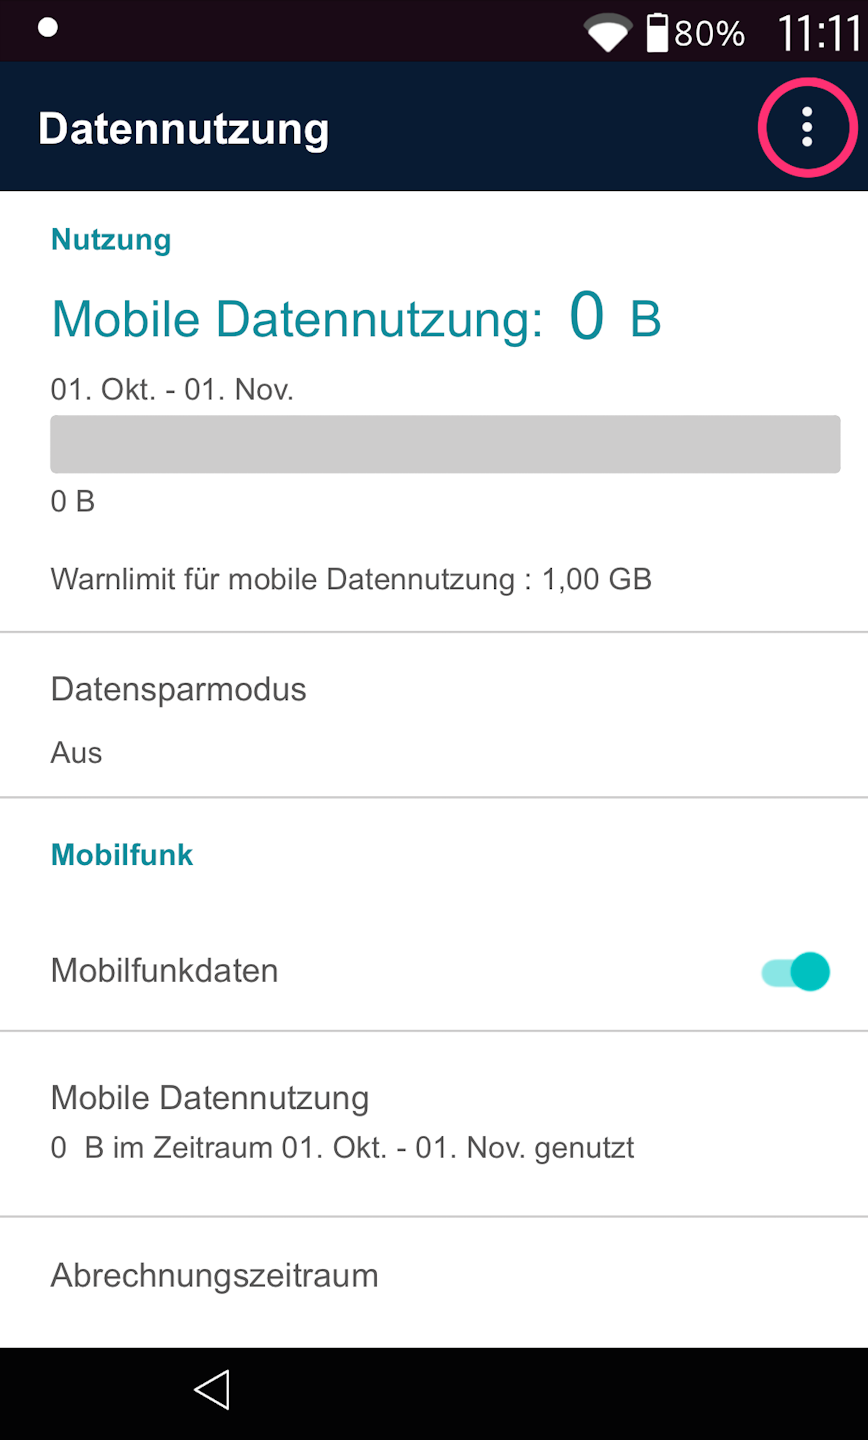
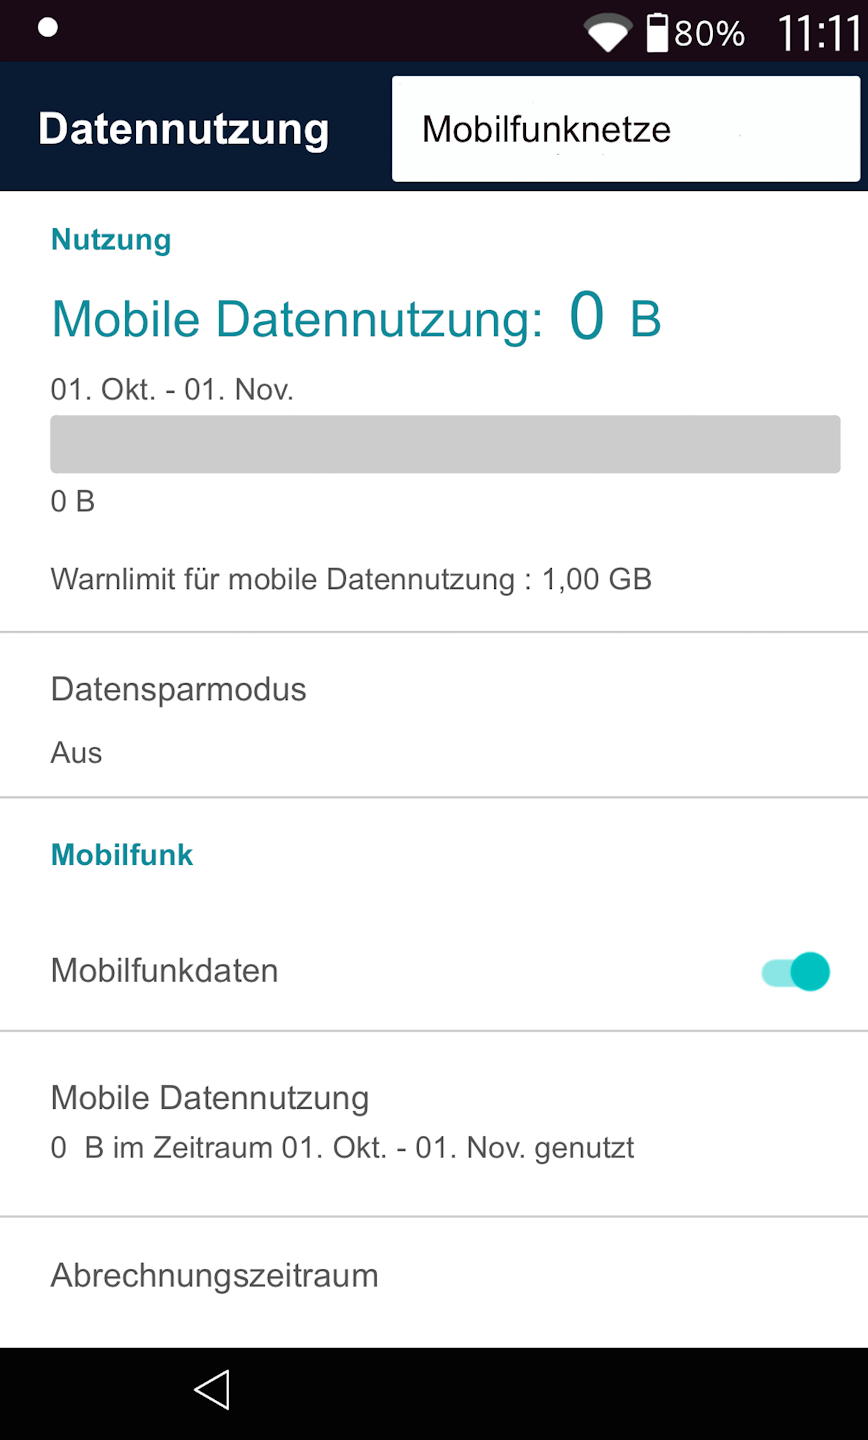
Fig. 1 - Please tap the three dots in the top right and select Mobile Networks (Fig. 2).
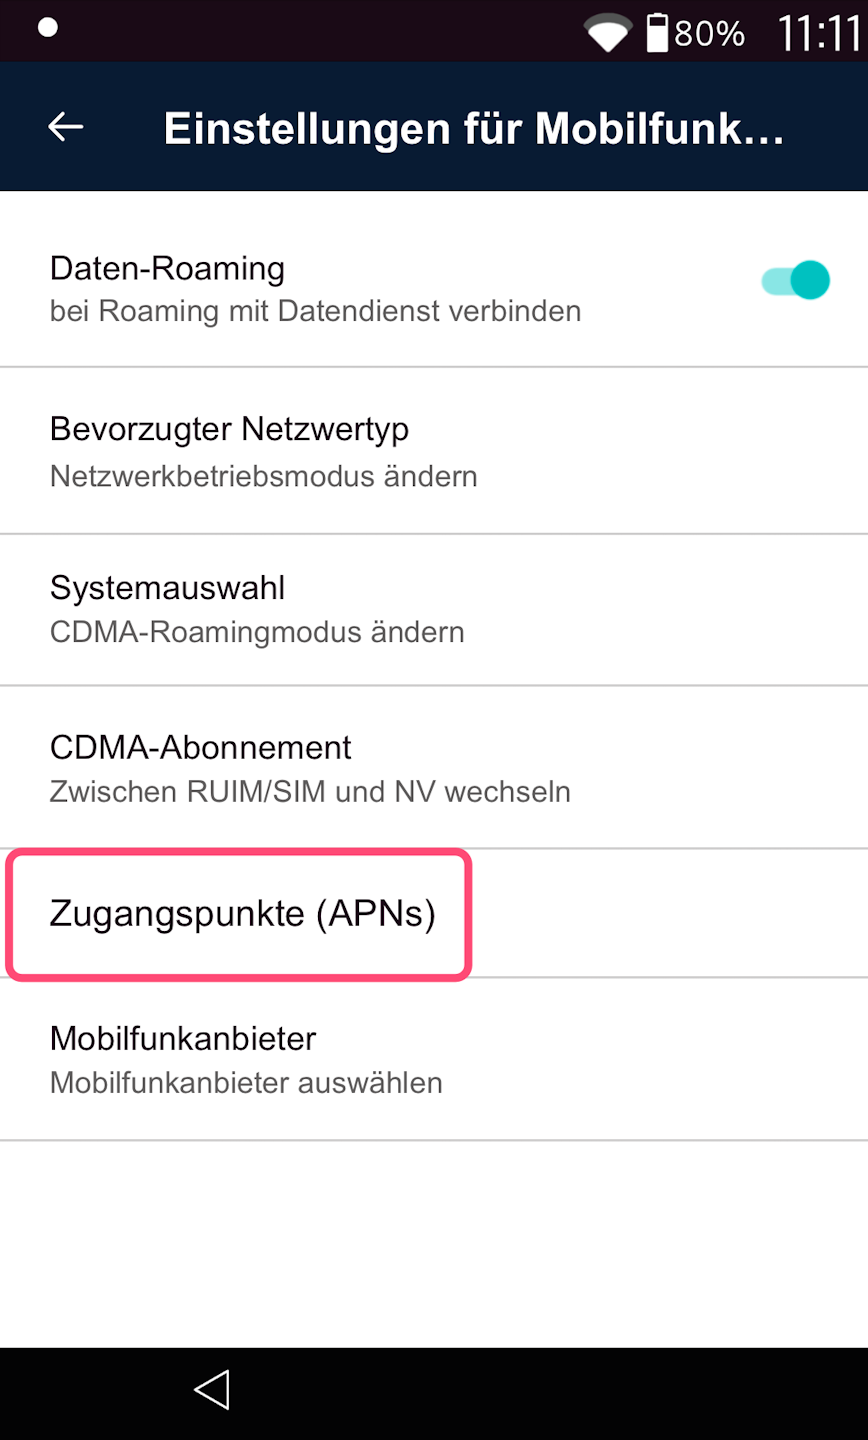
Access Points
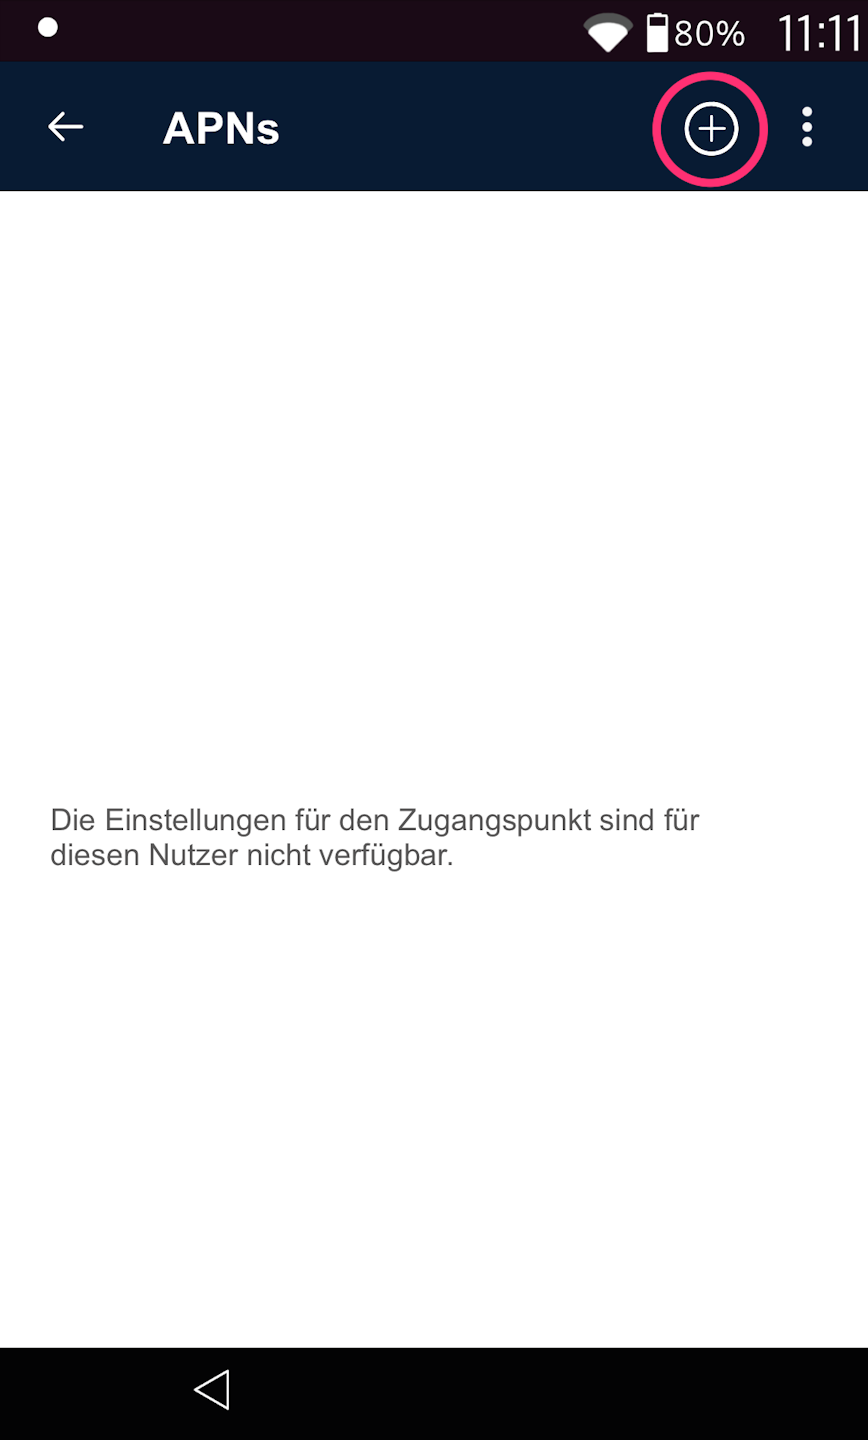
Fig. 1 - Please tap Access Points (APNs). Here we define which access point the SIM card will log in through. As seen in Fig. 2, please tap the plus symbol in the top right.
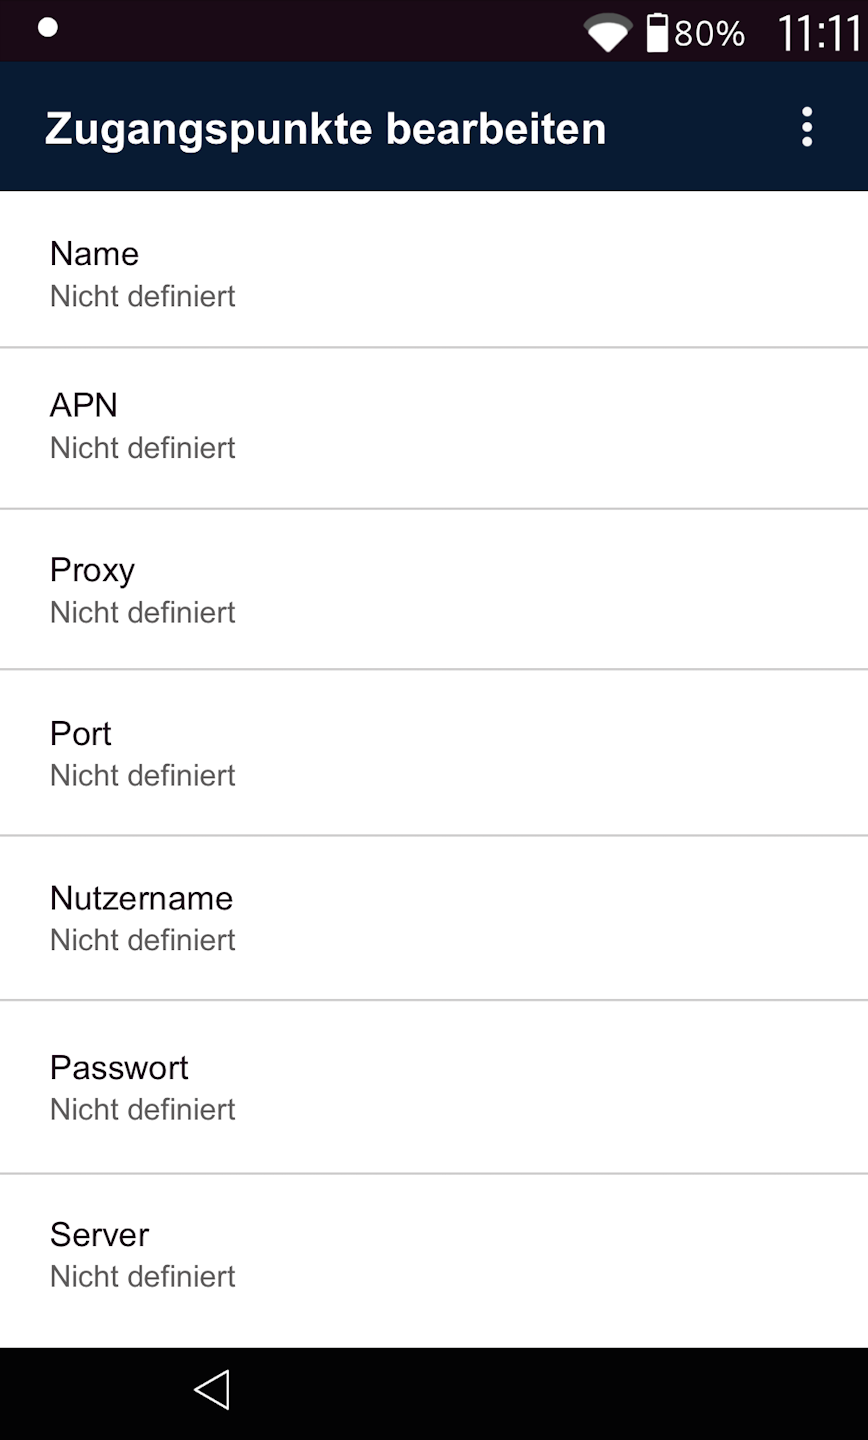
Fig. 3 - Now you can define the following access points.
Access Points (APNs) – these are mandatory fields
Name: M2M
APN: internet.m2mportal.de
Username: m2m
Password: sim
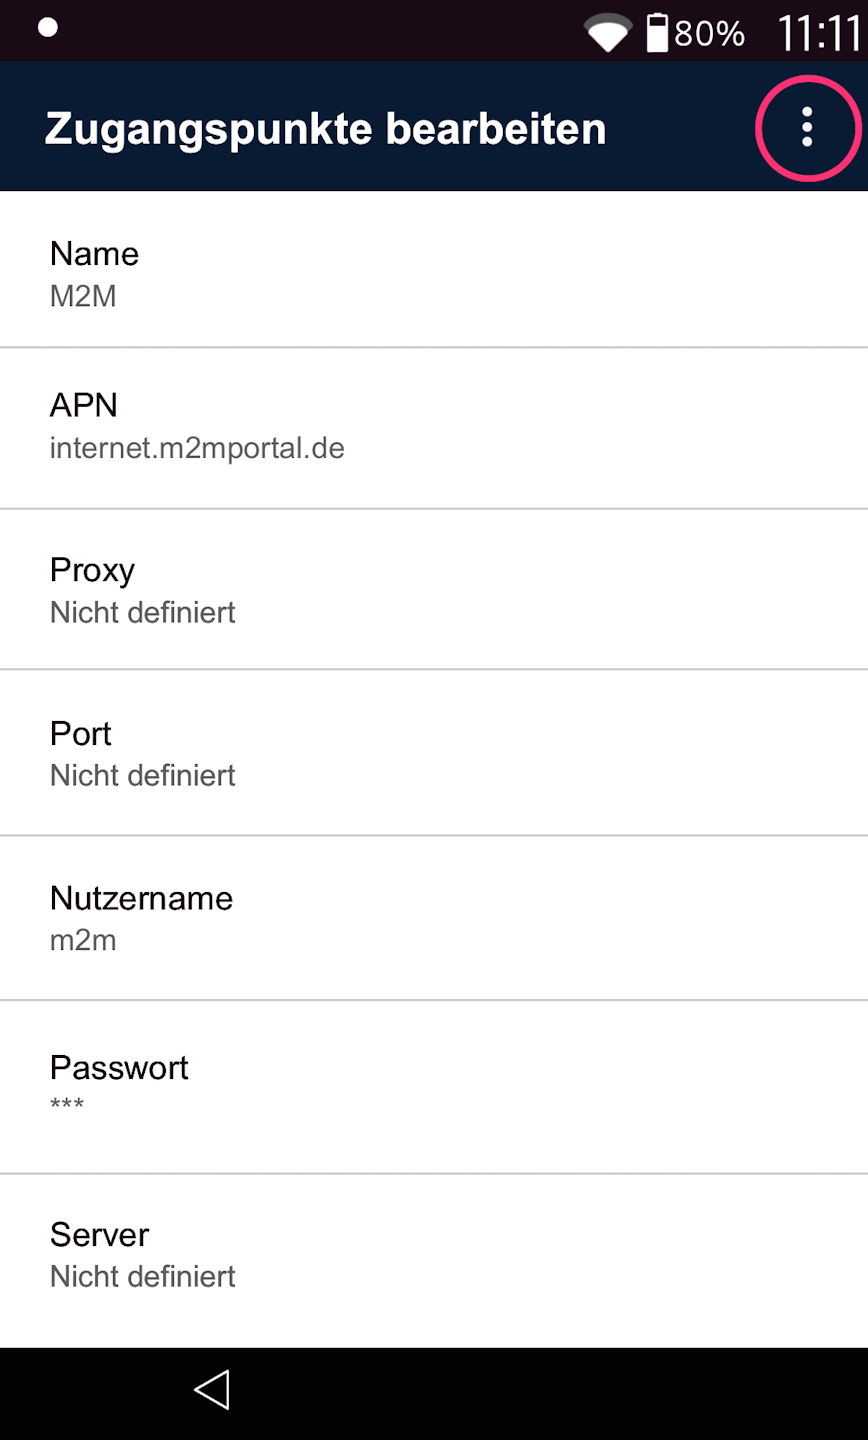
Entering the APNs
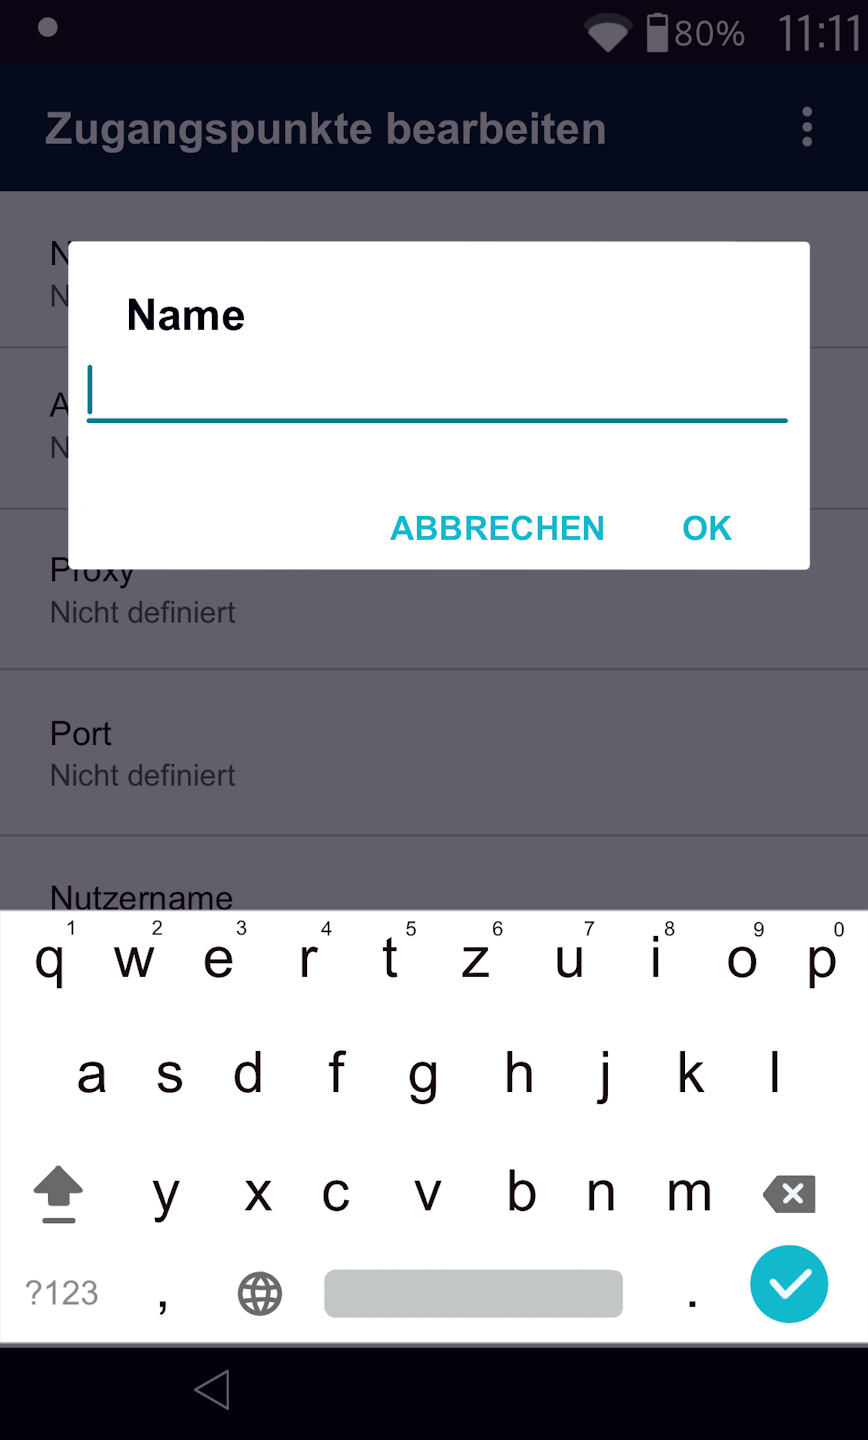
Fig. 1 - By tapping the fields, you can enter the following information.
Access Points (APNs) – these are mandatory fields
Name: M2M (required field)
APN: internet.m2mportal.de (required field)
Username: m2m (required field)
Password: sim (required field)
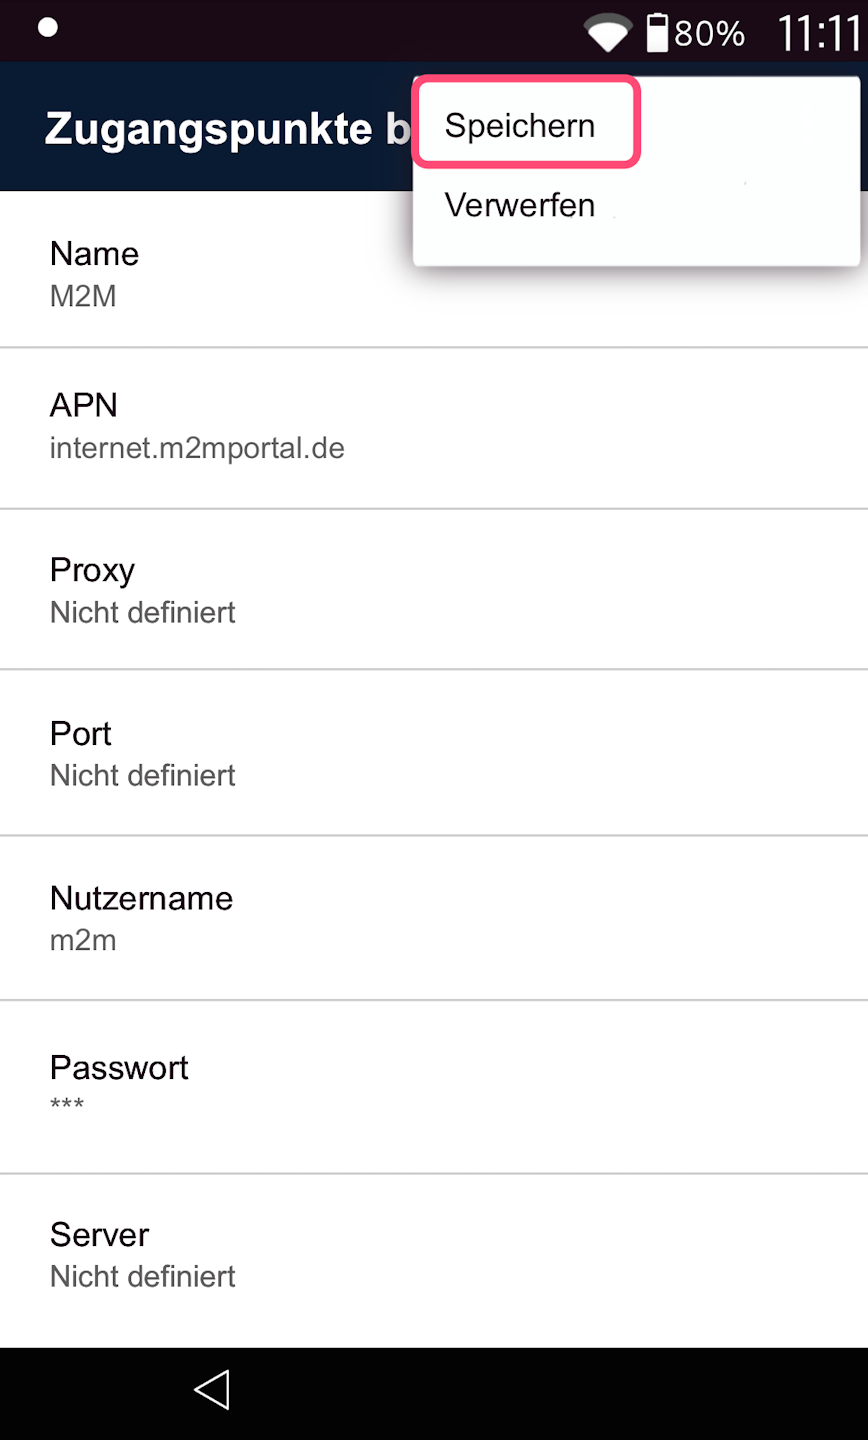
Fig. 2 - To save the entry, please tap the three dots in the top right again and select Save (Fig. 3).
The card reader has now received all the information from you to log into the mobile network.
Completion
The setup of the SIM card is now complete.
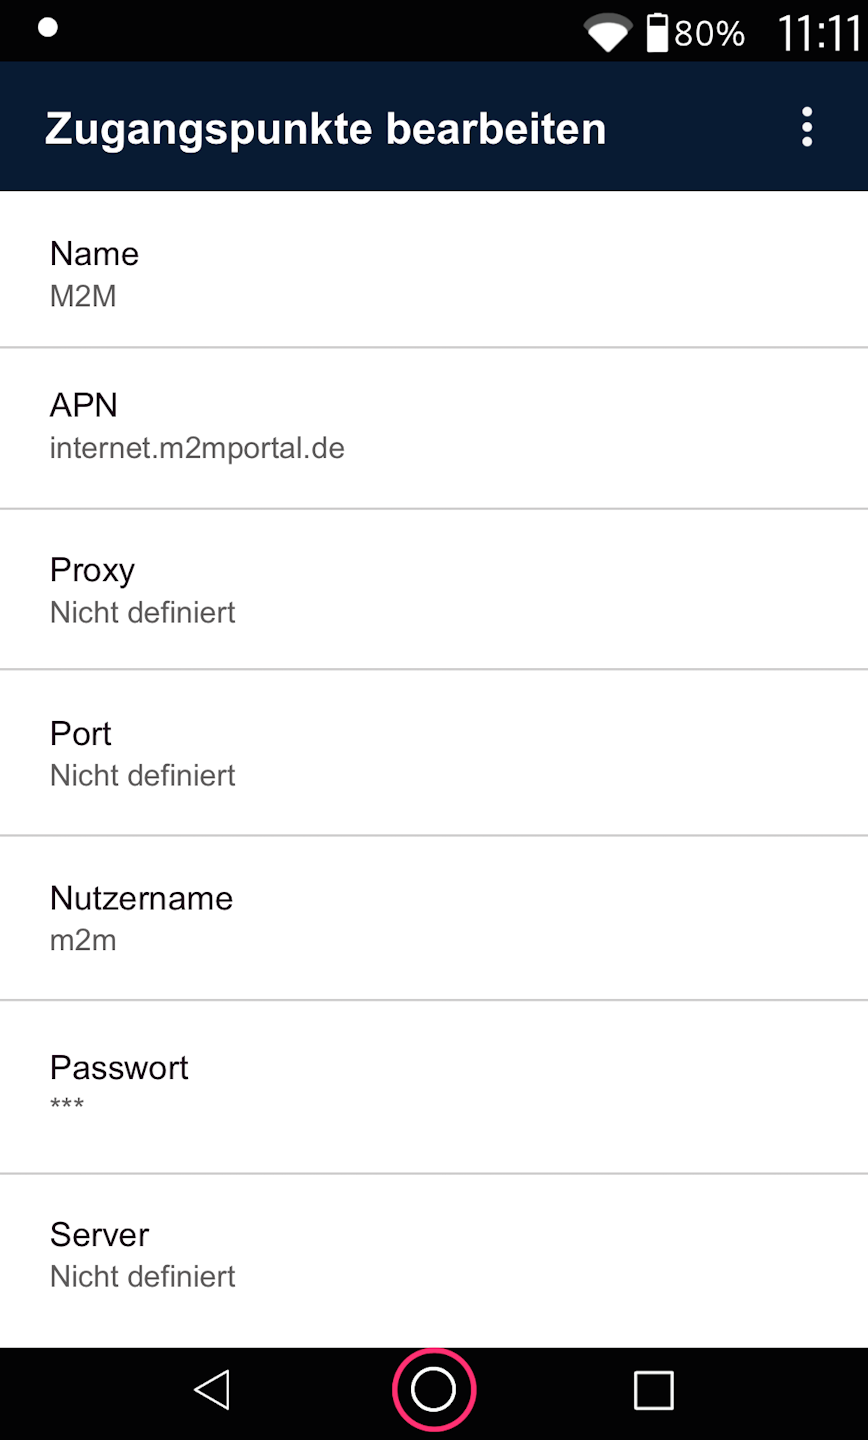
Please use the center circle to return to your app view.
If you have successfully set up the connection, please check functionality using our article Check Connection.
Here you will find an informative article about the connection symbols on your card reader.
Was this article helpful?
That’s Great!
Thank you for your feedback
Sorry! We couldn't be helpful
Thank you for your feedback
Feedback sent
We appreciate your effort and will try to fix the article