Invoice printing (optional)
Modified on Mon, 23 Feb at 10:36 AM
TABLE OF CONTENTS
Creating an Invoice – Step by Step
Before you begin, take a moment to check your dashboard. Make sure all settings – especially those related to calculation and printing – are correctly configured. Once everything is set up properly, the rest of the process will run smoothly.
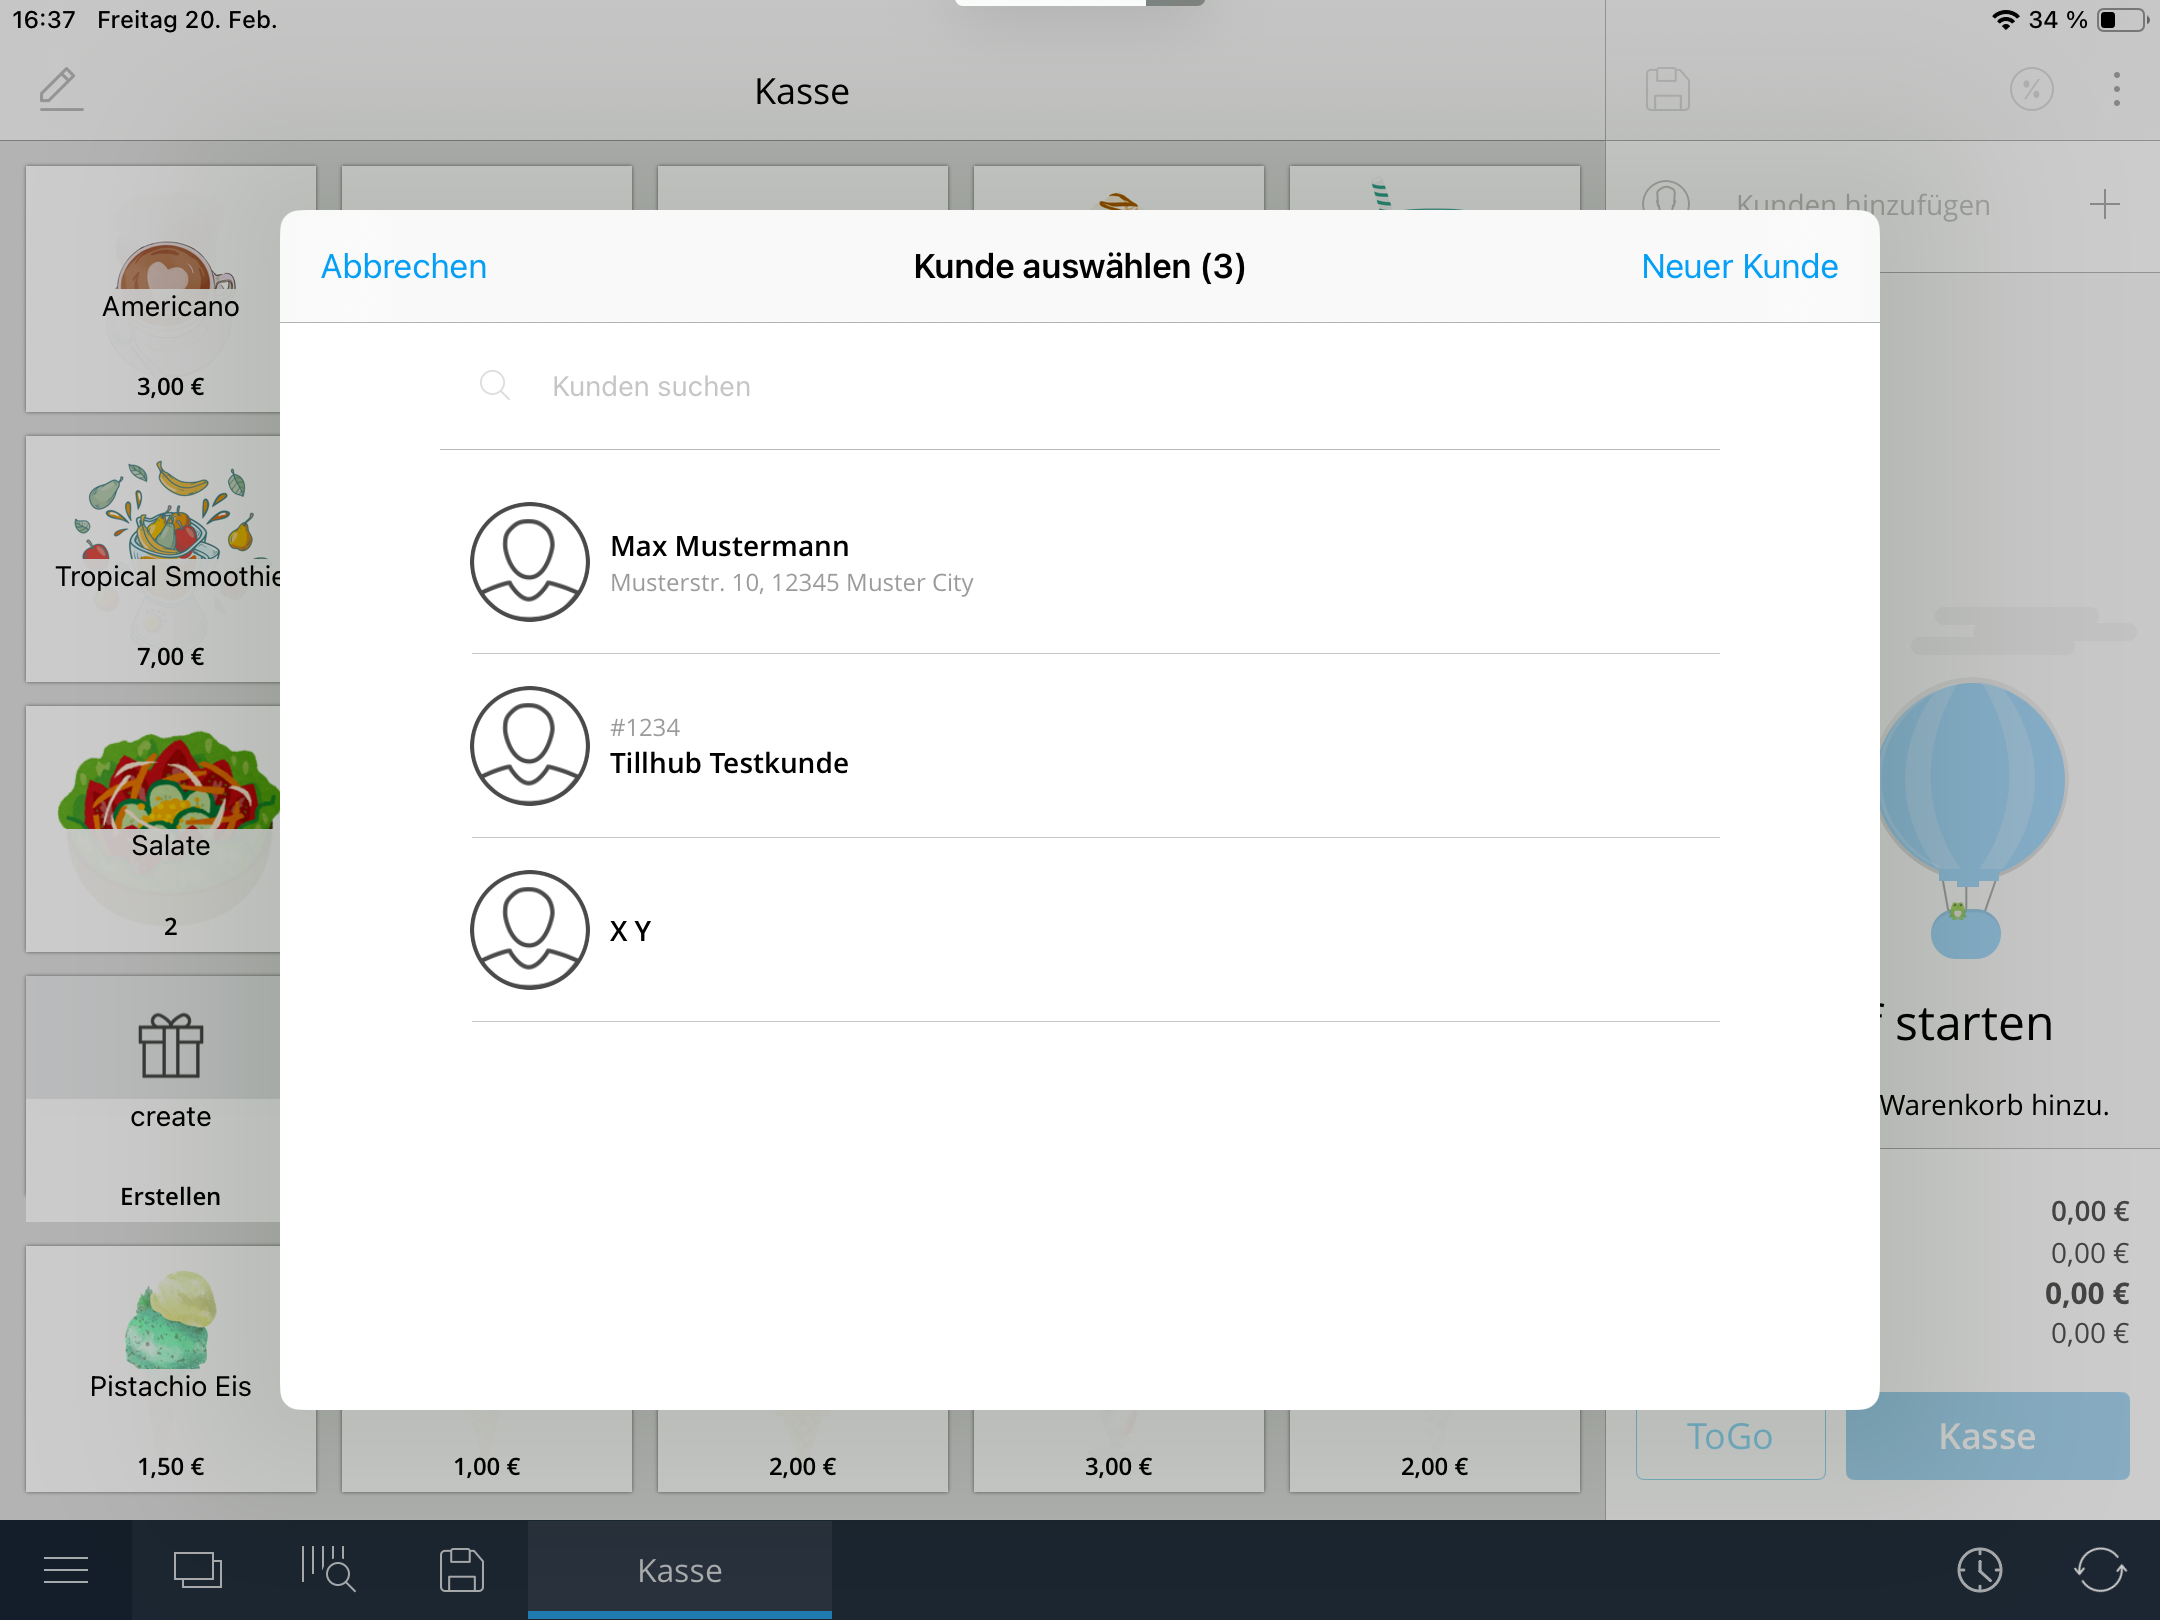
Adding or Selecting a Customer
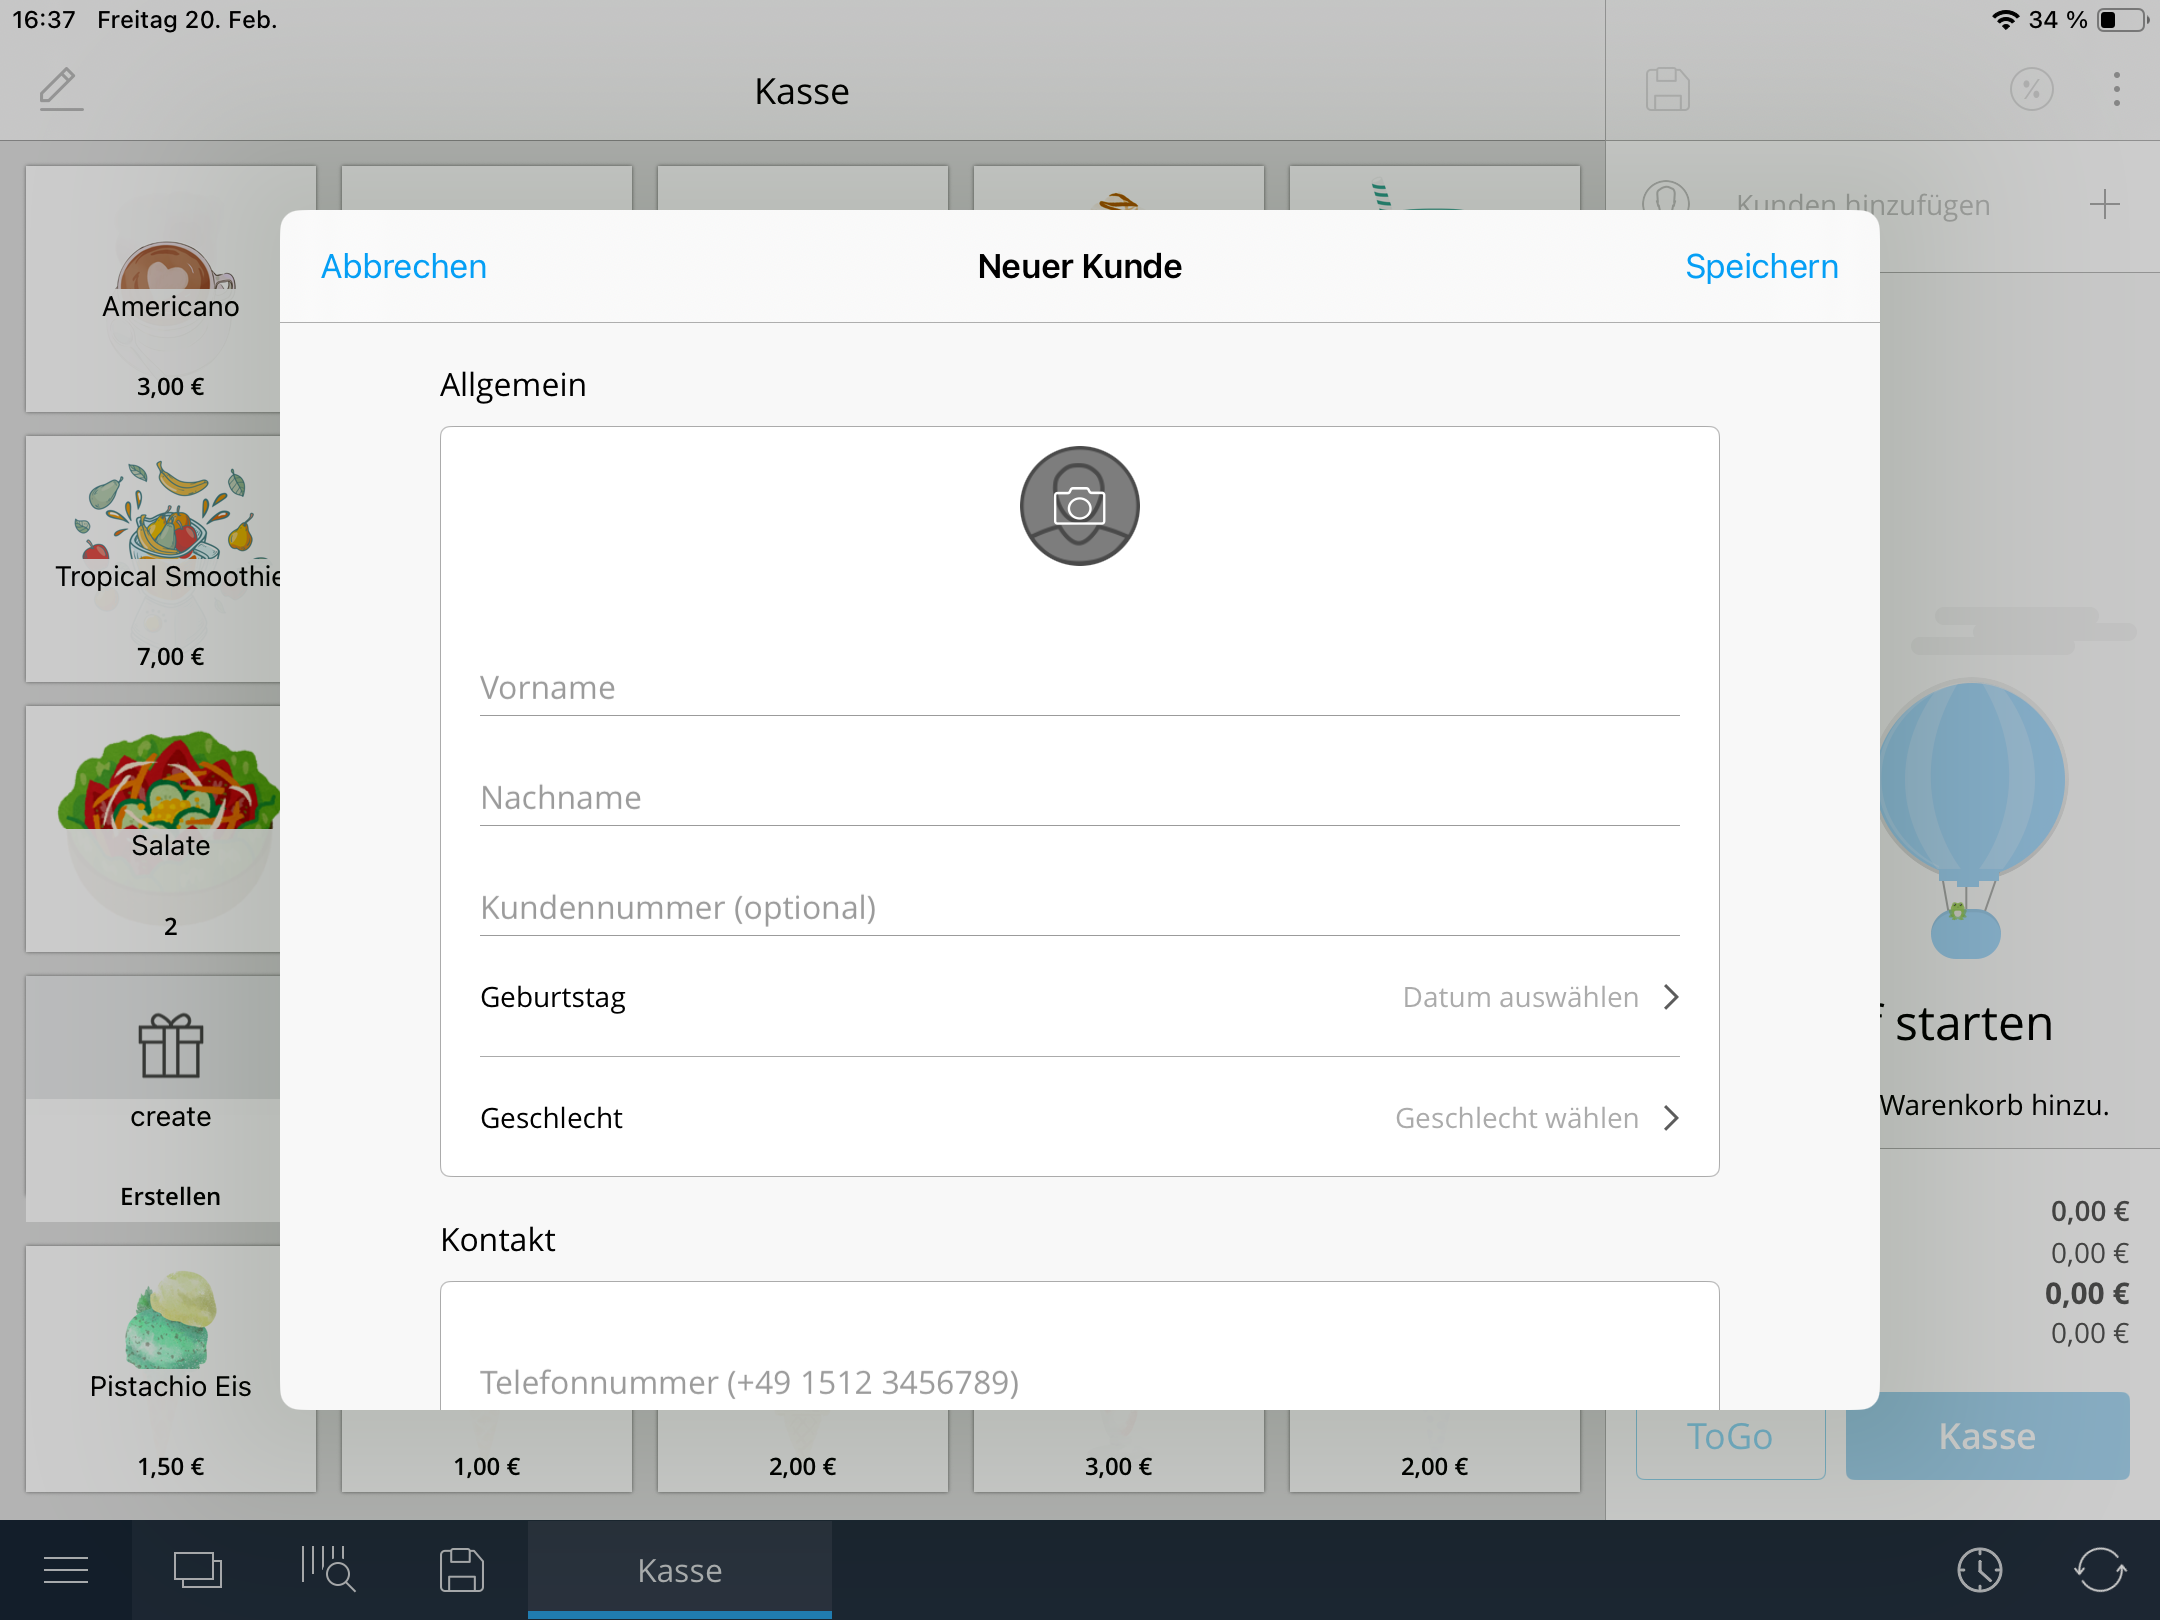
Start by clicking on “Add Customer.” You will see an overview of all existing customers. If you would like to create a new one, select “New Customer” and enter at least a first and last name. You can also add further details such as address and contact information to ensure the invoice appears complete and professional.
After saving, the customer will automatically be assigned to the cart. If you need to select a different customer, simply remove the current one and choose the correct customer instead.
Adding Items and Creating the Invoice
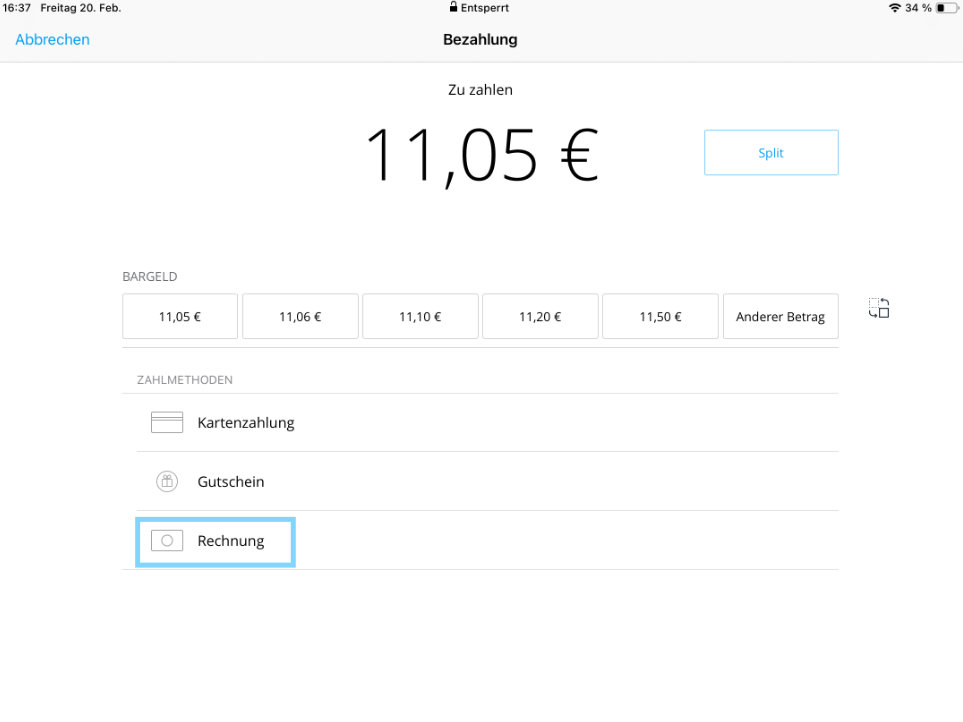
Next, add the desired items to the cart. Once all products have been entered, click on “Checkout” and choose “Invoice” as the payment method. The invoice will then be generated automatically.
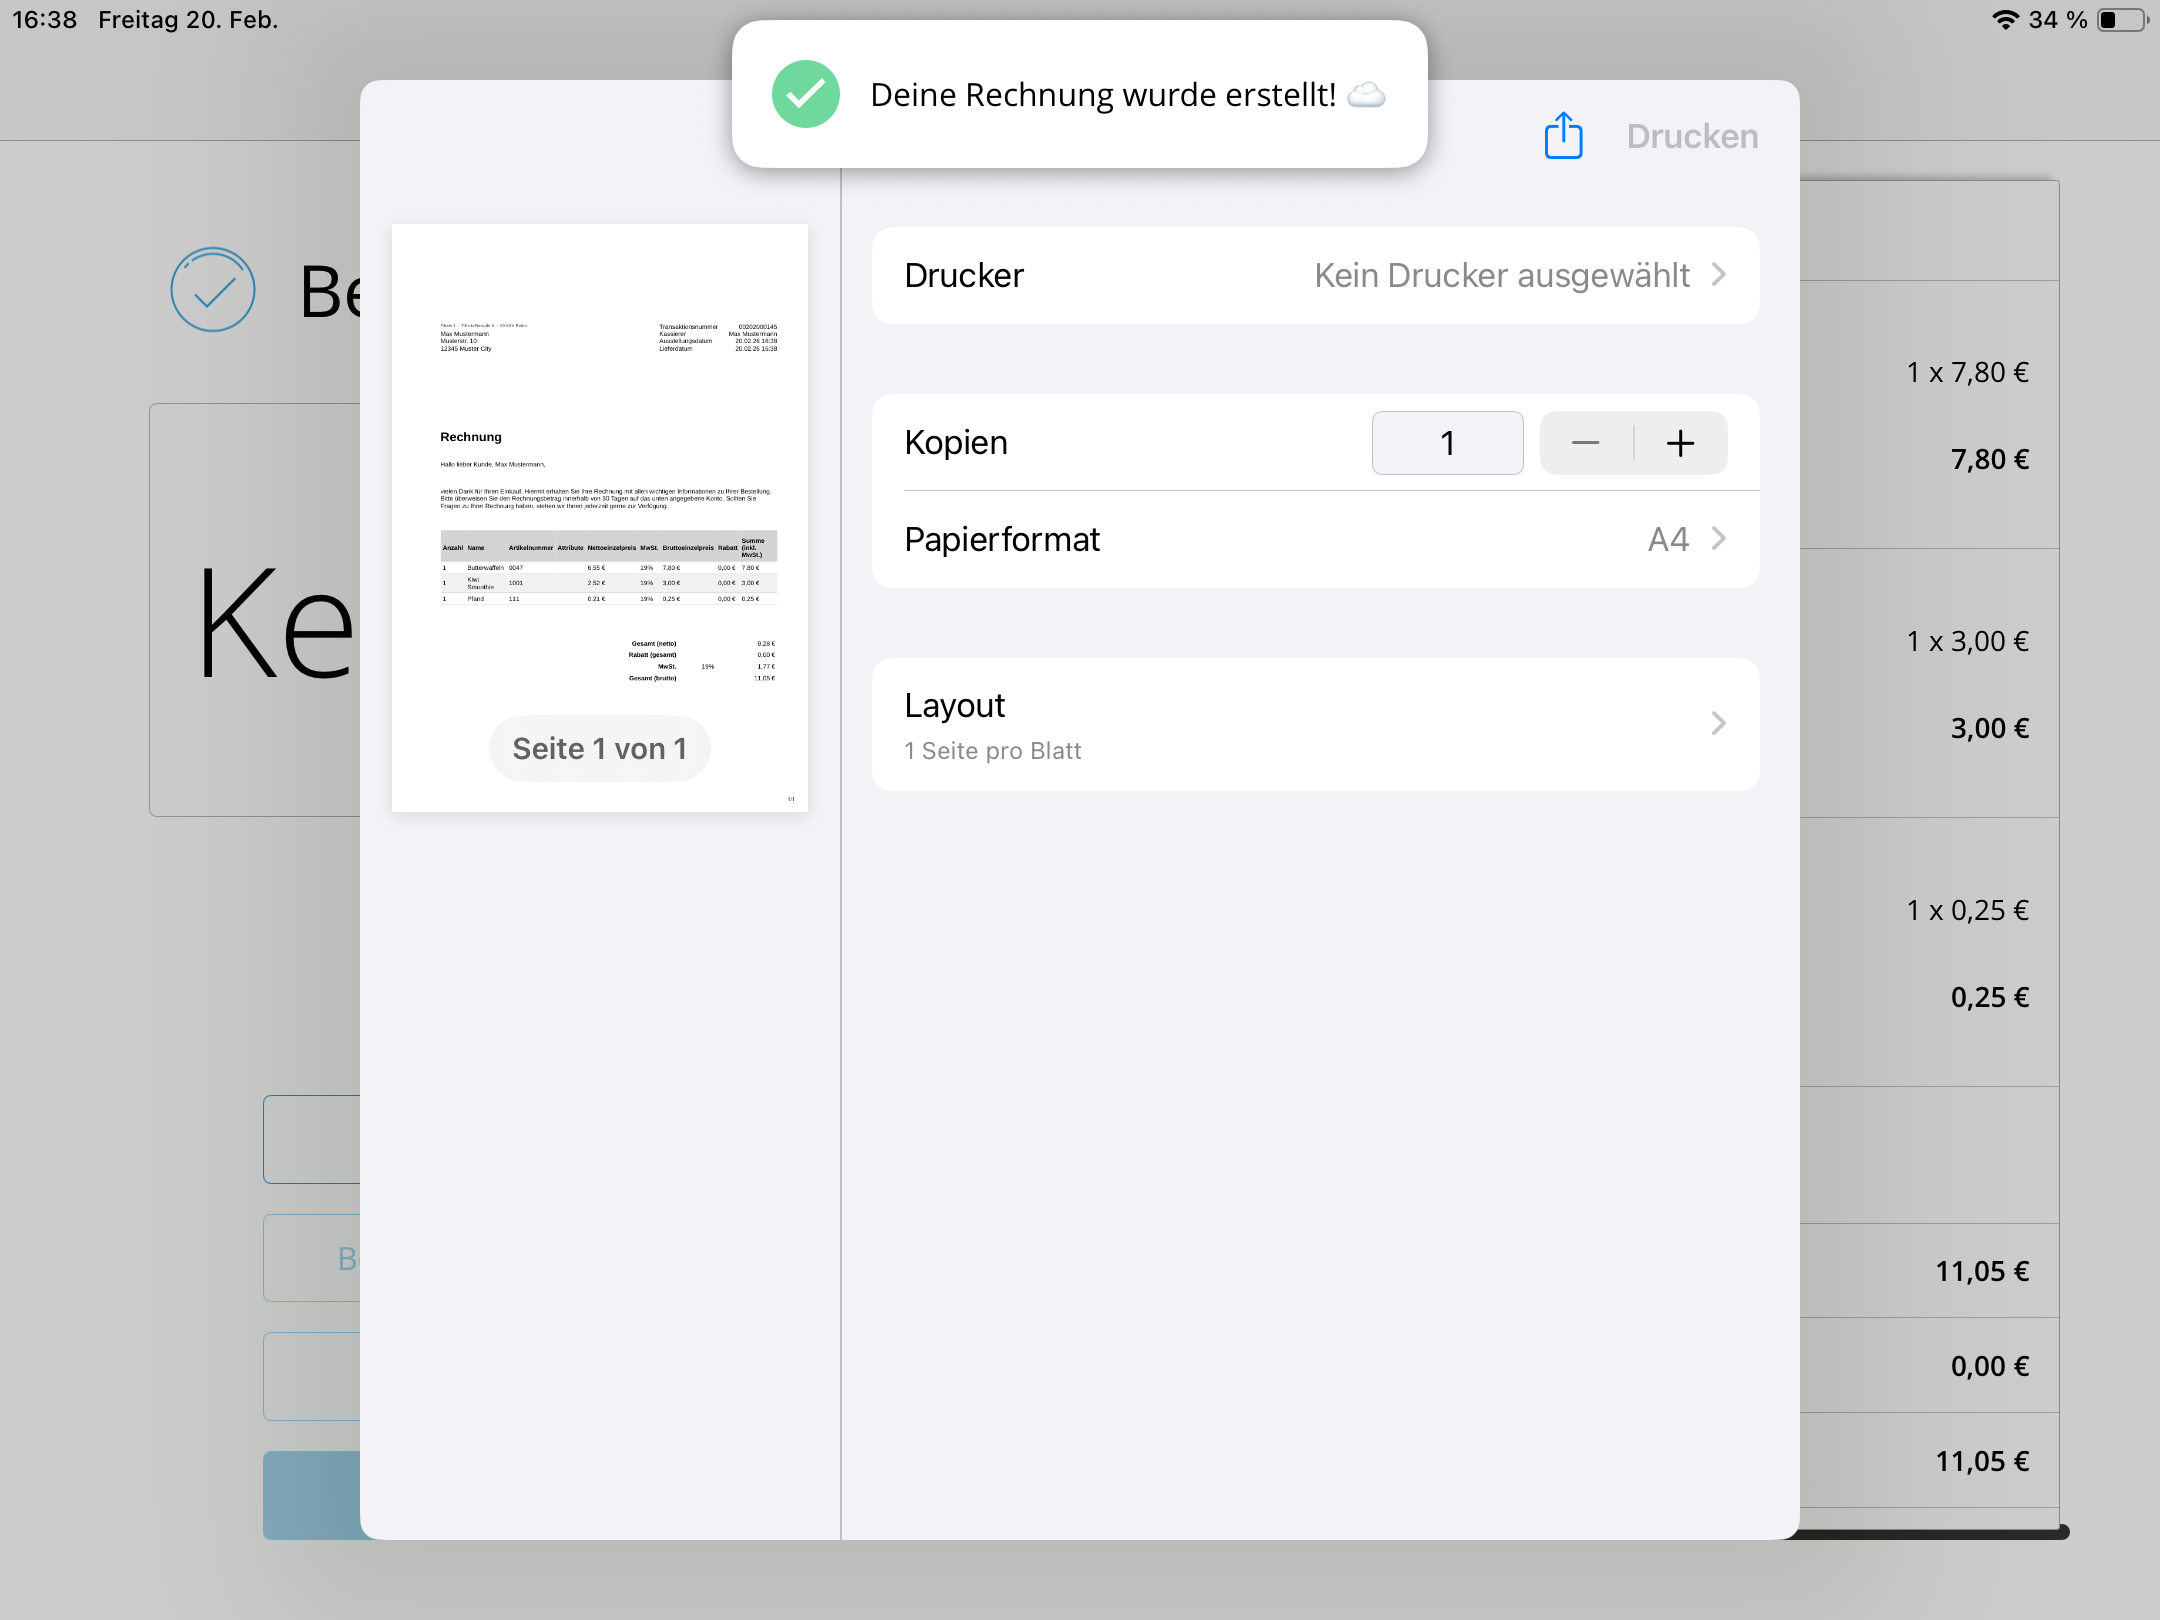
You can print the invoice directly, provided your iPad is connected to an A4 printer, or send it via email. By using the share icon, you can quickly send the invoice digitally. The document can also be reopened and printed again at any time.
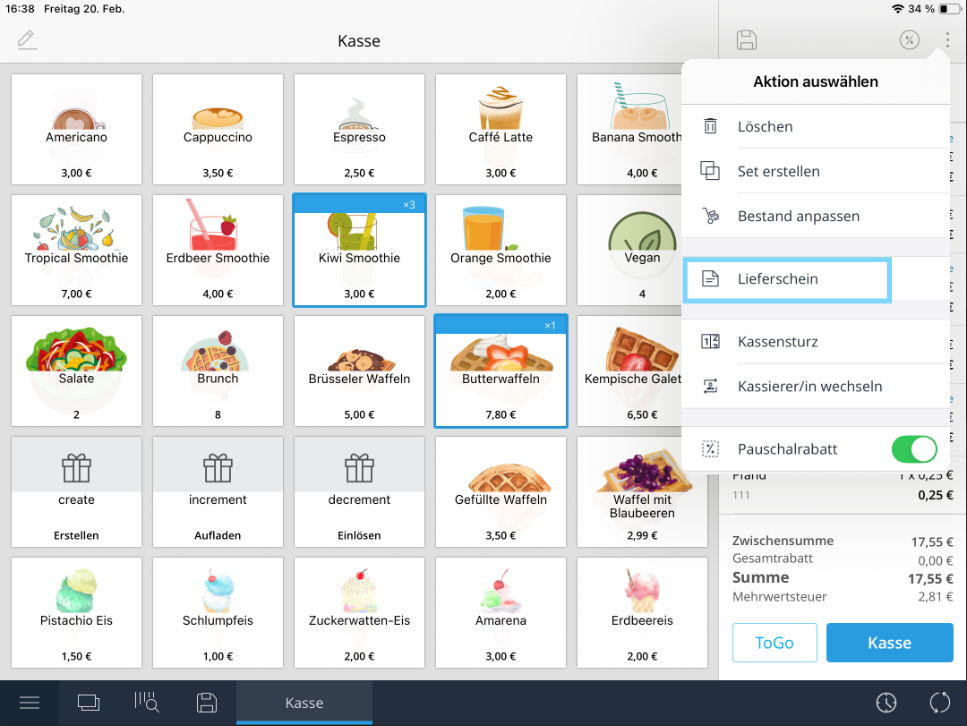
Creating a Delivery Note
To create a delivery note, follow a similar process. First, add the relevant items to the cart. Then click on the three dots in the top right corner, select “Delivery Note,” and assign it to a customer.
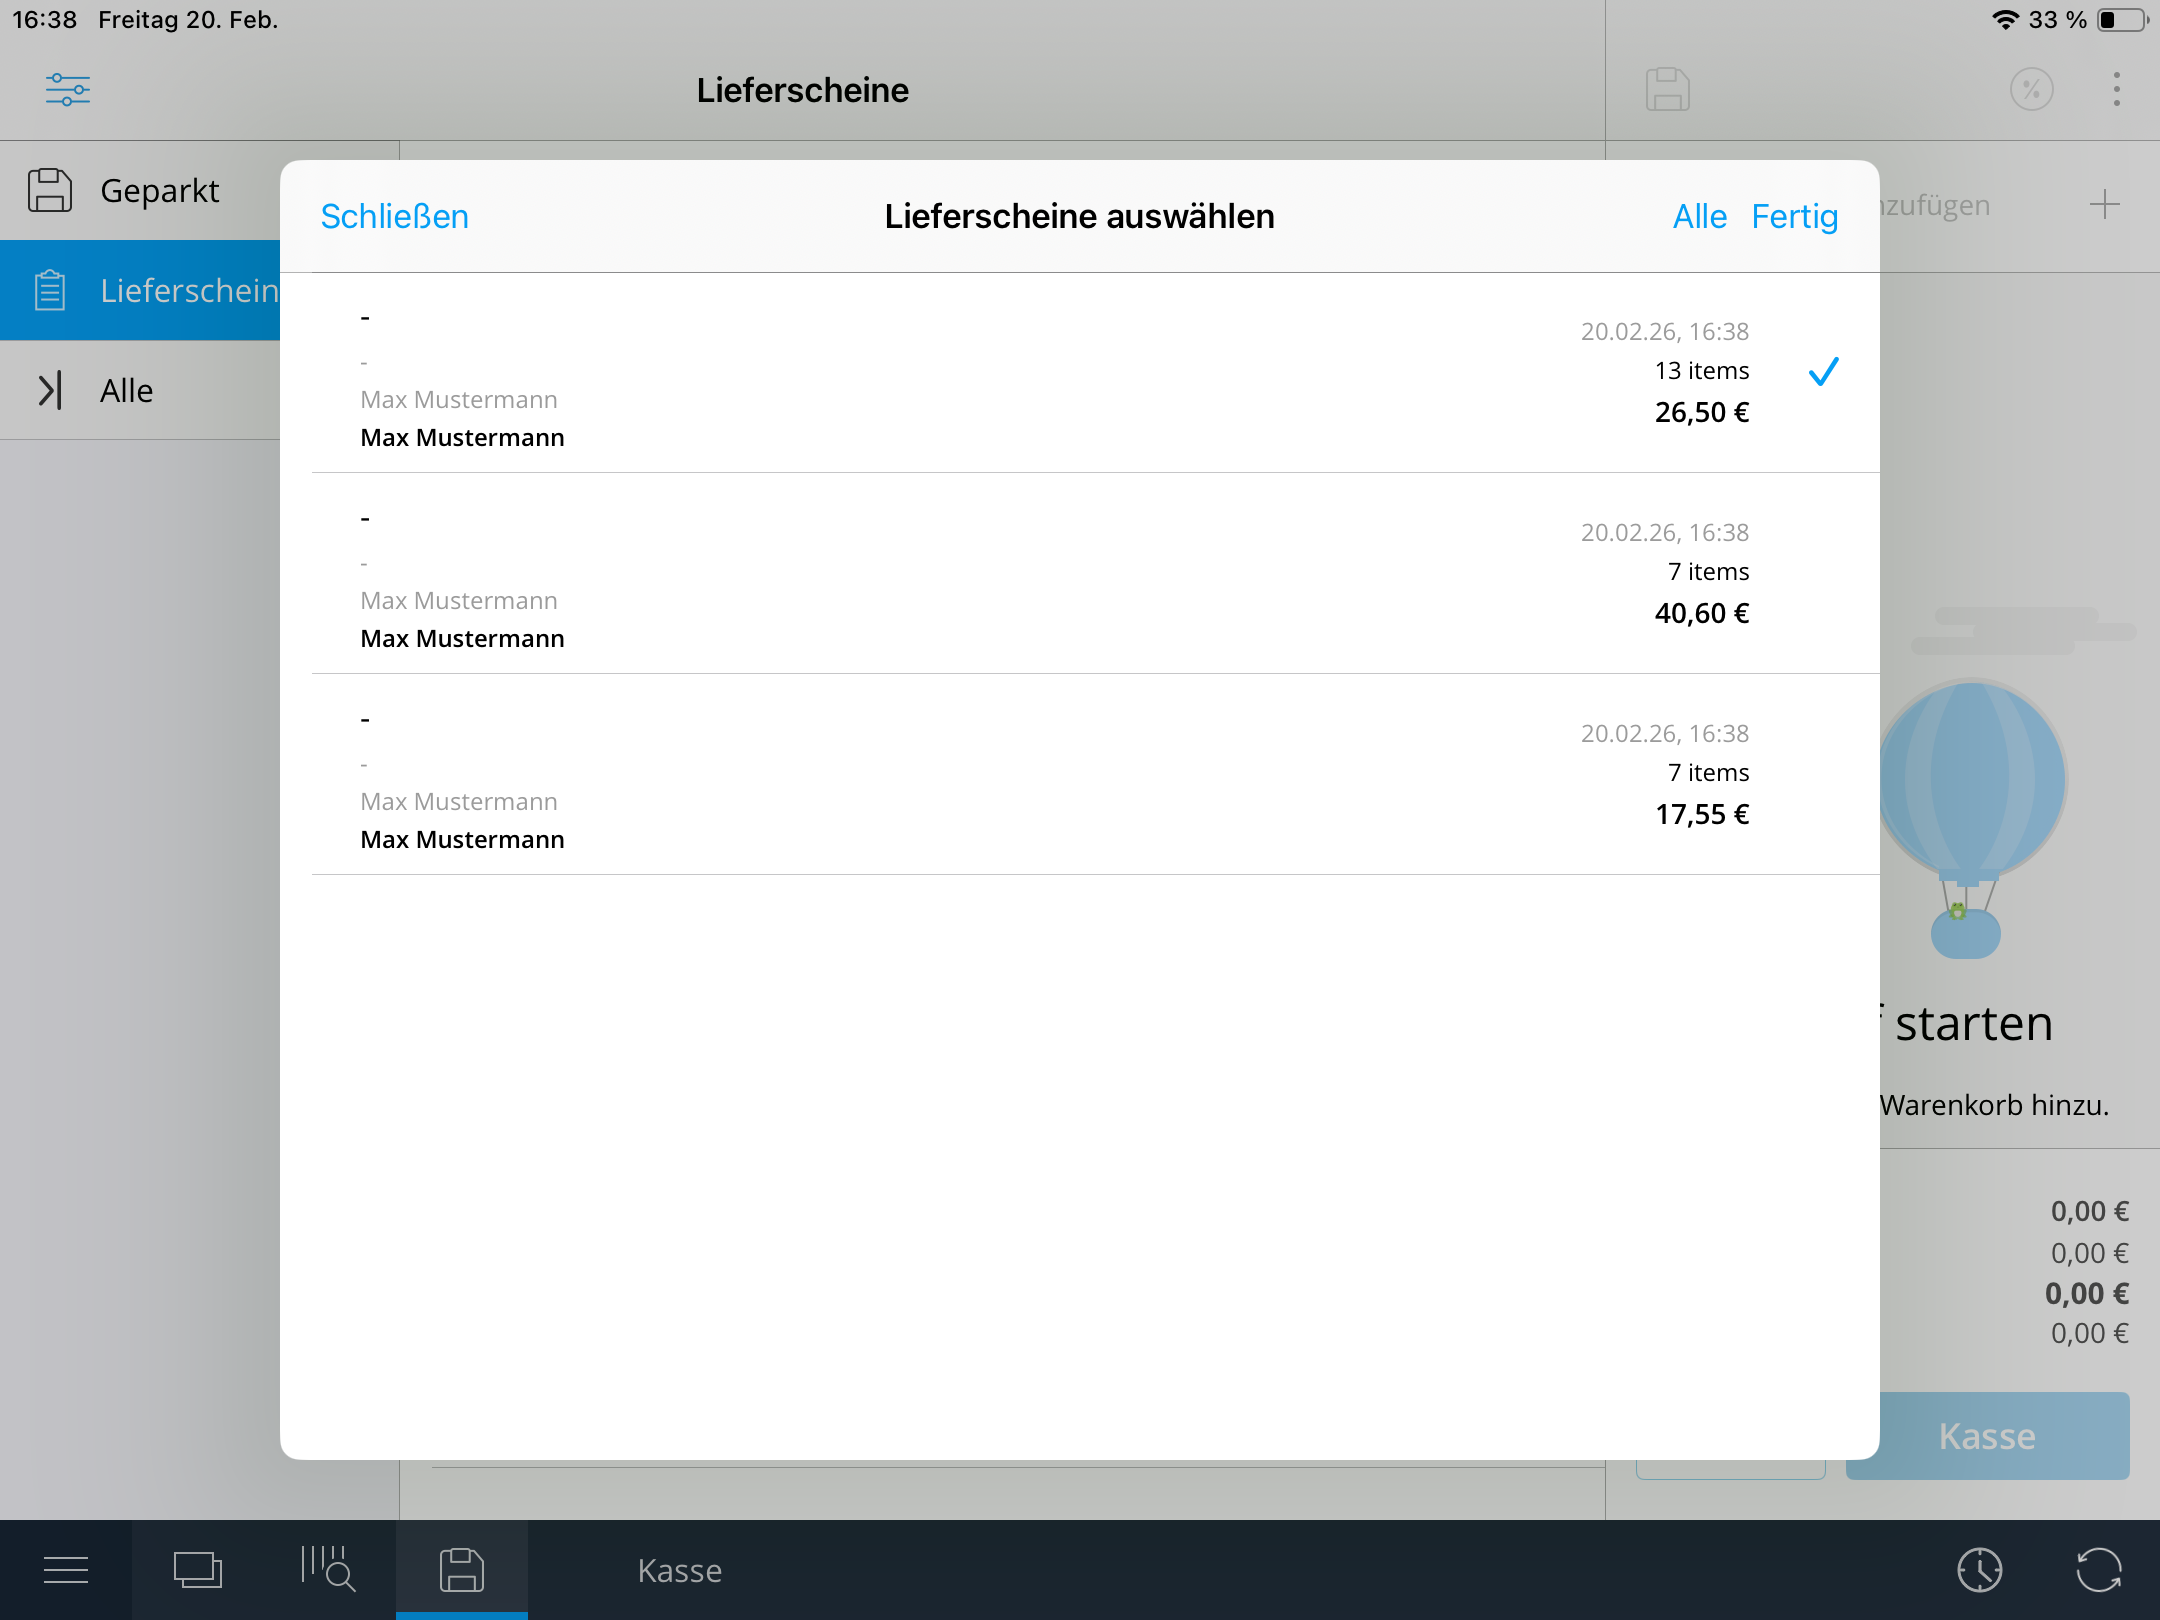
The delivery note will be saved and can be accessed at any time in the “Delivery Notes” section. From there, you can open it, send it by email, complete the sale, or process a refund.

Combined Invoice
If a customer has several open delivery notes, you can combine them into one consolidated invoice. First, create multiple delivery notes for the same customer as described above.
Then open one of the delivery notes and select “Sell.” You will see a list of all open delivery notes for that customer. Select the ones you would like to include, click “Checkout,” and choose “Invoice” as the payment method.
A combined invoice will automatically be generated from the selected delivery notes – clear, efficient, and professional.
Was this article helpful?
That’s Great!
Thank you for your feedback
Sorry! We couldn't be helpful
Thank you for your feedback
Feedback sent
We appreciate your effort and will try to fix the article