Gastronomy: Extras, Deposits, and Tags
Modified on Fri, 4 Sep at 11:04 AM
TABLE OF CONTENTS
Instructions: Creating Items with Extras / Side Dishes
For hospitality businesses: for items with many side dishes, we recommend not using item variants, but instead using items with extras. These are easier to manage, and changes can be made more flexibly.
sie sagen
Step 1: Create the standard item
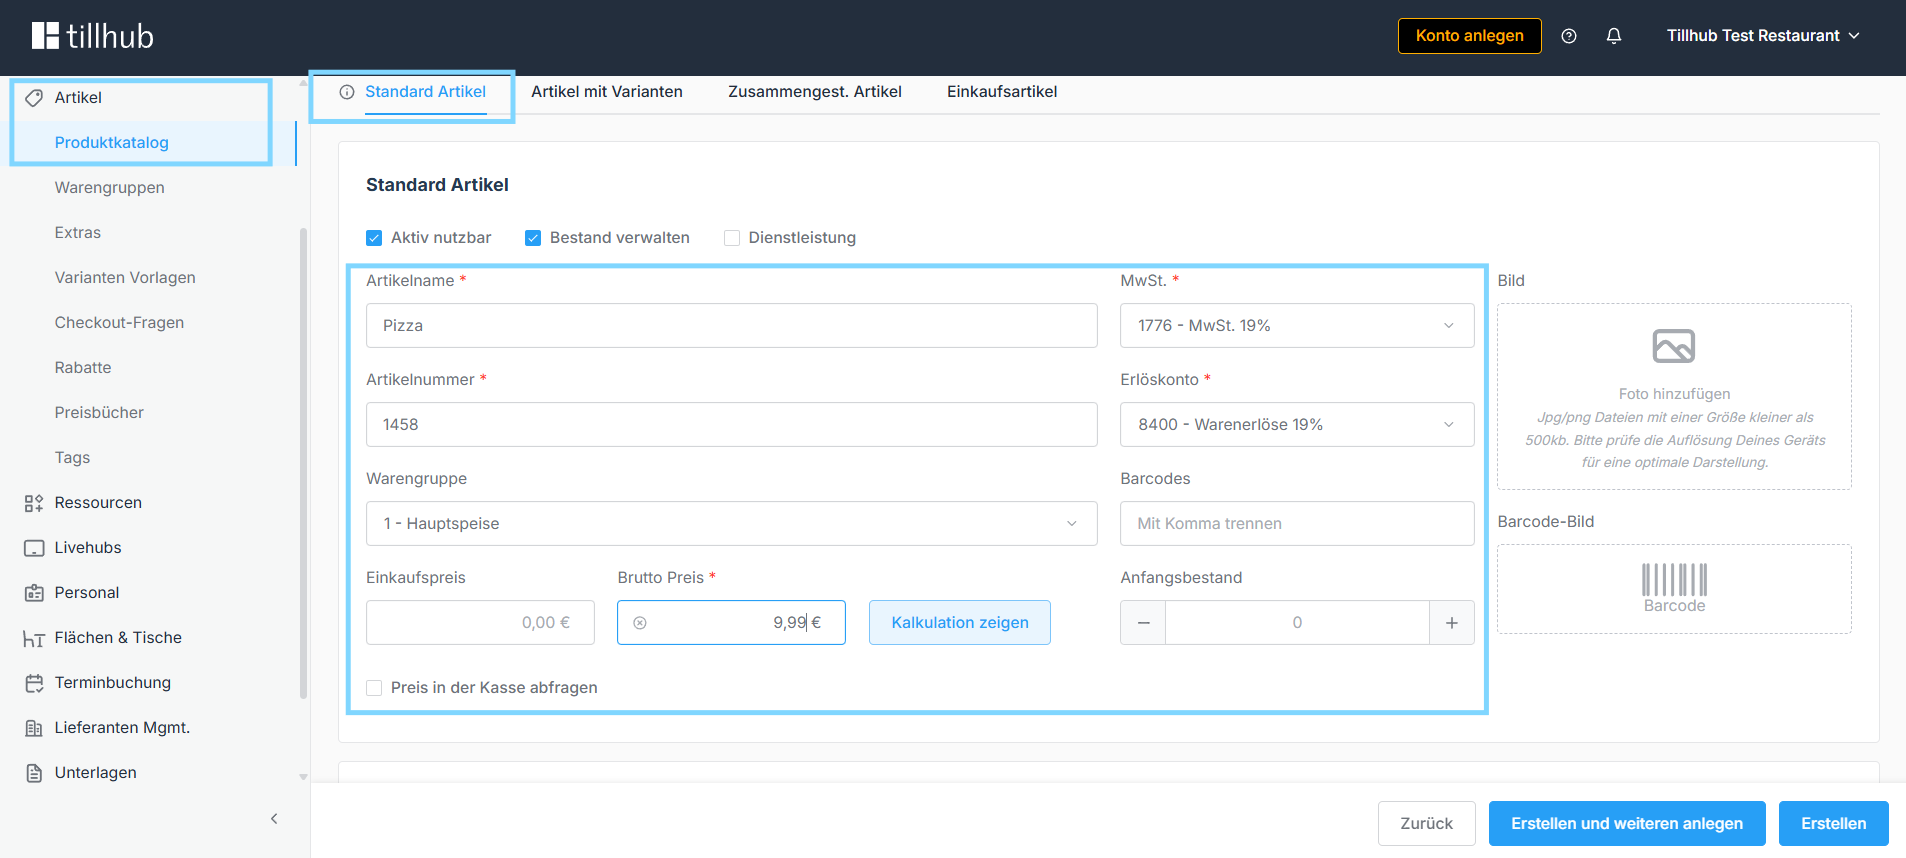
First, create the standard item without any side dishes. To do this, go to the product catalog and click + New. Then fill in all required fields (marked with *): item name, item number, VAT rate, product group, and the standard price (without side dishes). Then click Create.
Step 2: Create extras groups
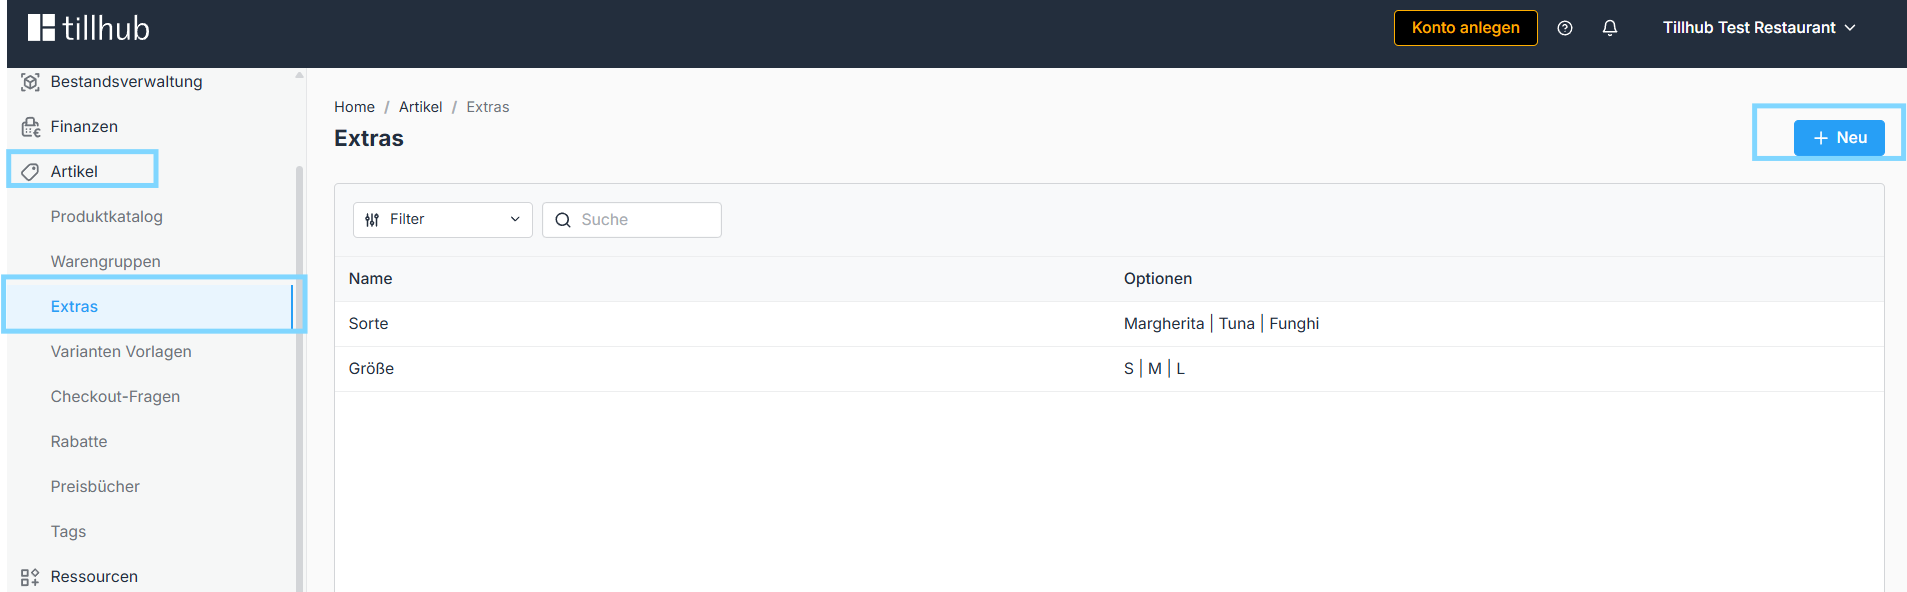
Each extras group represents a separate question asked during ordering. You can create as many groups as you like and design them freely. For a pizza, for example, this could look like: Group 1 asks for the size (S, M, L), Group 2 asks for the type (Margherita, Tuna, Funghi), and Group 3 asks for the toppings (extra cheese, etc.). For fries, it would be simpler - for example, just one group with extra ketchup and extra mustard.
To create a new group, go to the Extras section and click + New.
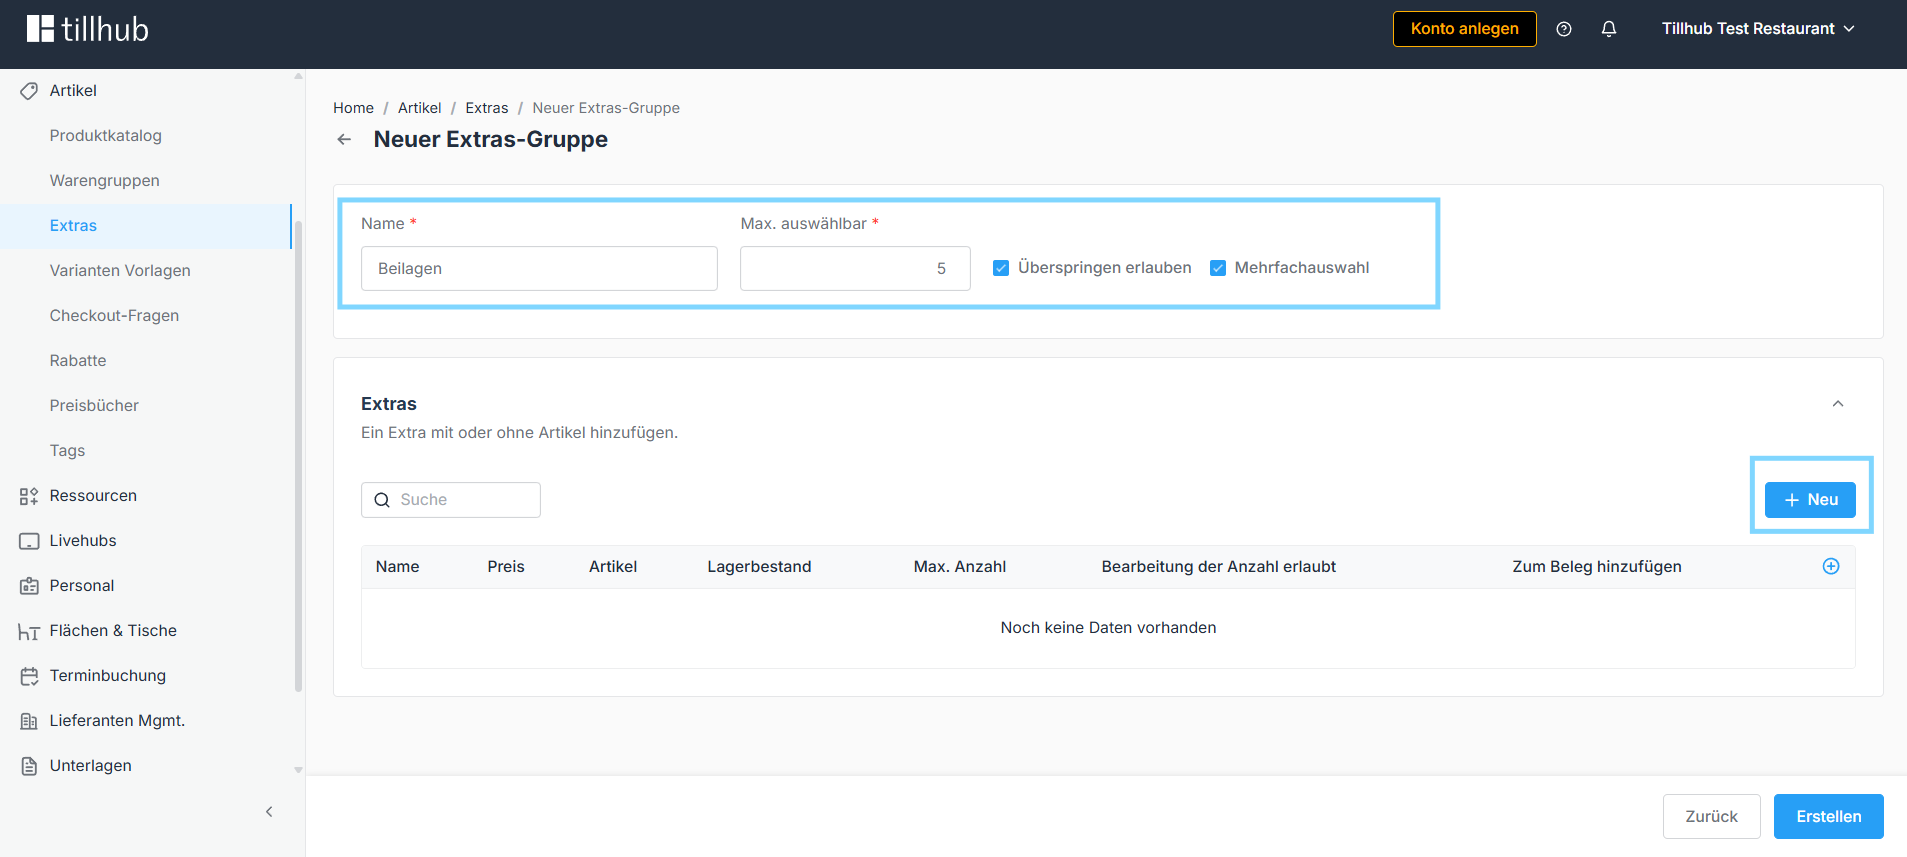
Then enter the name of the group, for example "Toppings," and set the options: whether customers may skip the group, whether multiple selections are allowed, and the maximum number of options that can be selected.
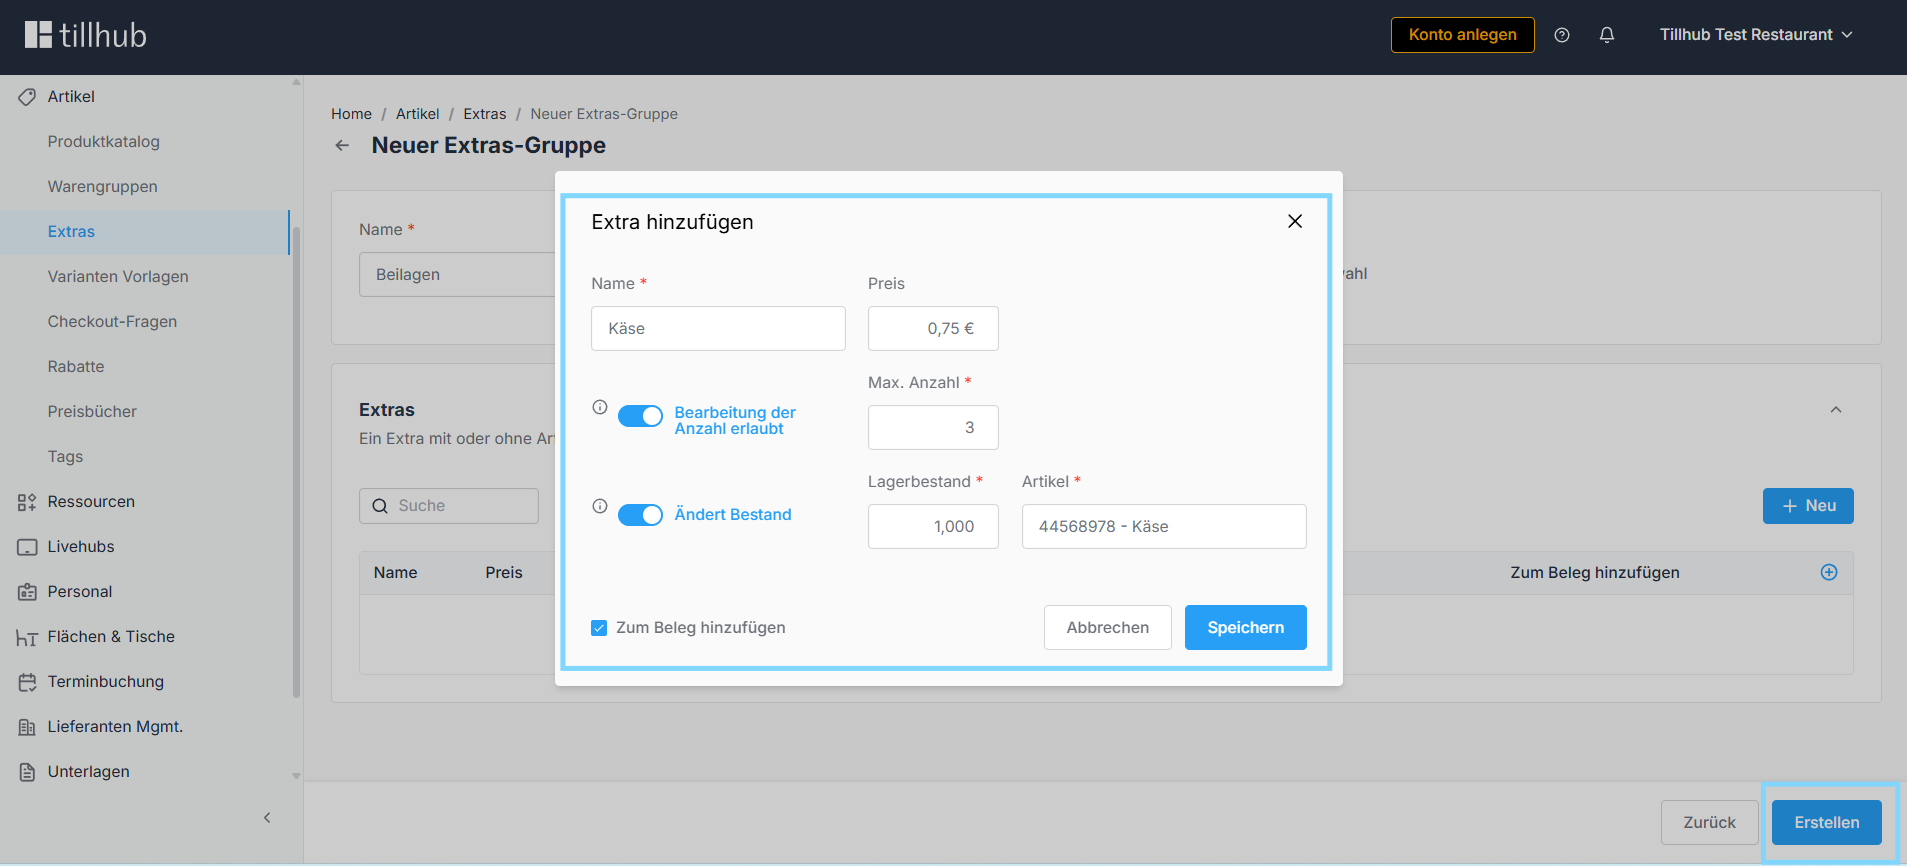
Next, create the individual extras within the group by clicking + New again. For each extra, enter the name (e.g., "Extra Cheese"), a surcharge if applicable, and the maximum number of times this extra can be selected (e.g., 3× for double cheese). Optionally, you can enable inventory tracking and link the corresponding item from the catalog so that stock is deducted automatically. If the stock should also be counted, click "Change Stock," enter the quantity, select the matching item that has already been created, and then click "Add to Document" at the bottom so that it is also recorded on the document. After saving, create all further extras in the same way and click Create at the end.
Step 3: Link the extras group to an item
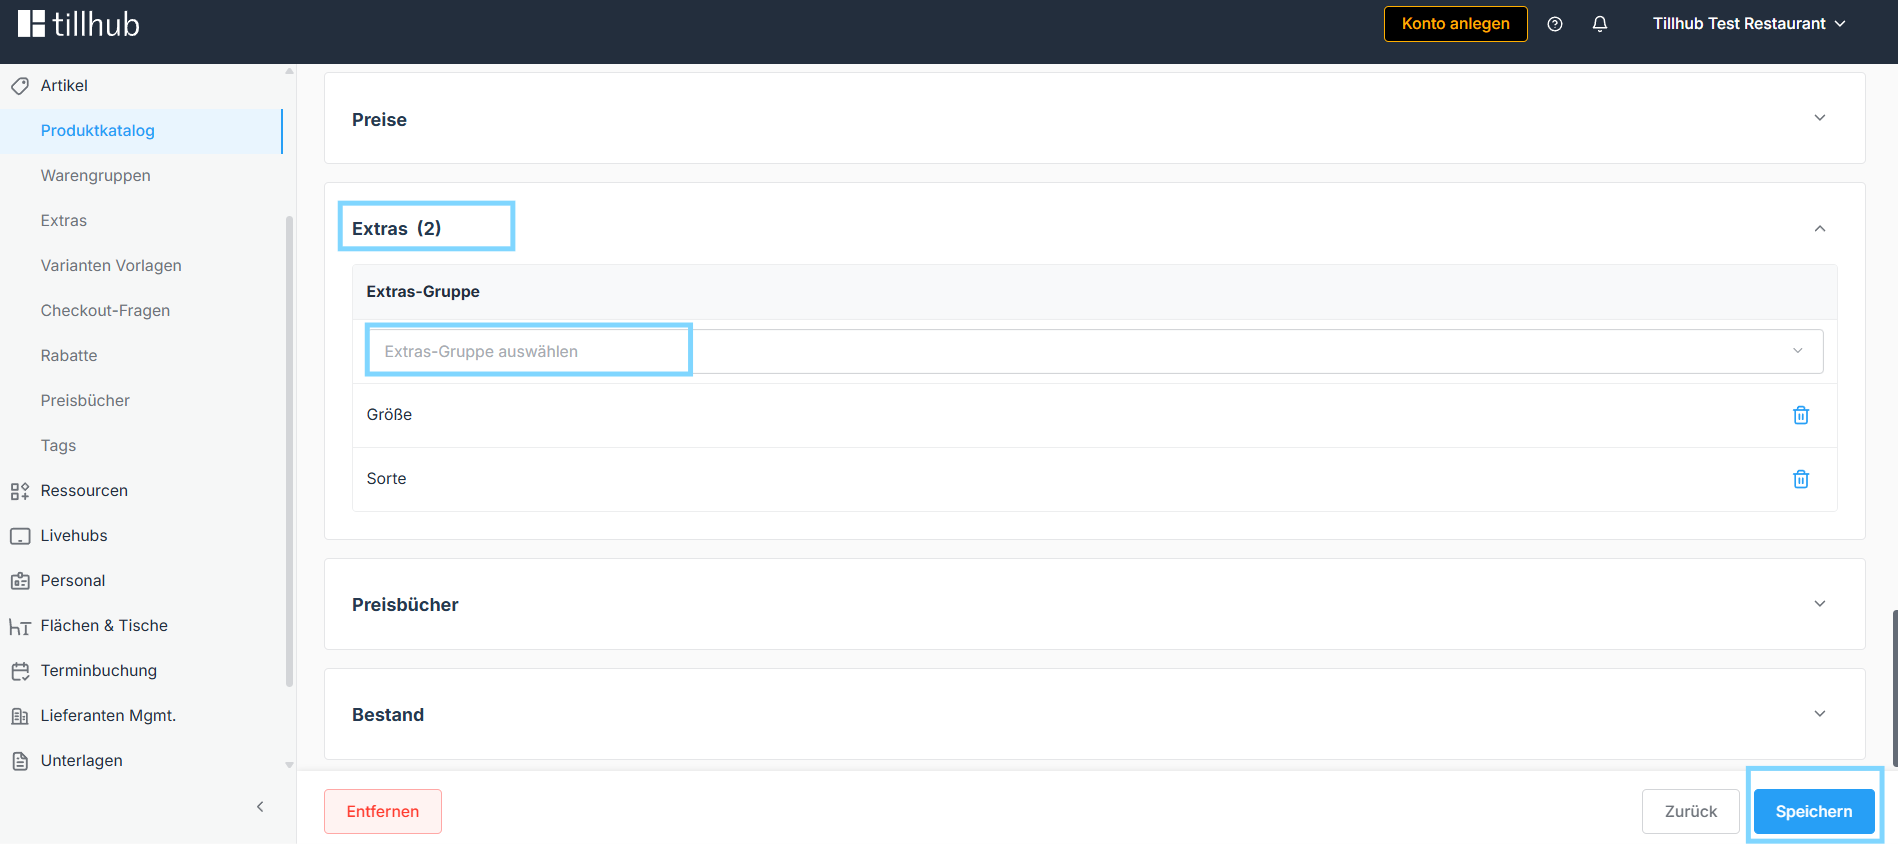
In the product catalog, open the desired item and scroll down to the Extras section. Click Select Extras Group, choose the appropriate group, and save.
Step 4: Create a deposit item
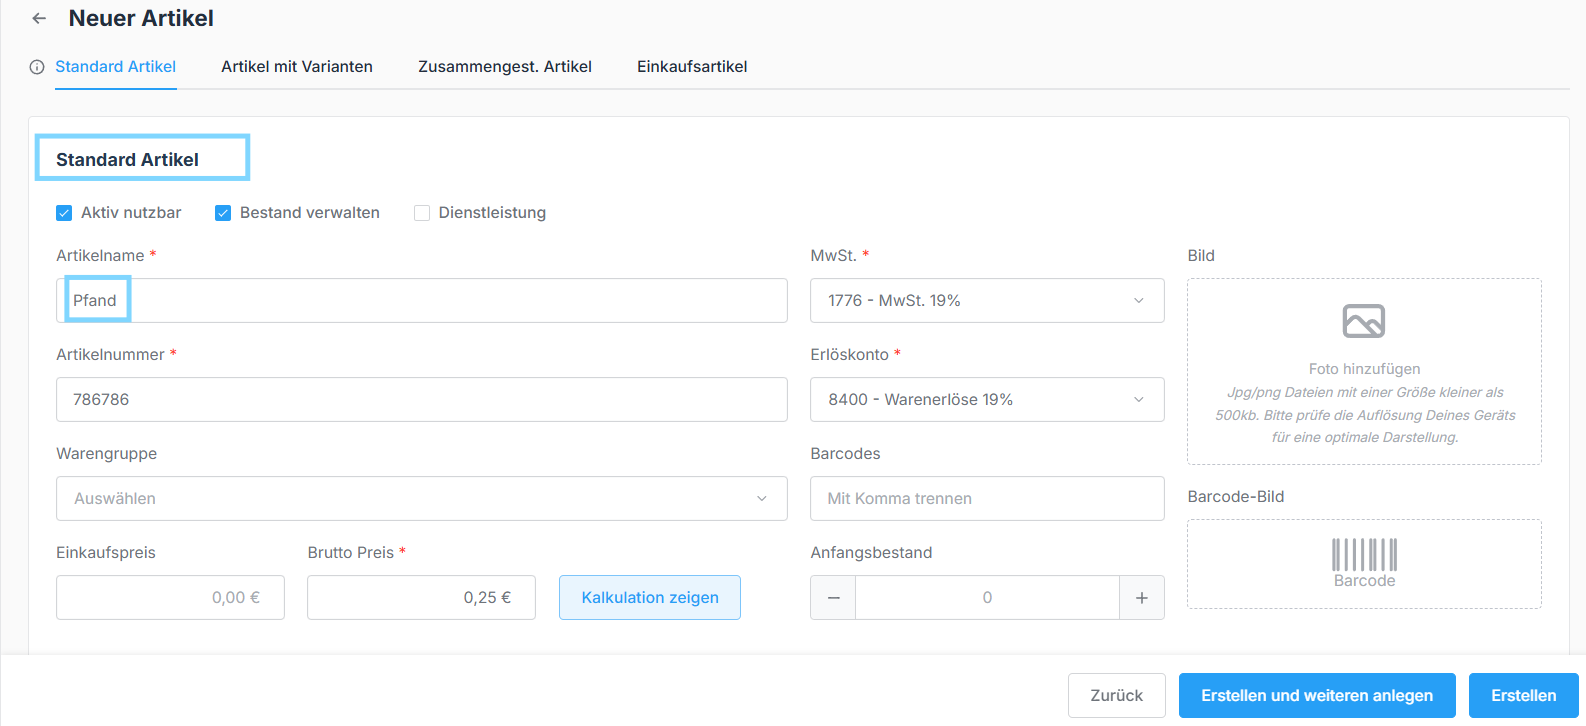
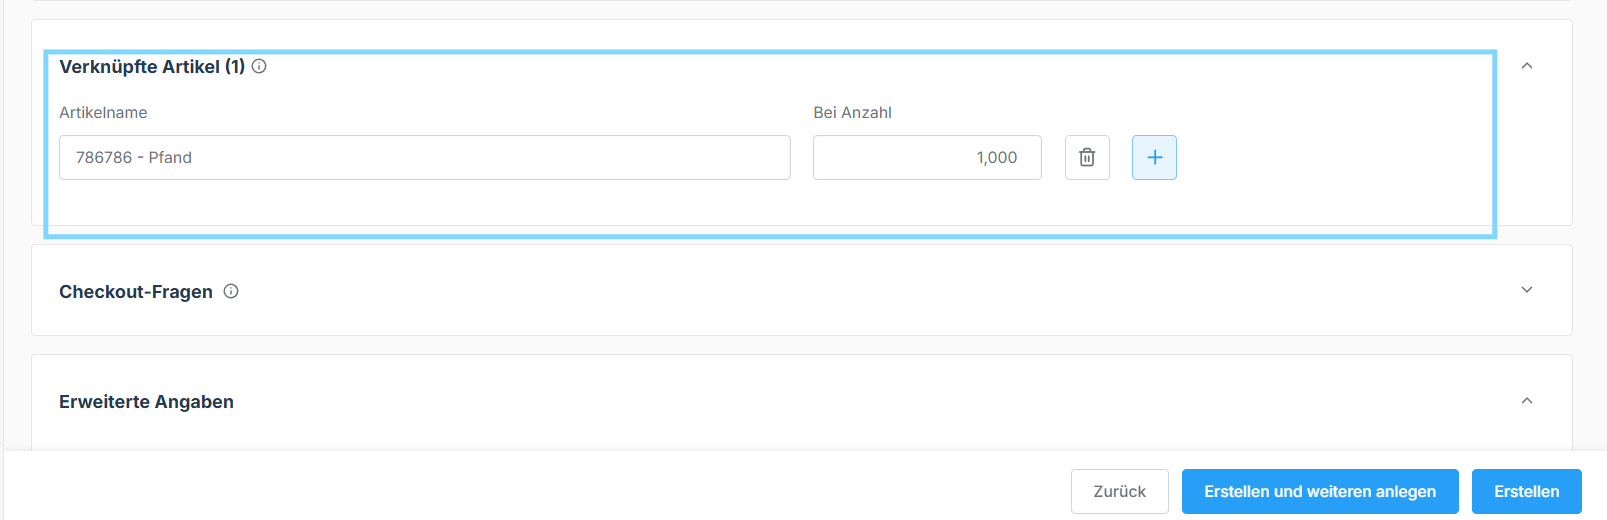
For deposits, first create a regular standard item, name it "Deposit," select the correct revenue account, and enter the price, for example €0.25. Then open the main item, scroll down to Linked Items, select the deposit item, and save.
If deposits are also refunded, additionally create a separate standard item for the deposit refund and enable the minus function at the register.
Step 5: Set up tags for receipt/kitchen printers
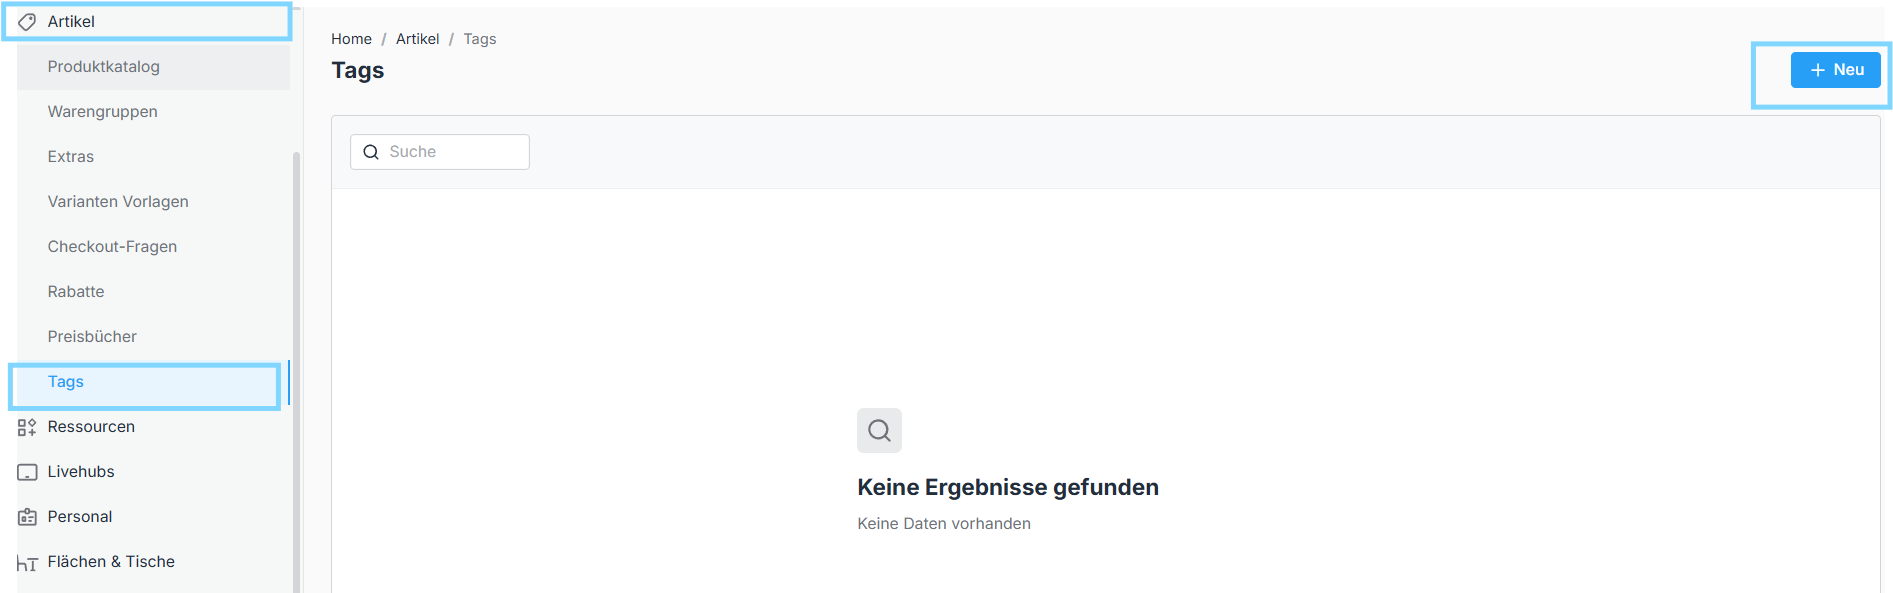
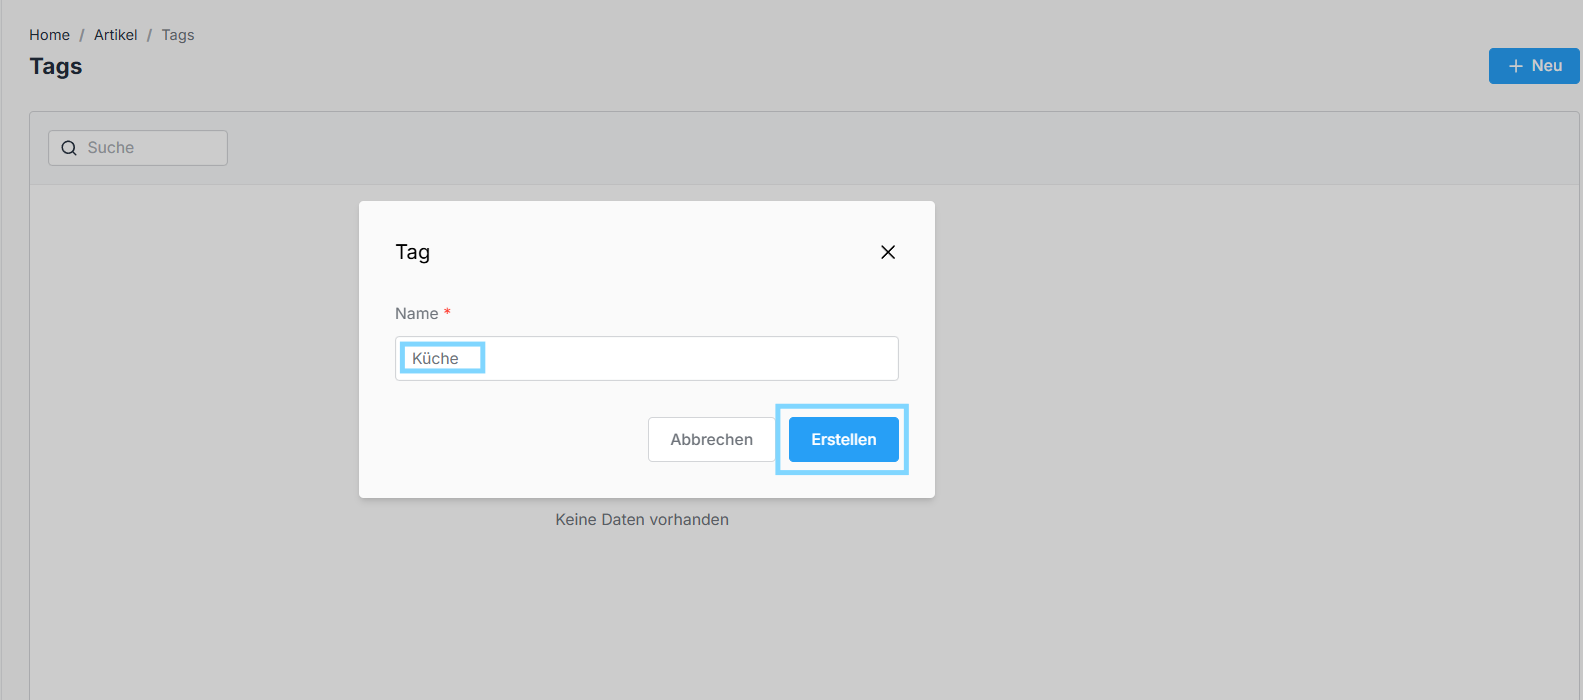
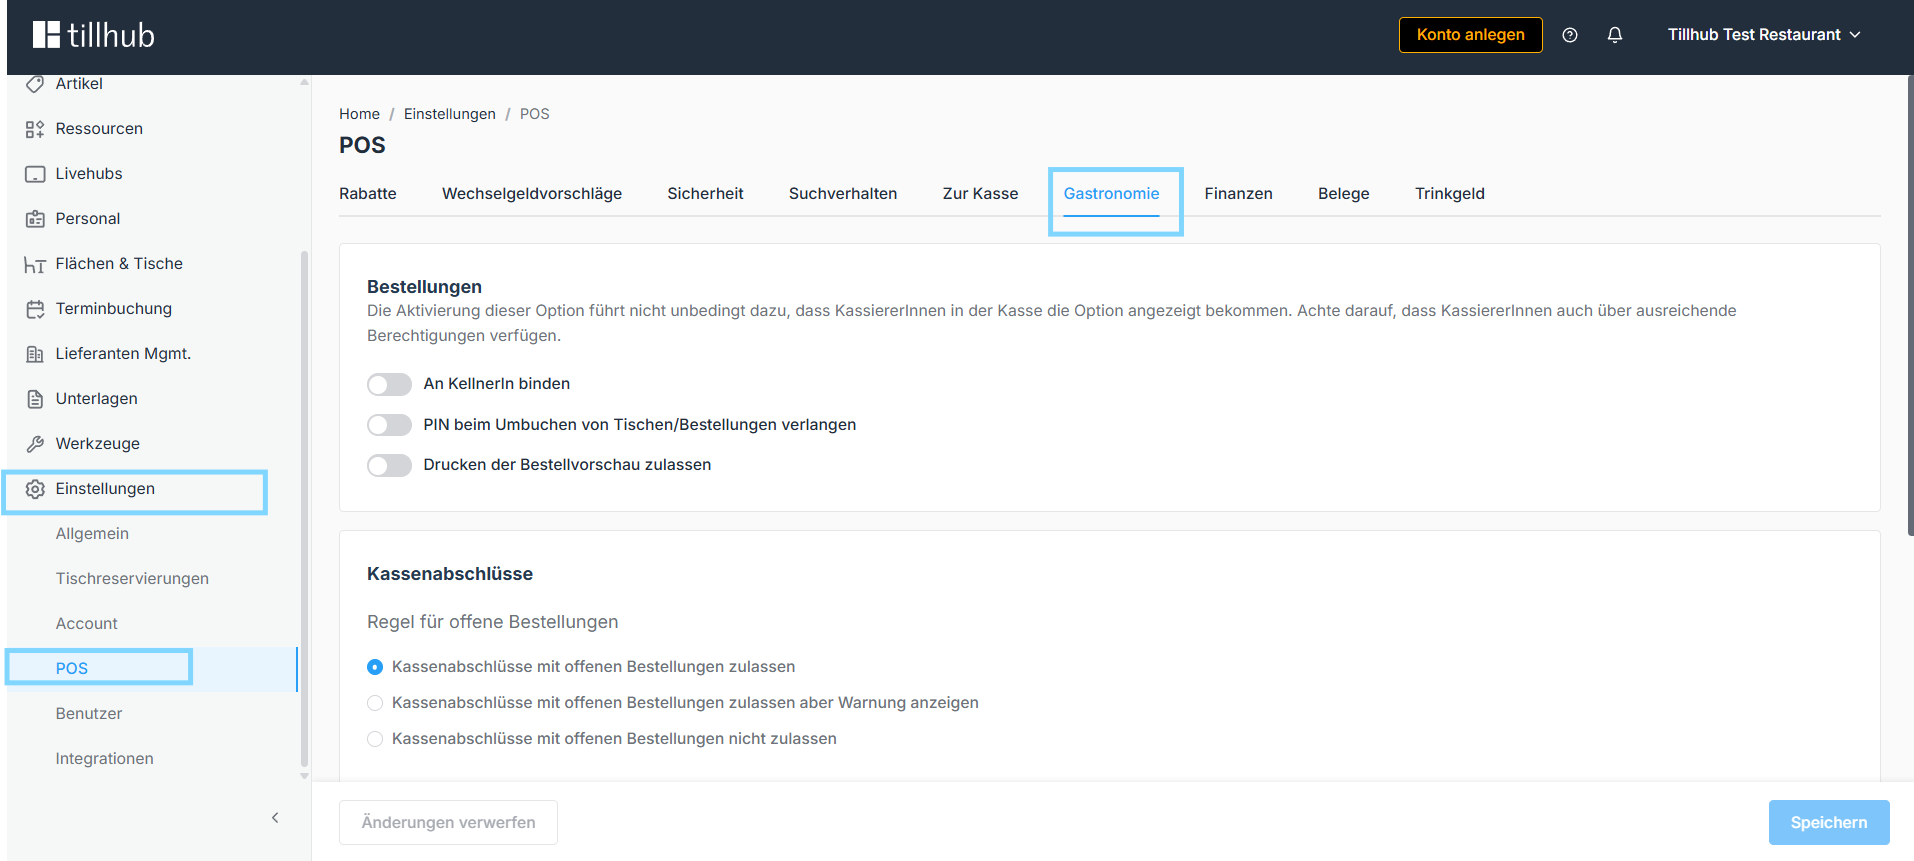
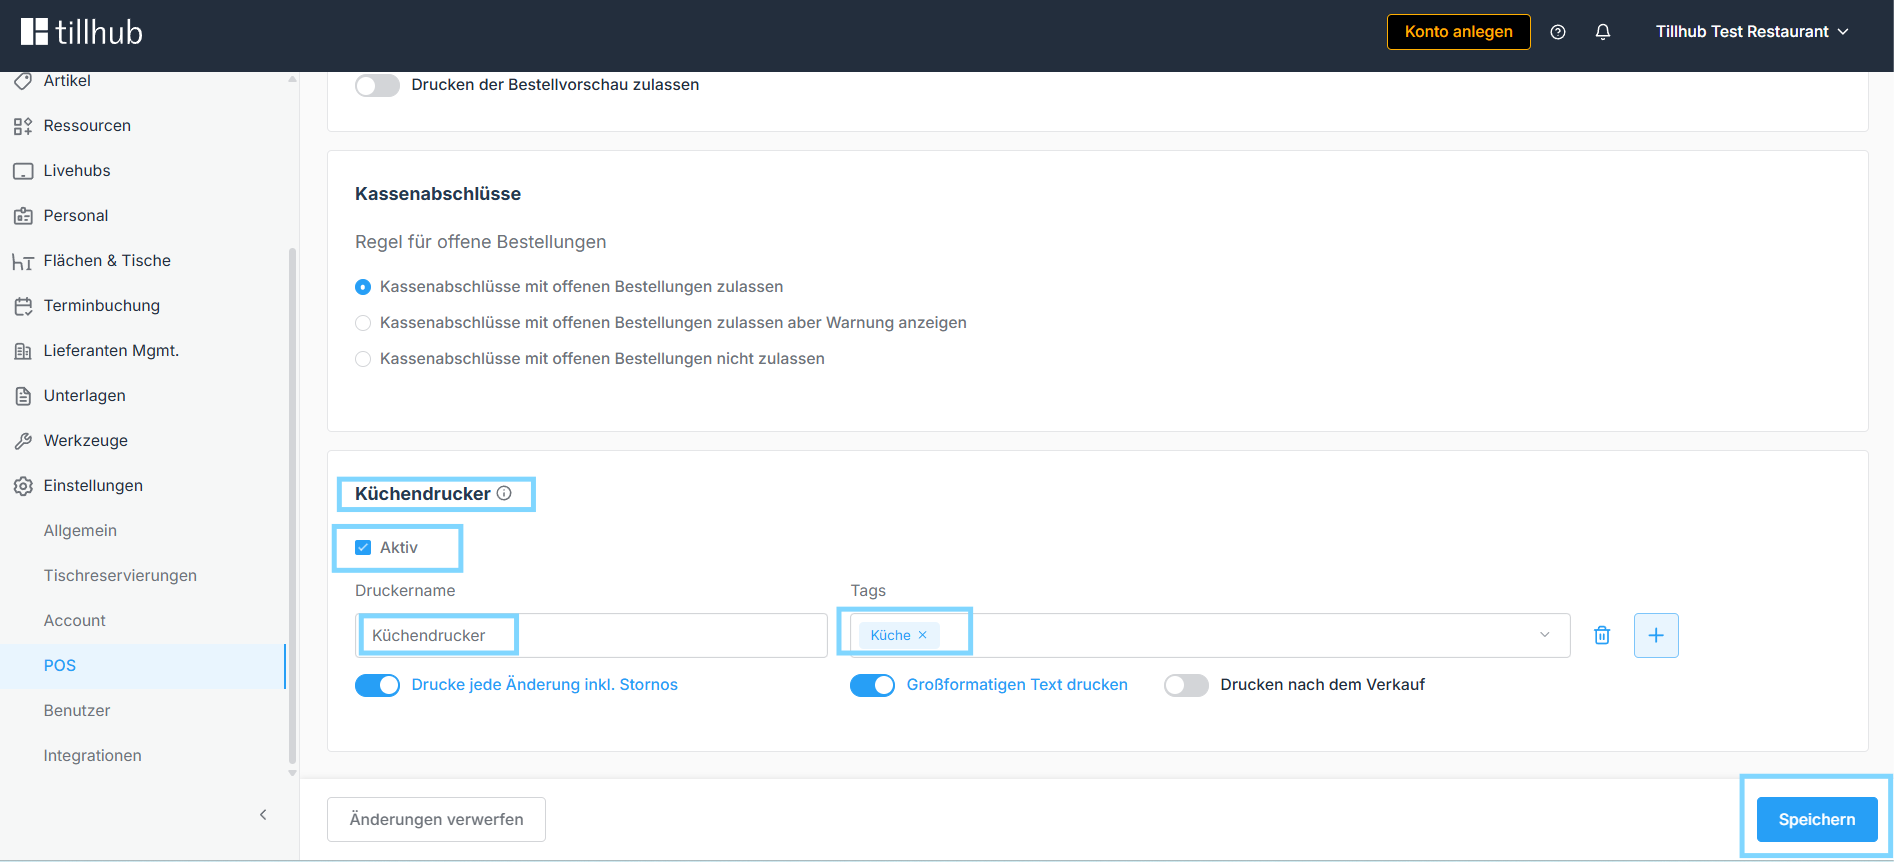
Tags control which printer order receipts and kitchen tickets are sent to. First, create the tags by going to the Tags section, clicking + New, and entering the names, for example "Kitchen." A separate tag is needed for each printer area.
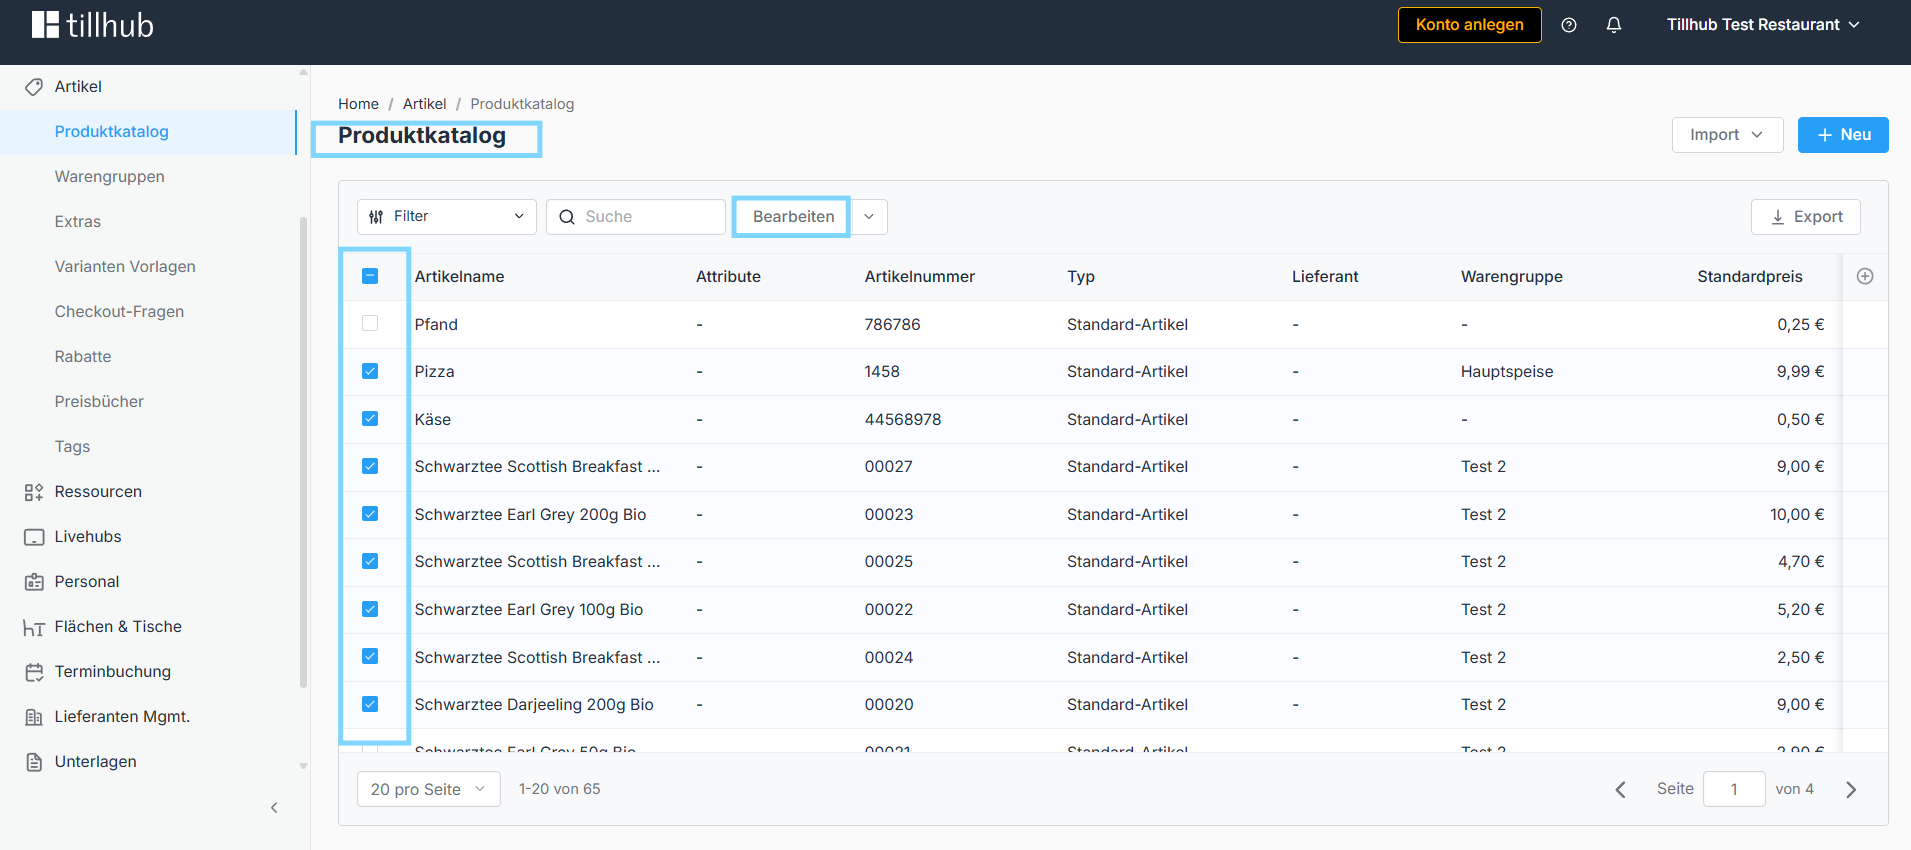
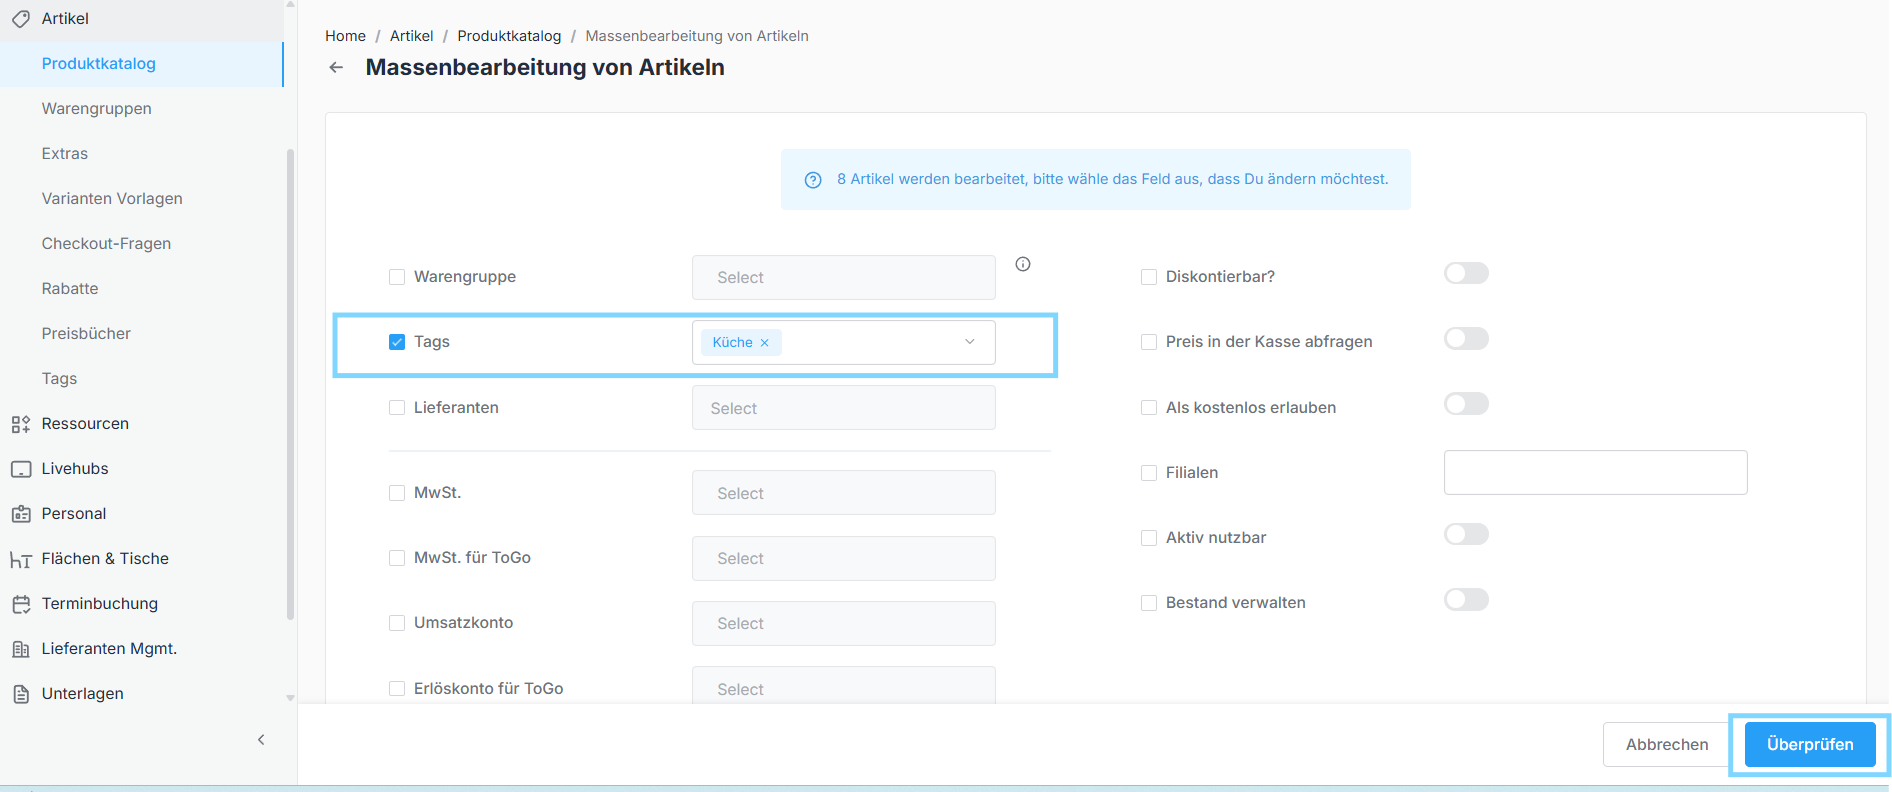
Next, assign the tags to the items. This can be done individually directly within the item under the advanced settings. It's faster to do this via bulk editing: in the product catalog, select all desired items using the checkbox on the left, click Edit, choose Add Tags, select the tag, and save. The system then uses the tag to determine which printer the receipts should be sent to.
Was this article helpful?
That’s Great!
Thank you for your feedback
Sorry! We couldn't be helpful
Thank you for your feedback
Feedback sent
We appreciate your effort and will try to fix the article