Appointment Calendar for Your Business
Modified on Mon, 23 Feb at 10:36 AM
In this article
- Managing Customer Appointments
- Set Employee Availability
- Switch Branch
- Further Navigation in the Appointment Calendar
Get to know the new appointment calendar to easily enter and manage appointments. Make use of the features for individual bookings and customer management.
With the appointment calendar, you can manage customer appointments and the individual availability of your employees.
You can access your appointment calendar via the following link:
https://appointment-calendar.tillhub.com/auth/login
Log in using your dashboard login credentials. If you have multiple branches, you can select the appointment calendar for the desired location.
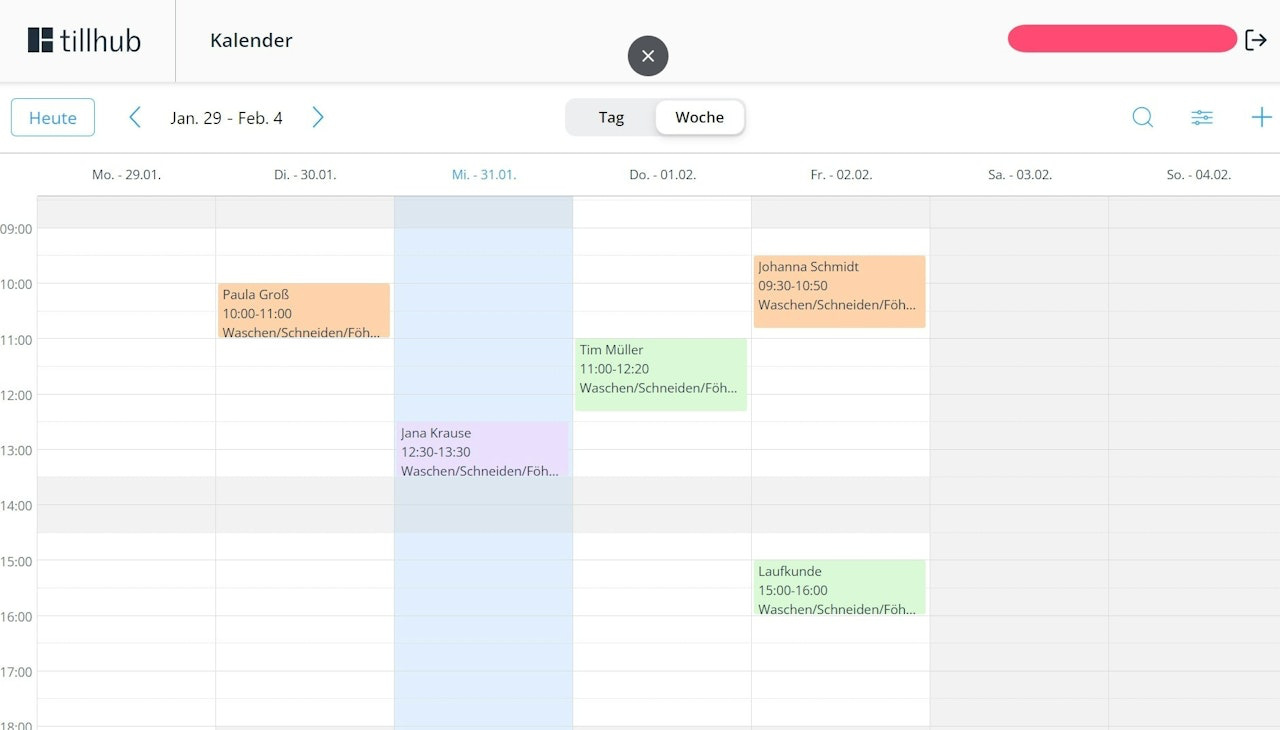
Managing Customer Appointments
Here we show you how to use your appointment calendar effectively. With this tool, you can not only create new customer appointments, but also manage existing ones and even add new customers to your database.
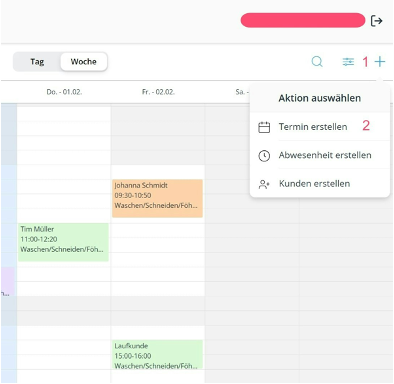
Create a New Customer Appointment
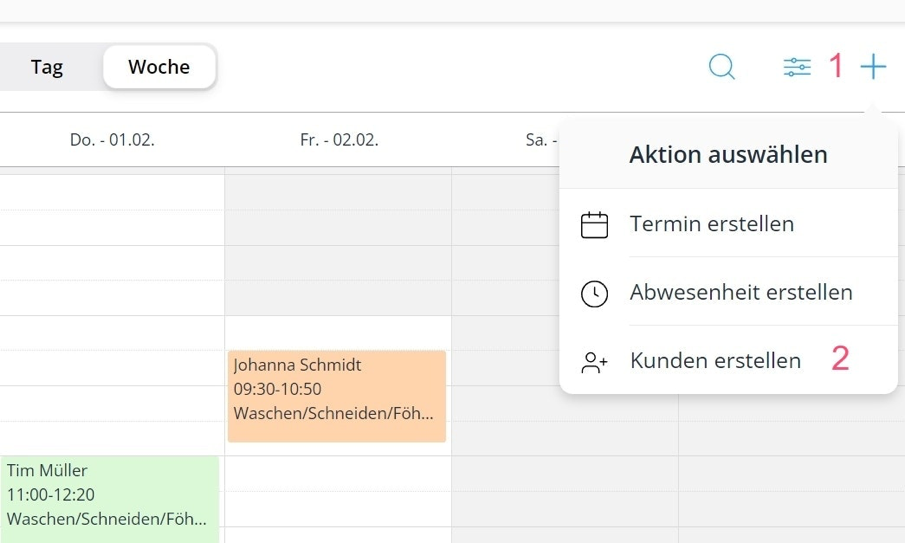
- Click the blue + symbol in the top right corner.
- Select the option Create Appointment.
- Link the appointment either to a customer from your database or create a new customer. The Walk-in customeroption is available but optional.
- Optional: Assign the appointment to one of your branches.
- Select the service for this appointment. If the planned duration differs from your preset time span, you can adjust it.
- Choose the employee who will handle the appointment.
- Edit the date as needed and add a note if necessary.
- Finally, click Create.
You can also create an appointment by clicking directly on the desired time slot in your calendar.

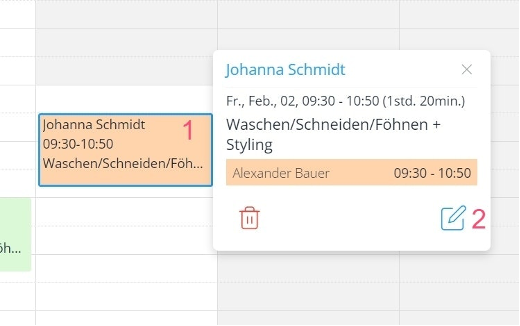
Edit a Customer Appointment
- Click on the desired appointment in the calendar.
- You can either delete the appointment using the red trash can icon or edit it using the blue pencil icon.
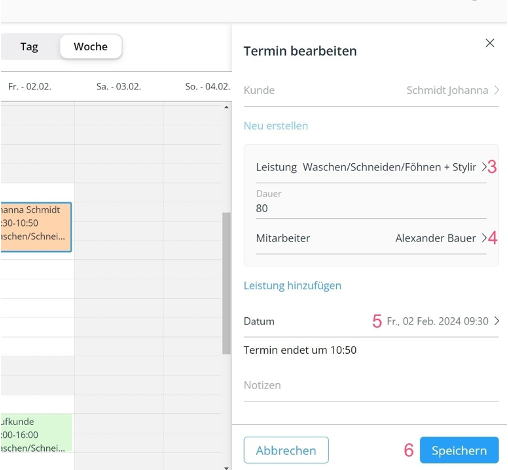
- Change the service by clicking on it and selecting another service from the list. You can also enter a new service duration.
- Choose a different employee by clicking on their name.
- Adjust the date by clicking on it and selecting a new date and time from the pop-up calendar.
- Finally, click Save.
Create a Customer
- Click the blue + symbol in the top right corner.
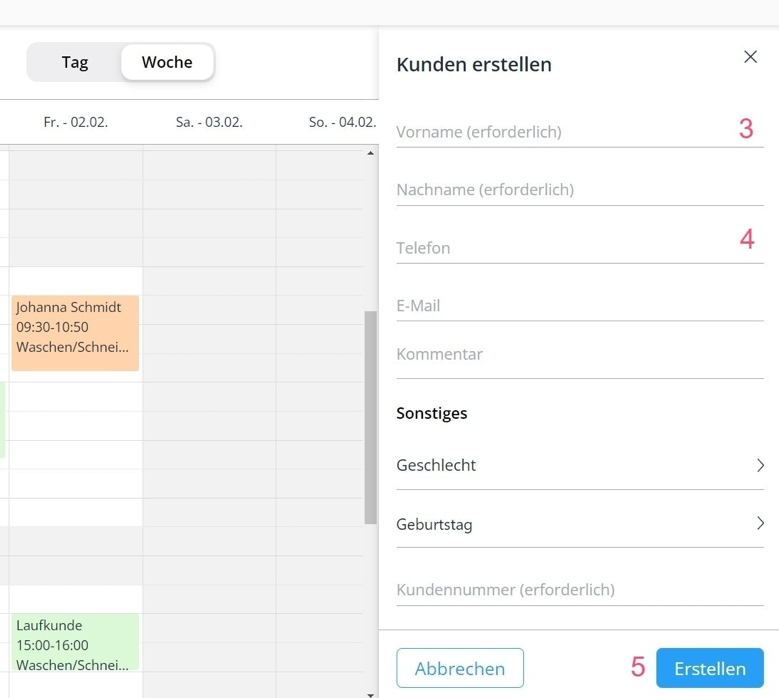
- Select the option Create Customer.
- Enter the required information, including first and last name as well as a unique customer number.
- Complete the customer profile with additional details such as contact information, gender, birthday, and any comments.
- Finally, click Create.
Add Customers to Customer Management
- Select an appointment that was booked online.
- Click the edit icon.
- Click MATCH to link the appointment with an existing customer from the CRM.
- Click Save Customer to add them to the CRM.
Set Employee Availability
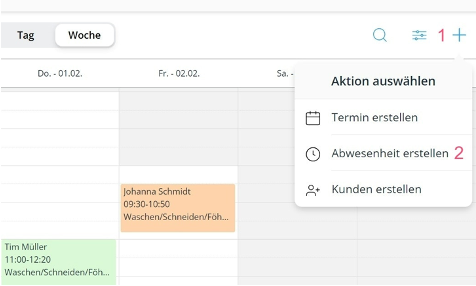
- Click the blue + symbol in the top right corner.
- Select the option Plan Absence.
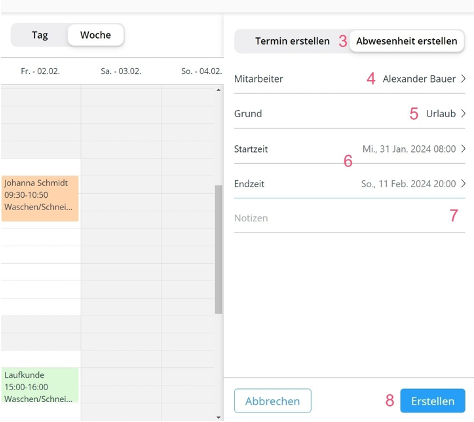
- Switch to the Create Absence mode.
- Select an employee.
- Enter the reason for the absence.
- Set the start and end date of the absence.
- Add an optional note if needed.
- Finish the process by clicking Create.
Switch Branch
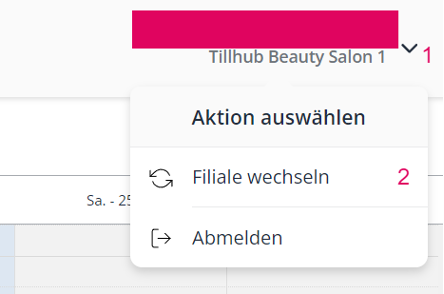
- To change the calendar for a branch, click on the branch name displayed in the top right corner.
- Select the action Switch Branch.
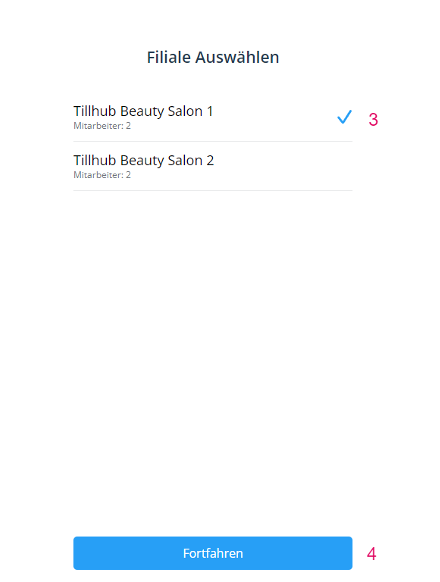
- Choose the branch where you want to continue working.
- Click Continue to confirm your selection.
Further Navigation in the Appointment Calendar
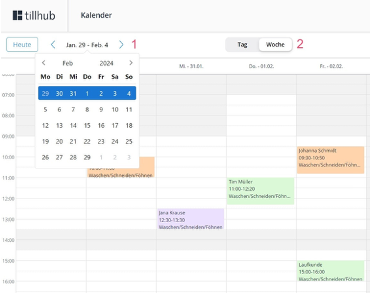
- To return to the current day, simply click Today.
- To change the view to a specific week, use the week selector and choose the desired date in the pop-up calendar.
- You can switch between the Week and Day views by selecting the corresponding tab.
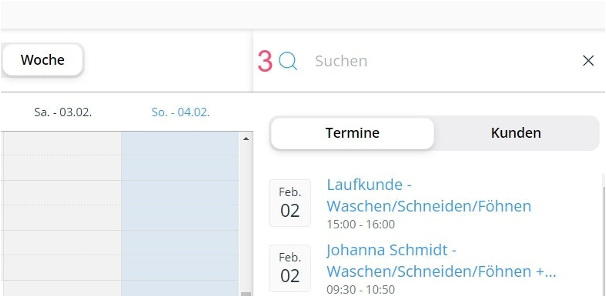
- To search for upcoming or past appointments, click the magnifying glass icon in the top right. Switch to Customersif you want to specifically search for appointments with them.
- For an employee-based overview, you can filter the calendar by staff. Use the checkboxes to adjust the display according to your preferences.
Was this article helpful?
That’s Great!
Thank you for your feedback
Sorry! We couldn't be helpful
Thank you for your feedback
Feedback sent
We appreciate your effort and will try to fix the article