Ingenico - Setting Up Your POS Connection
Modified on Wed, 4 Feb at 11:37 AM
Would you like to set up your Ingenico card reader with your POS system via the network? We will assist you with our step-by-step guide.
A POS connection with the Ingenico Move5000 Bluetooth terminal model and a base station (connected via LAN cable) is only possible using a serial POS cable.
With an active POS connection on your Ingenico card reader, manual amount entry is no longer possible.
Function Code
Please press the F key at the bottom left of the keypad repeatedly. You will now see the function code on the display.
Function Code 513
Please enter the number 513 and confirm the entry with the green OK button.

Password
Please enter the 5-digit technician password and confirm the entry with the green OK button.
You can find the terminal ID on your merchant receipts or on the end-of-day report.
Terminal IDs starting with 61xxxxxx – 82024
Terminal IDs starting with 68xxxxxx – 11599
Terminal IDs starting with 526xxxxx – 17356

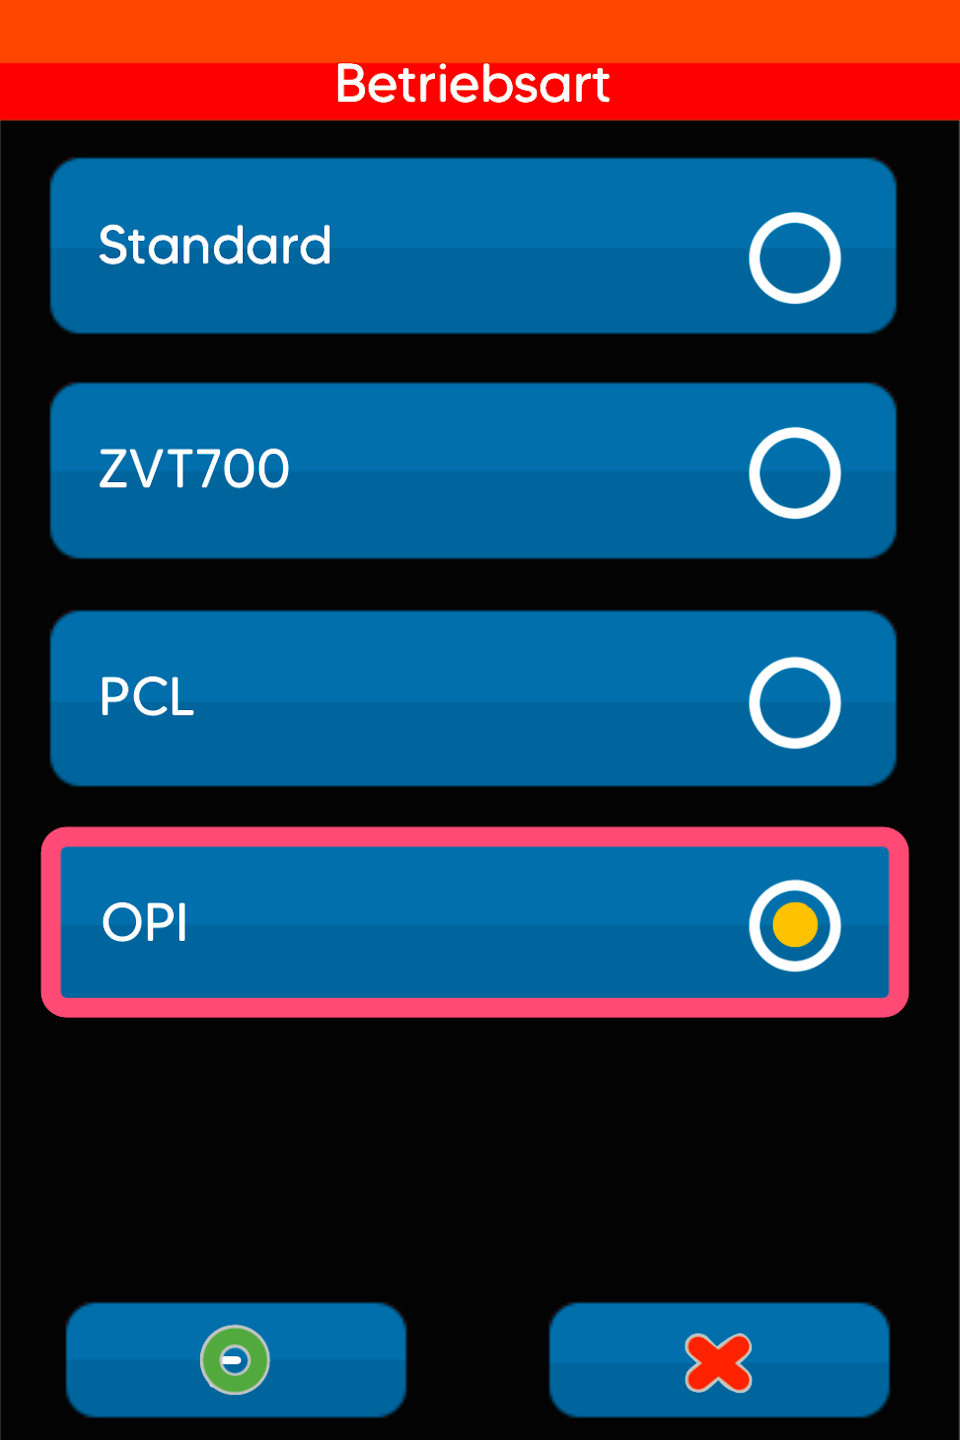
Operating Mode
At this point, you can select the POS protocol (Fig. 1-2) used by your POS system. Please confirm the selection by tapping and pressing the green OK button.
You can choose between ZVT700 or OPI (Fig. 1-2).
If you are using a Tillhub POS system, please select OPI.
Don’t know the POS protocol? Then please contact your POS integrator.

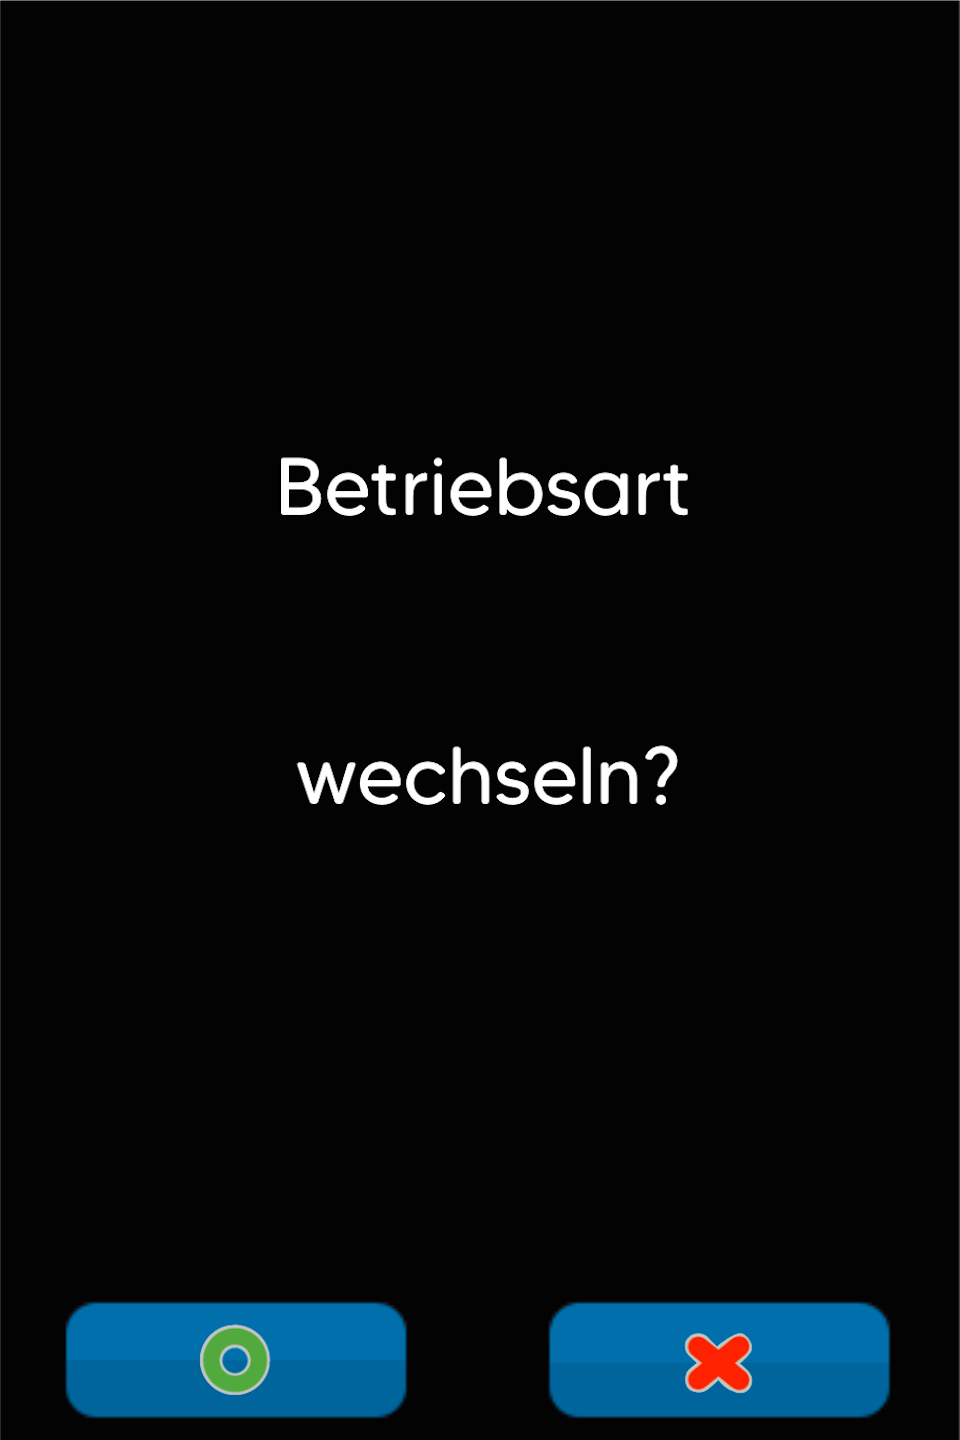
Switch
You will be asked whether you want to change the operating mode.
Please confirm the change by pressing the green OK button.
The card reader will now automatically restart. After the restart, you will see a green checkmark on the display. The device is now configured for POS connection mode.
Manual amount entry is no longer possible.
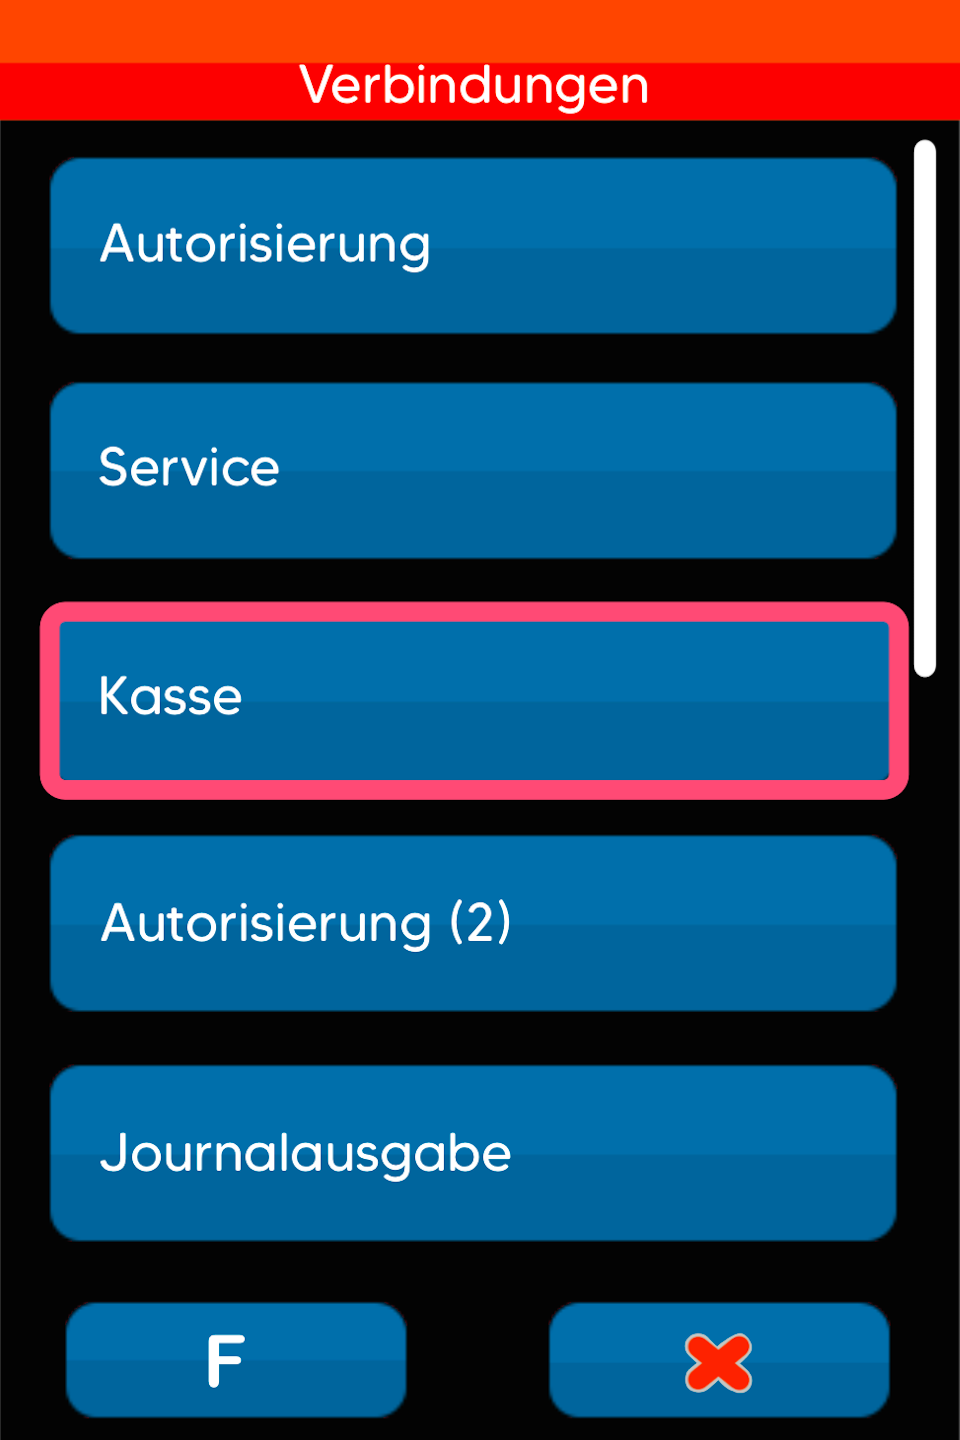
In the next step, the POS interface configuration is carried out. Please select the interface.
ZVT
POS ZVT
Please refer to the following illustrations for the next steps.
Fig. 1
First press the F key at the bottom left of the keypad repeatedly. You will now see the function code on the display.
Function Code 54 (Fig. 1)
Confirm the entry with the green OK button.
Fig. 2
Please enter the 5-digit merchant password and confirm the entry with the green OK button.
Fig. 3
Select the menu item “POS.”


Port Number
In this section, the port number (4-5 digit number) for the POS connection must be entered.
Don’t know the port number? You can get it from your POS integrator.
Fig. 1
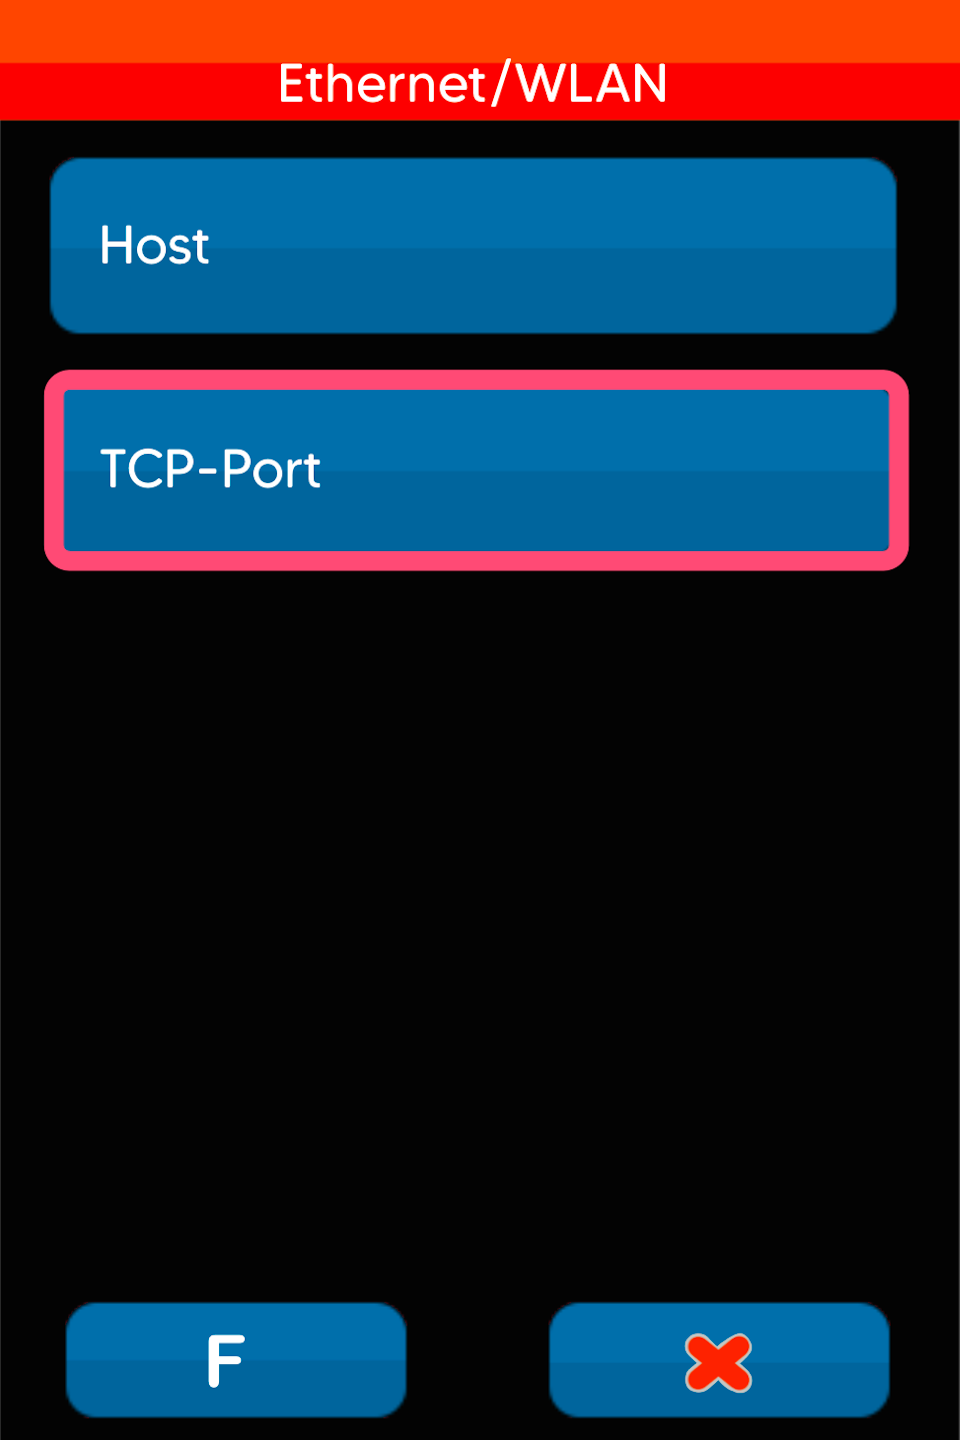
Please select Ethernet/WLAN
Fig. 2
Select the menu item TCP-Port
Fig. 3
Enter the port number and confirm the entry with the green OK button.
After entering and confirming the port number, please press the red stop button 3 times to move to the next step.


Save Parameters
Please confirm the prompt with the green OK button so that all entered data is saved.
Press the red stop button again so that the card reader restarts.
Your card reader is now set up for POS connection using ZVT.
Feel free to try a test transaction initiated from the POS system.
The amount transfer should now take place.
To ensure a smooth replacement of your card reader if necessary, please provide us with your POS connection data and parameters using the "POS Connection Data" button. In case of replacement, we can provide you with a pre-configured card reader.

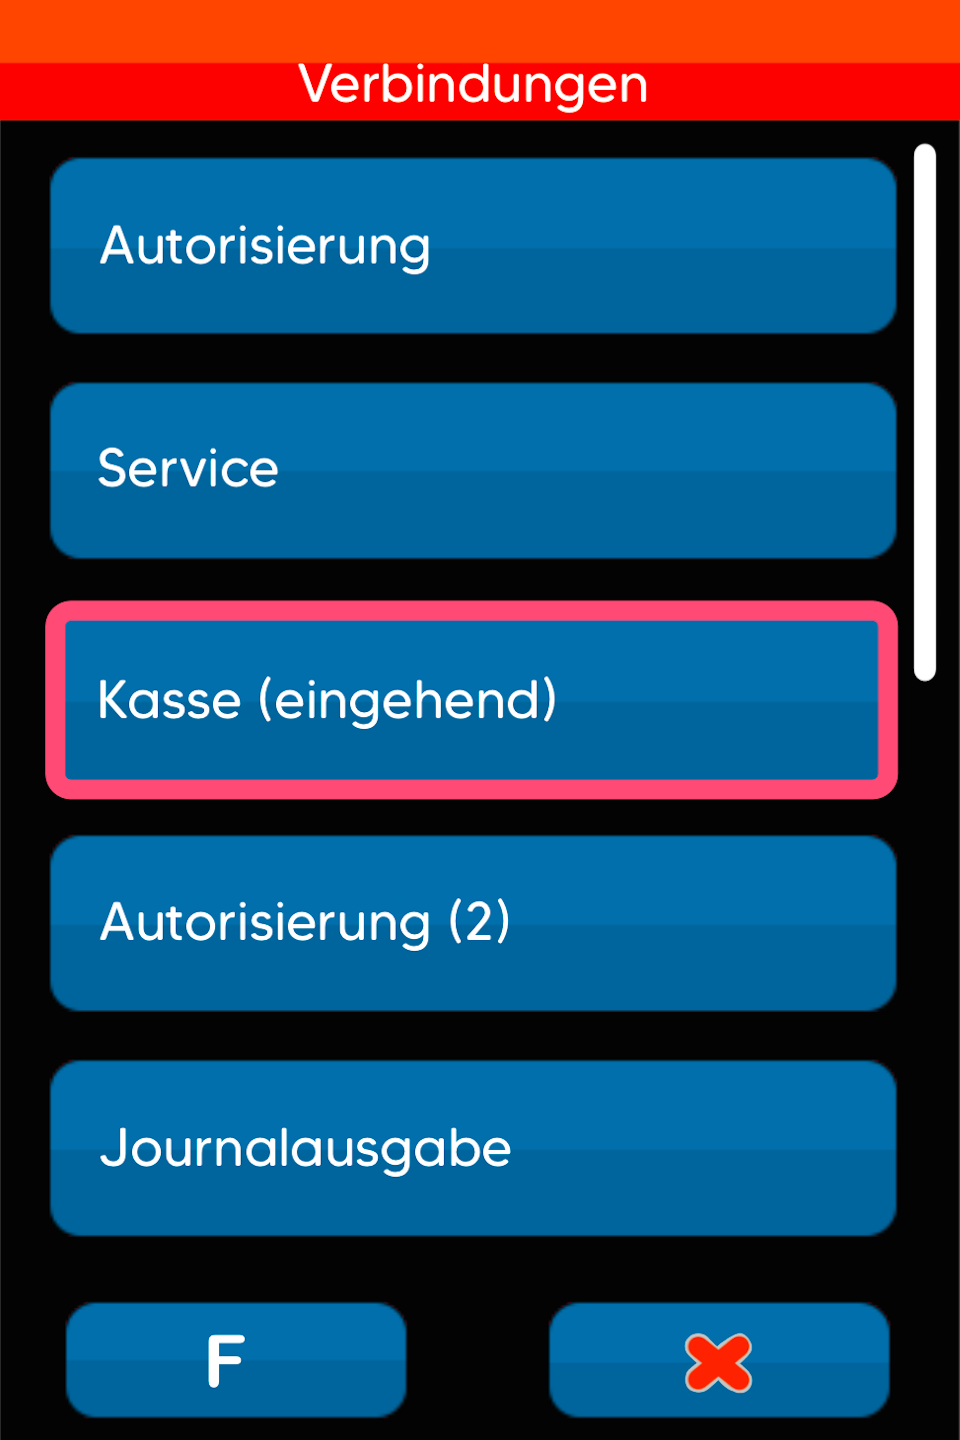
OPI
POS (Incoming) OPI
Please refer to the following illustrations for the next steps.
Fig. 1
First press the F key at the bottom left of the keypad repeatedly. You will now see the function code on the display.
Function Code 54 (Fig. 1)
Confirm the entry with the green OK button.
Fig. 2
Please enter the 5-digit merchant password and confirm the entry with the green OK button.
Fig. 3
Select the menu item “POS Incoming.”


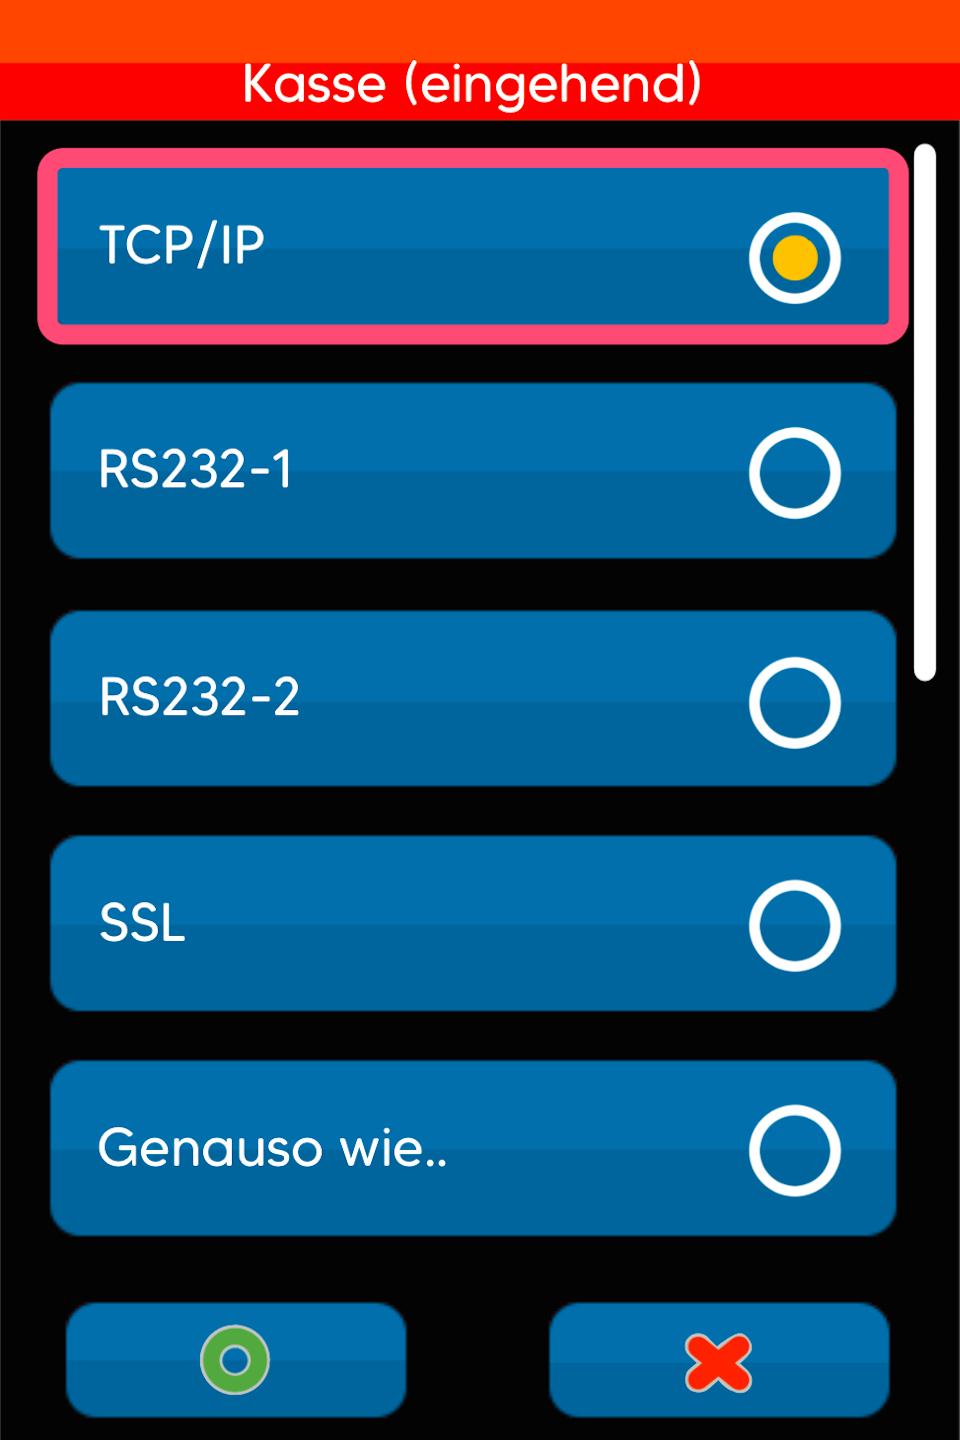
Selecting POS Interface
In this section, the POS interface is selected.
Fig. 1
Select TCP/IP
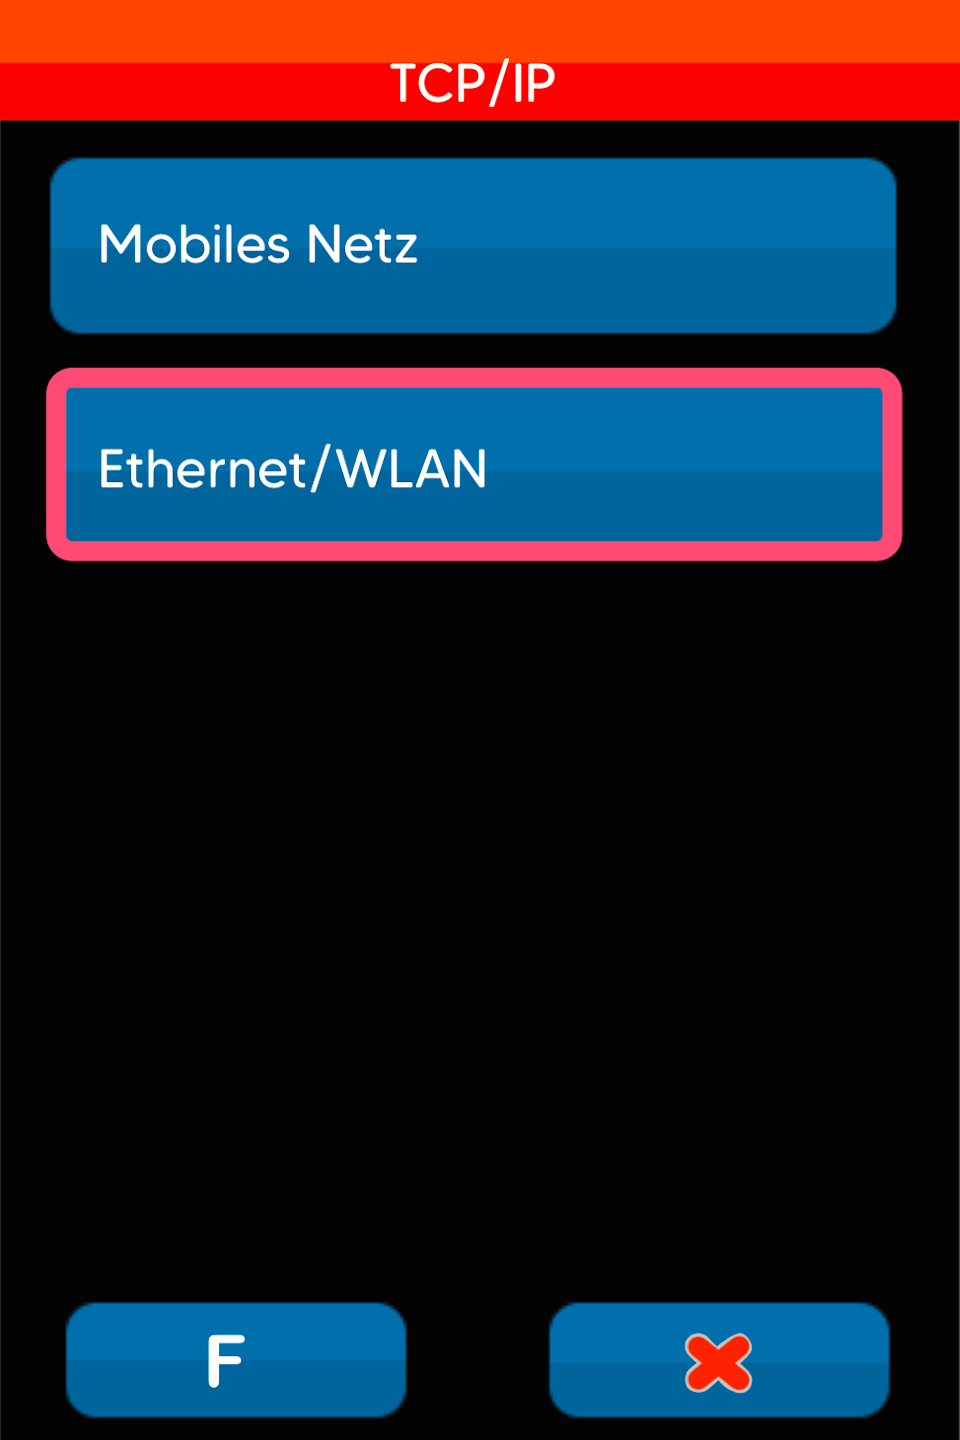
Fig. 2
Select Ethernet/WLAN
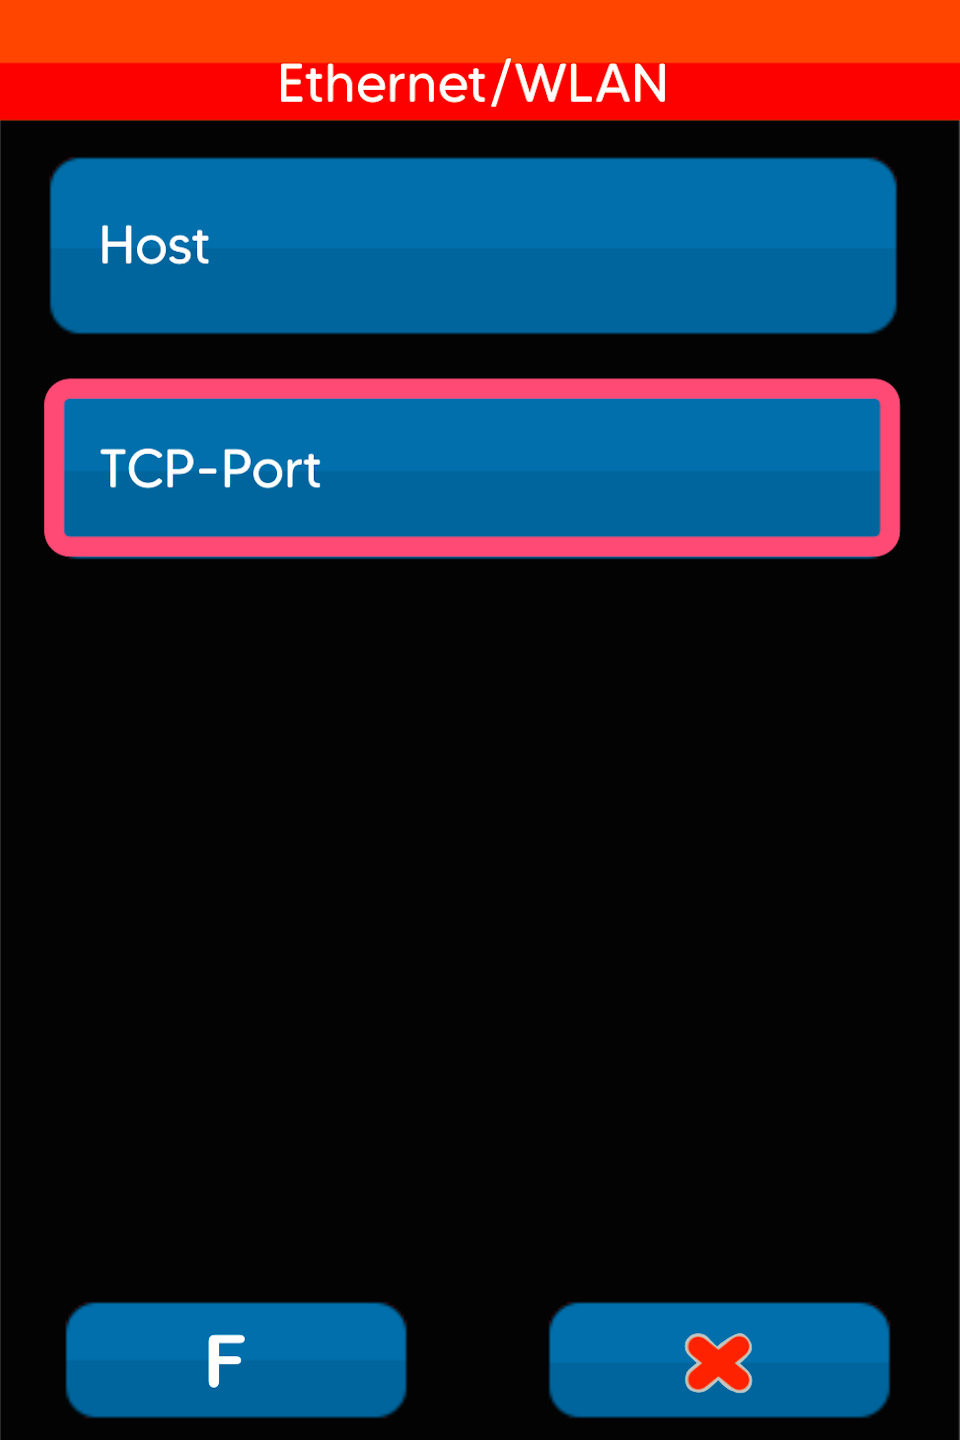
Fig. 3
Select TCP-Port
Port Number
Now enter the port number (4-5 digit number) that should be used for the POS connection. Confirm the entry with the green OK button.
Don’t know the port number? You can ask your POS integrator. In most cases, the incoming port number is 20002 and the outgoing port number is 20007.
After entering and confirming the port number, please press the red stop button 3 times to move to the next step.

Save Parameters
Please confirm the prompt with the green OK button so that the entered data is saved.
You will return to the “Connections” menu.

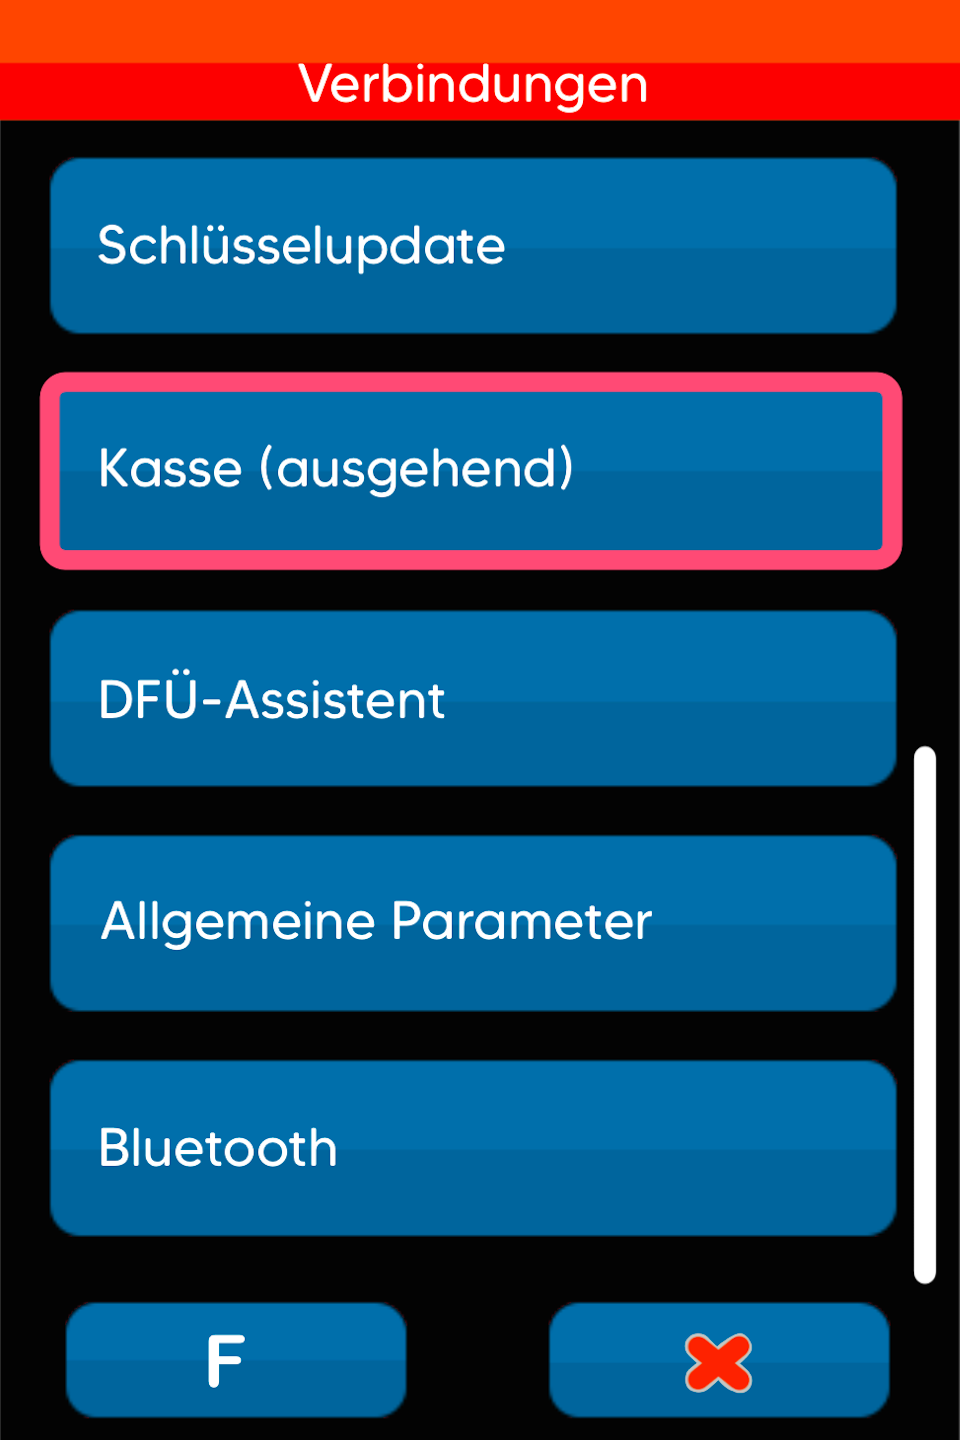
POS (Outgoing) OPI
The OPI protocol requires two port numbers (incoming and outgoing). Here we configure the outgoing port number.
Fig. 1
Please select “POS (Outgoing)”
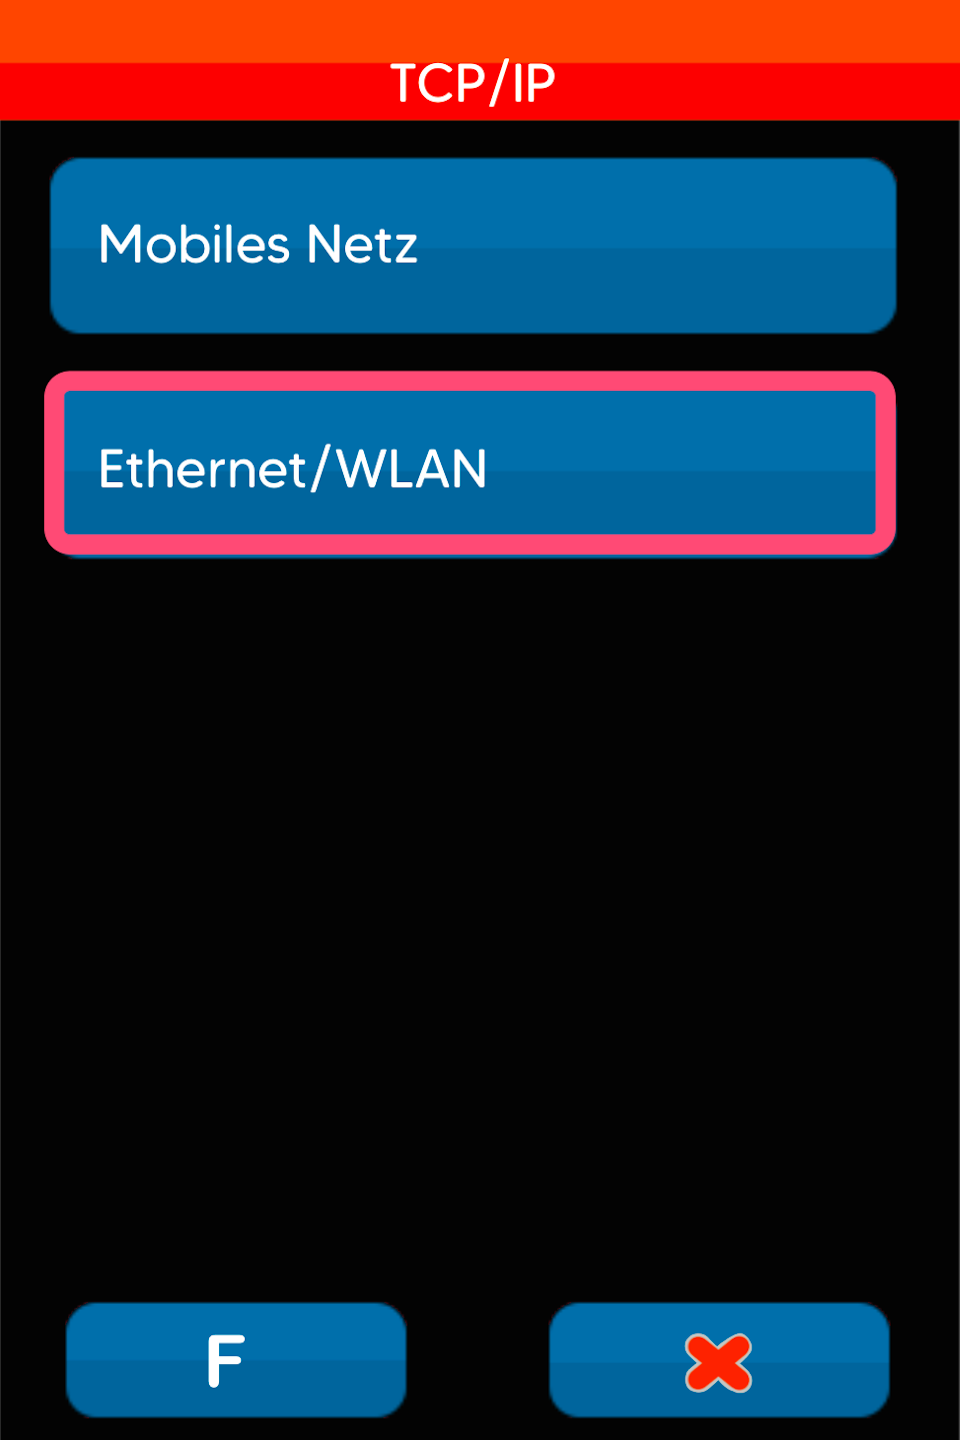
Fig. 2
Select TCP/IP
Fig. 3
Select Ethernet/WLAN

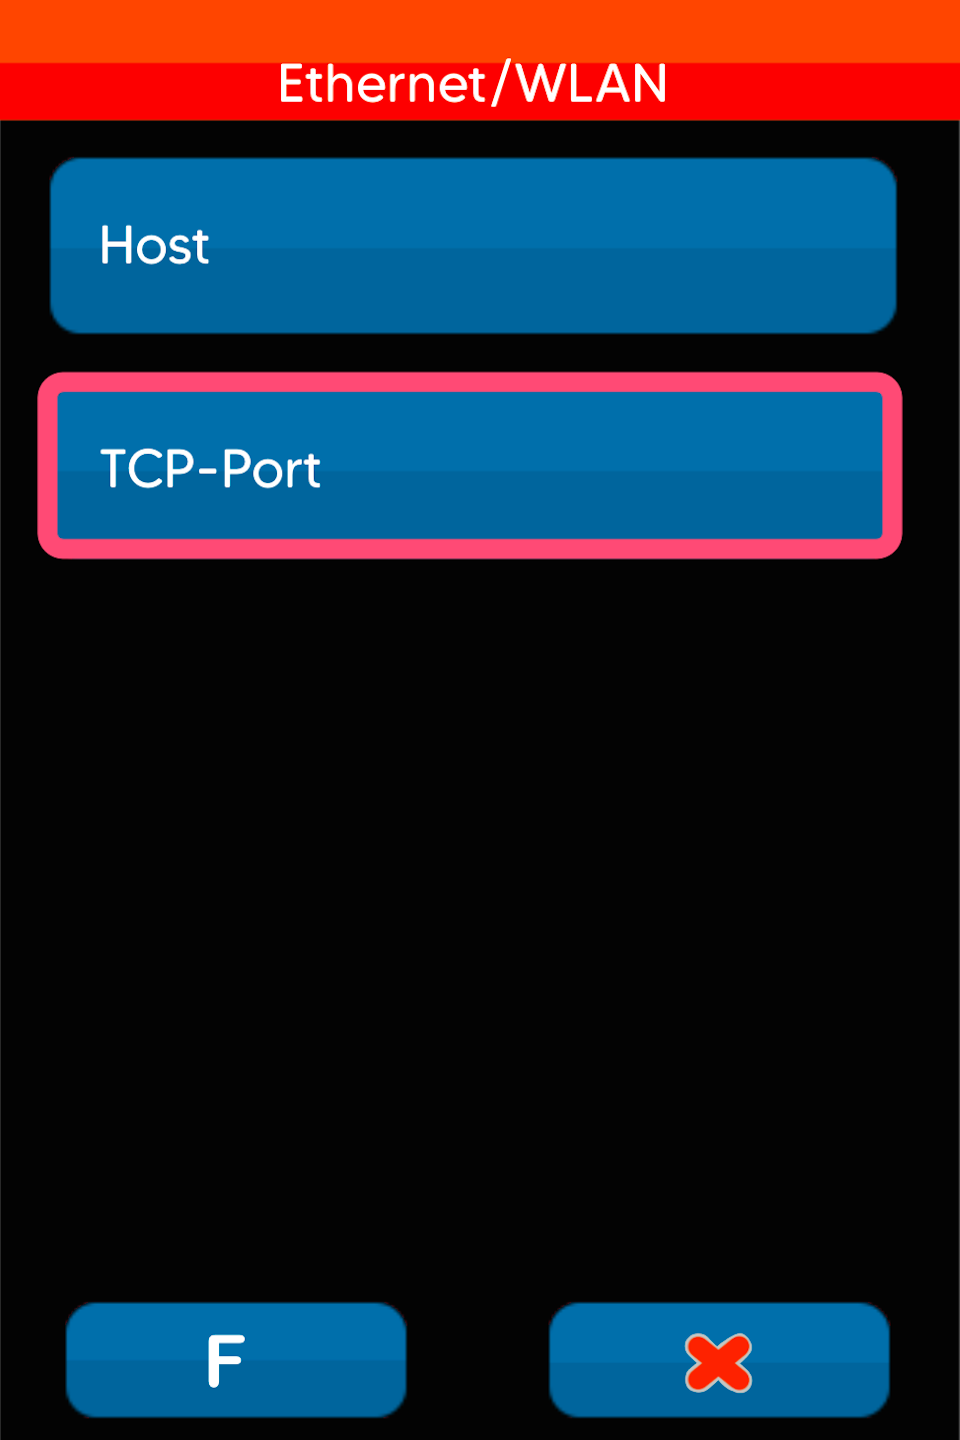
Port Number
Fig. 1
Select TCP-Port
Fig. 2
Enter the outgoing port number
The standard outgoing OPI port number is 20007.
Please confirm the entry with the green OK button so that all entered data is saved.
Then press the red stop button 4 times so that the card reader restarts.
Your card reader is now set up for POS connection using ZVT.
Feel free to try a test transaction initiated from the POS system.
The amount transfer should now take place.
To ensure a smooth replacement of your card reader if necessary, please provide us with your POS connection data and parameters using the "POS Connection Data" button. In case of replacement, we can provide you with a pre-configured card reader.

Was this article helpful?
That’s Great!
Thank you for your feedback
Sorry! We couldn't be helpful
Thank you for your feedback
Feedback sent
We appreciate your effort and will try to fix the article